The use of a suspended ceiling structure allows you to change appearance the entire room unrecognizable. Drywall, glass, stretch fabric - all these modern materials able to embody any design fantasies for interior design.
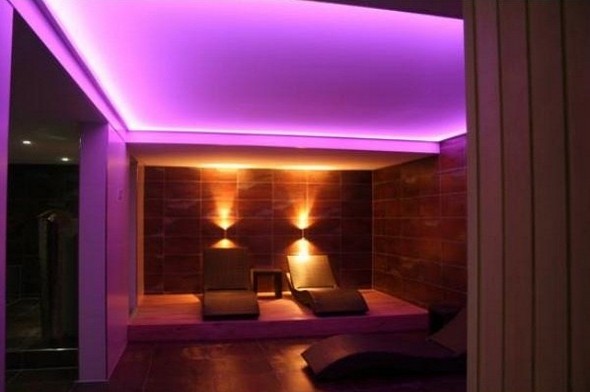
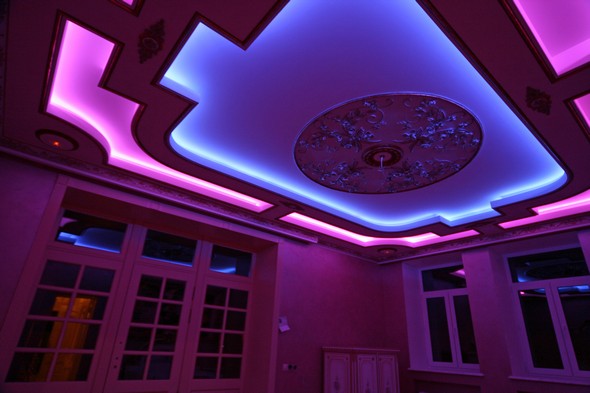
The use of backlighting is a fashionable solution that will be a great addition to high-tech rooms as well as classic options. A suspended ceiling with lighting will look great in the living room, kitchen, bedroom, and bathroom, creating an individual image of each zone.
We select lighting
Whatever type of material you choose to form a false ceiling, the style of lighting will depend solely on the tasks that you set for it.
False ceiling lighting led strip
- Diffused light to illuminate the entire room. This is the most budget option that allows you to quickly mount a small number of medium-sized LED lamps, most often 5-7 pieces to create a sufficient level of illumination. As an alternative, spotlights can be used, evenly distributed over the area or running along certain embossed contours. Distinctive feature this kind of lighting is a function of covering the entire space
- Target (directional) light. We are talking about zoning, when the emphasis is on highlighting certain areas, for example, the place of the dining table, bar counter, coffee table with a sofa, and so on.
- Interior lighting is an unusual, but very original type of lighting, when the task is not so much to create the necessary level of light, but to fulfill the tasks of interior design. In a word, such lighting is an artistic move, a detail in the overall conceptual style.
Let's dwell on it in more detail.
Neon lighting
Neon lighting for false ceiling decoration
This species is characterized by very warm soft radiation, which, by the way, will be in small rooms, such as kitchens or bathrooms. By placing a plastic wire on the inside of a false ceiling, you can create a fabulous atmosphere in your home. No type of lighting, even common LED lamps, is incapable of full size accomplish the task of forming a mysterious areola. However, neon light is quite unusual and does not have the necessary brightness, which makes it not very popular for home interiors.
LED lightening
original LED lights for false ceiling
The most common, capable of embodying a wide variety of ideas. It can be installed in a false ceiling with one level or several levels, mounted in the inside or on the outside of the lower level. Mounting method depends on the tasks. Any contour directions, drawing, pattern, the fulfillment of zoning functions - all this is according to the power of the LED.
The most popular forms today are spotlights or LED strip.
LED Strip Light
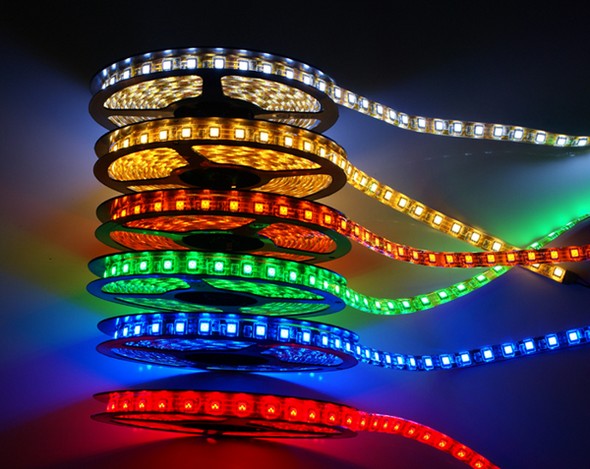
LED Strip Light
This is the easiest and cheapest way to create an illuminated suspended ceiling structure, the installation of which is so simple that you can do it yourself. Due to the special adhesive surface, it can be applied to absolutely any surface: metal, drywall, canvas, glass. But its special advantage is in the design component. Any circular, rectangular and non-standard shapes can be created with it, including drawings with small dotted details.
There are tapes of various capacities, waterproof or ordinary. For the living room, you can not overpay for additional functional qualities, but for the bathroom and kitchen, it is better to choose additional silicone protection.
How to choose LED strip?
Light strips are sold in running meters, so before purchasing, prepare a drawing in advance with a drawing of the locations of the LED strips, their attachment points, note the required power, and the level of illumination. In the store, you will not only have to know the exact length, but also choose a certain type.
Power
All tapes have a double abbreviation. The first part of the SMD says that this device can be installed on the surface. Pay attention to the numbers below. The higher they are, the greater the brightness of the radiation, that is, the power. Accordingly, the more powerful the tape, the more expensive it is. For example, SMD 3528 is an average indicator, good for small rooms, including a bathroom, and SMD 5050 will perform its functions perfectly in a large hall.

Characteristics of different types of LEDs
The density of the arrangement of LED microlamps
An indicator indicating the number of LEDs per linear meter. It also affects brightness and power consumption. 30, 50 diodes is a normal level, sufficient for a bedroom, corridor, bathroom. Above - this is a living room or hall. Do not get carried away with a large number of microlamps! An excess of brightness negatively affects well-being. Remember, the house is primarily a place of solitude and relaxation, and an overabundance of light does not contribute to relaxation at all!
moisture resistance
It has already been noted that there are unprotected or special tapes, they are marked with the abbreviation IP. If for rest rooms you can not overpay for additional functionality, then in the bathroom and kitchen - this is an indispensable condition for normal functioning.
Color rendering
It can be a constant color or an RGB tape with a controller that allows you to change the color scheme as you wish. If the choice falls on a simpler functionality, be sure to think over the tone in advance, give preference to calm warm tones, for example, orange-yellow or green.
Features of mounting LED backlight
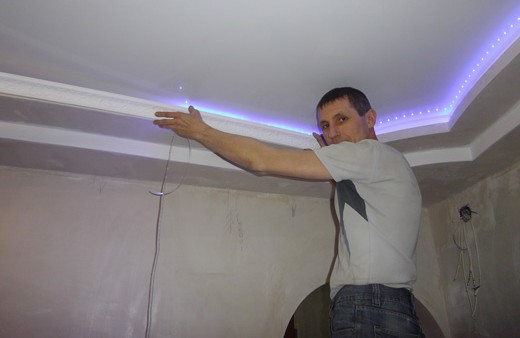
Installation of LED lighting
In itself, the installation of lighting fixtures is quite simple, especially when it comes to tape. The main thing here is the correct installation of the suspended ceiling itself. For drywall, the frame that bears the main load is extremely important. Only the correct marking of the ceiling and walls strictly according to the drawing will make it possible to form a personalized type of ceiling that you are aiming for. It is worth considering in advance the attachment points of the point paws, as well as then all the wires will be hidden.
It is possible to ensure uniform illumination of the room and all objects and furniture that is in it only with the help of a distributed light source. Even the most sophisticated sconce, installed in the center of the ceiling, is unlikely to cope with this. After all, the light will come from one place, and as a result, shadows will appear. To solve this problem, so-called spots are used - spotlights of small size and power, which are evenly distributed over the surface of the ceiling. They are designed to mount exclusively suspended ceiling systems. Fairly easy to install spotlights into the ceiling with your hands. It is important to take care of the configuration of the lighting system even at the stage of designing a false ceiling.
A bit about spot lighting
By their design, spotlights, which are fixed flush with the suspended ceiling, have only a 30-degree lighting sector. But due to their compactness, they can be mounted quite tightly around the entire ceiling. To ensure proper illumination, the distance between rows should not exceed 1 meter, the distance from the lamp of the last row to the wall should not exceed 60 cm. The figures are given for rooms with a ceiling height of 2.5 meters. The requirement is taken into account that the intersection of the cones of illumination from each spot be located at a height exceeding the bulk of the objects in the room.
You can mount spot lighting on dropped ceilings any type. Installing spotlights in drywall is the simplest and most reliable option, but the installation process is no different in the case of ceiling sheathing with plastic, aluminum strips or MDF, with a few reservations.
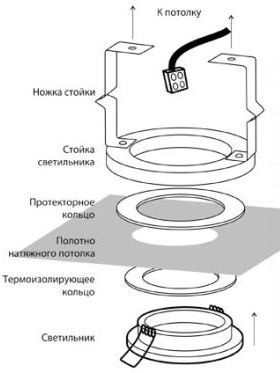
Only the installation of fixtures in a stretch ceiling should be carried out by craftsmen and installers. This is due to the technological features of the material and the fact that it is necessary, using special equipment, to fix dense inserts made of heat-resistant plastic in the places where the fixtures are installed. These inserts also prevent the material from stretching. In all other cases, installation can be done independently.
What is needed for installation
From the material you will need the following elements:
- Spotlights;
- lamps;
- power wire;
- terminal blocks or sleeves for connecting wires;
- insulating heat shrink, electrical tape;
- switch.
standard ceiling spot device
It is advisable to select fixtures of the same type for each type of lighting. Accordingly, the lamps of the required quantity are purchased for the type of construction. It is important to strictly check the presence of a reflective layer along the cone at the base of the base for incandescent lamps and specifications in accordance with the requirements for the lamp. For suspended ceilings, 40 W lamps are used, more powerful ones will significantly heat the material of the suspended ceiling and can lead to damage to the structure or even a fire. Halogen and LED options for lighting elements are selected according to the power and spectrum of the output light.
The wire is selected depending on the material from which the suspended ceiling is made. So for drywall, which is a refractory material, an ordinary two-core or three-core wire VVG-2 (3) x1.5 is suitable. For materials such as MDF or plastic, it is necessary to select a fireproof version of the RKGM wire. The wire must be soft, that is, each core is represented by many small veins, combined under one insulation.
To connect the wires and connect fixtures to them, you can use special terminal blocks, which are sold at any hardware store. However, the bolted connection is serviceable. It will be necessary to check the tightness of the hold-down bolts at least twice a year. Otherwise, at the point of contact, the terminal blocks and wires may begin to heat up and char. A more reliable and durable option is to fix with copper or tinned copper sleeves.
It is necessary to protect the connection points with electrical tape or using a special heat shrink tube for insulating power wires.
Mounting order
The whole process of installing fixtures in the ceiling can be divided into the following stages:
- lighting planning;
- wiring to the place of installation of fixtures;
- the formation of holes for them;
- connection;
- consolidation and verification.
Why is such a simple task divided into several stages? This is due to the fact that each item is best performed at a certain stage in the formation of the ceiling itself.
Planning
It is very important to decide in advance, even before the ceiling sheathing, how to place the lamps on the ceiling. This is especially true when the suspended ceiling is formed with several levels. Each level should be separated into a separate lighting circuit, and the light sources should be distributed accordingly, starting from the independent use of these circuits. Do not forget that the distance between the lamps must be kept within a meter from each other, the distance from the walls is 60 cm. It is important to distribute the lamps so that their installation site does not fall on the installed frame elements. That is, the holes for them should be at a distance of 25-30 mm from the edge of the hole for the lamp to the nearest frame element. Otherwise, the profile of the frame may interfere with fixing the lamp with its latch.
When distributing spotlights, it is also necessary to take into account the presence and location on the ceiling and walls of chandeliers, sconces and other decorative elements. With simultaneous use, you can take spotlights to the sides. Or divide the lighting circuits with spotlights of zones near other light sources and the rest of the room into separate switches.
Wire distribution
It is best to distribute the wires at the stage of forming the false ceiling frame and fix them on the frame in advance so that when drilling holes for the lamps, you can get the wire loops and make the connection. In extreme cases, the wire is connected to the first of them, and for all subsequent wires, they are already threaded from hole to hole. The disadvantage of the latter option is the inability to fix the wires on the frame, and they will simply lie on the surface of the suspended ceiling material.
With a normally advance distribution of the wire, it is enough to lay a two- or three-core cable in an optimal route through all the places where the fixtures are installed, leaving a loop of 10-15 cm of bent wire at each point. Fastening to the frame should be done using plastic ties, but not tightly and with a slight sag of the wire, without stretching. This will prevent damage to the wire during a thermal change in its length.
After that, you can proceed to the sheathing of the suspended ceiling.
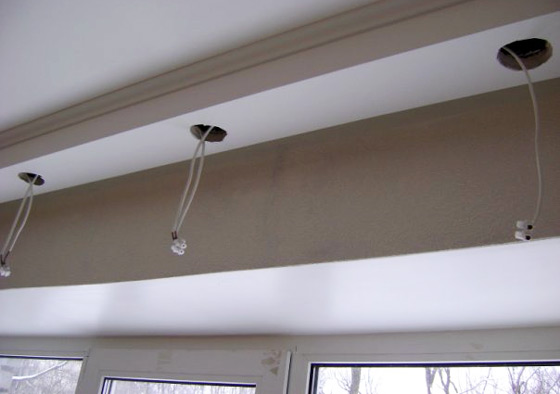
Formation of holes for lamps
You can finally determine the position of the fixtures only after the ceiling is completely sheathed. When designing, the moment of placing spots at a distance from the frame elements was already taken into account. Now, one should also take into account the laying of the seams between the elements of the suspended ceiling, this is especially important when installing fixtures in a suspended ceiling sheathed with plastic or aluminum. If the luminaire is placed at the junction of the ceiling elements, then it should be moved to the middle of one of the strips.
Holes are drilled using a special wood crown, which is also used to drill recesses for boxes for sockets. In this case, perfectly even holes are obtained, this option allows you to effectively fix the lamp in drywall. The diameter of the holes must be selected in accordance with the dimensions of the devices used. It should be 3-4 mm smaller than the outer diameter of the front of the luminaire, but larger than the dimensions of its inner part. The most commonly chosen size is 60 or 75 mm.
Important: Remember that once a hole is drilled, it cannot be moved, so once again make sure its location is correct.
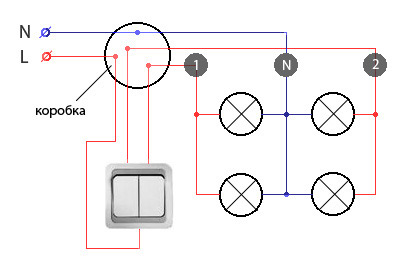
Typical wiring diagram for ceiling lights
Connection
After all the holes are drilled, the loops of the previously laid wire are pulled out. Or, two wires are laid from hole to hole, starting from the outer one, to which the power wire is connected.
Important: All connection work is carried out only when the appropriate wire is de-energized.
The loops on the laid wire are cut along the bend and exposed. To connect each lamp, two small wires 10-12 cm long are used. Having stripped 10-15 mm wire on each side, short wires (leashes) are clamped at one end in the corresponding terminal on the lamp, and the other end of the wire is twisted with a power cable. The connection is observed using the marking on the lamp: L - phase, N - zero, PE - ground.
Anchoring
Most built-in spots are provided with two brackets on the sides. They must be bent up to the stop and in this position inserted into the hole in the ceiling. Pay attention that the wires supplying the lamp do not fall under the hooks. After inserting the lamp, the hooks independently press it to the ceiling and hold it securely there. After all the elements are installed, you can connect the main power wire to the switch and junction box or to a step-down power supply if low-voltage LED lights. This is where the work ends. You can check the operation of the lighting.
Video: installation of a spotlight in the ceiling
In the interior of the room, the design of ceilings and lighting plays one of the most important roles. Suspended ceiling lighting is what we use every day for several hours. And you can not leave this element unattended, because it is important not only for the beauty of our home, but also for the health of the whole family.
In our article, we will look at what types of lighting can be used in false ceilings, whether it is recessed ceiling lighting or recessed ceiling lighting. Since LED and halogen light sources are most often used, we will pay special attention to them. We will not forget to give a small instruction on the installation of lighting in the house, so that you are definitely fully equipped.
Types of lamps for lighting suspended ceilings
Suspended ceilings are one of those materials that allow you to feel free in choosing lighting. Fortunately, or even vice versa, you can choose it for a very long time, spending several hours in a row on it. It is necessary to try to use all the potential that is contained in stretch ceilings for their illumination. To do this, it is important to create a ceiling plan with lighting in advance in order to solve the problems that have arisen on paper and correct them if possible. Fluorescent, halogen lamps, LED strips and tubes help us with this. But as we mentioned earlier, only the last two will be considered in our article. Let's start with halogen lighting.
Halogen lighting for suspended ceilings
Beautiful on their own, combined with a false ceiling halogen lamps look even more impressive. Although low voltage lamps require a transformer to work, this does not make them worse. You can still professionally combine the location, direction and power of the light source. On the other hand, it must be taken into account that the transformer has a limited output power, so it will not work to connect many lamps to one of them at the same time. There are two ways to solve this problem: either buy another transformer and install it for mounting additional lighting, or purchase halogen lamps with built-in reflectors that amplify the light in a given direction. But you can also try to purchase high-voltage lamps, which basically do not require a transformer.
Be sure to consider when planning the location of the lamps that each one should not be very close or far from the next. The lighting should be uniform, and if an uneven distribution of lamps by location has already turned out, then it is necessary to compensate for this with power.
By the way, about the properties of the lamps. The shelf life of most of them is in the region of 4000 hours, and the price for both low-voltage and high-voltage solutions starts at 30 rubles and goes up.
LED lighting in false ceiling - tapes, strips, tubes
LED lightening is one of those modern options in a market that presents us with the widest variety of its products. A variety of colors, shades, variable lighting power, adjustable manually or automatically, a combination of up to 100 LEDs in one strip - all this applies to the described option. It is not surprising that in a relatively short period of time a huge number of people began to use them. LEDs can be used as lighting for low ceilings.
Typically, the installation of the LED strip occurs using double-sided adhesive tape, supplied with it or purchased separately. This opens up the possibility of creating some kind of luminous figure or simply placing a light source on an uneven surface.
It is worth noting that LED strips can be moisture resistant, and therefore are often used in bathrooms and other rooms with high humidity. Their average price usually fluctuates around 100 rubles per meter.
LED lamp
It would seem, what is the difference between this paragraph and the previous one? In fact LED lamp is fundamentally different from its relative in that it combines many more LEDs, thus increasing its power. Therefore, instead of a couple of meters of LED strip, you can use one lamp with 100 LEDs. Yes, this is quite possible. But it is better to choose the previous option if you plan to create room lighting with low ceilings. The price of this type varies in a huge range: from 2 and a half dollars to 30 for one piece.
Lighting options for suspended ceilings, see the video:
False ceiling lighting installation
Here we come to the final topic of our article. After choosing the lighting, you need to install it on the ceiling. How to do this, we will consider here and now. Make sure that there is 10 cm in the interceiling space for installing a transformer just in case and start work:
- Make marks for the installation of fixtures.
- Drill holes in them.
- Turn off electricity throughout the house.
- Run the wiring to the installation locations of the fixtures.
- Install a transformer if necessary.
- Attach light sources to the holes.
- If you mount the lamp, it is usually installed with a thread or retaining ring.
- Connect the power that you turned off before starting all work and check the performance of each element.
- Troubleshoot if necessary.
This simple algorithm will allow you to mount lighting in just a day, without spending a huge amount of your precious time on it. But first, make sure that you choose the right type of lighting and you can be sure that you will like the finished result!
An important component in any design is its lighting. Recently, the direction of repair work in houses has moved away from the old principles and adopted new ones. In modern repair today, drywall is a regular guest. Suspended ceilings look especially beautiful from it. various types illumination.
The popularization of such plasterboard ceiling structures has become possible for a number of reasons. One of these reasons is the possibility of assembling a suspended structure with your own hands. How to do this, you will learn from our article.
Variety of choice
Lighting plasterboard ceiling can be of the following types:
- open. It assumes direct and directional lighting of the room. At the same time, the lamps will be noticeable and still act as a decorative decoration of the room;
- hidden. In this case, the lighting fixtures are hidden from view. As a result, diffused and soft lighting will be created, suitable for a more comfortable stay of people;
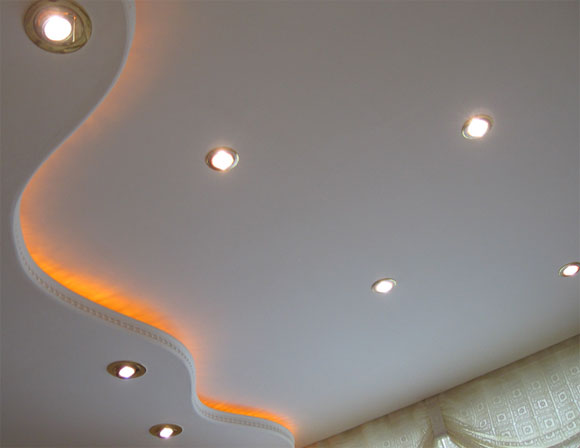
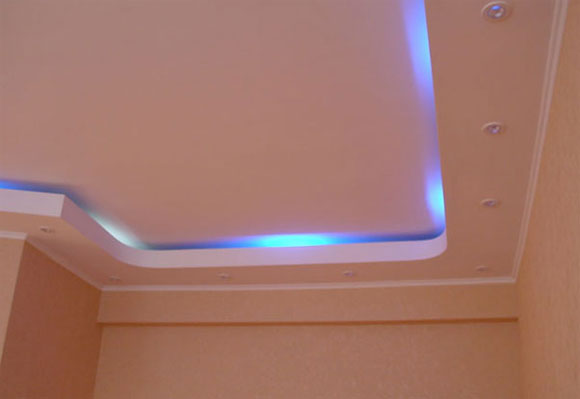
- combined. Very often, when using a suspended structure for a ceiling made of plasterboard or a stretch fabric, they resort to a combination of open and hidden lighting. It turns out effectively, beautifully and gracefully.
Combined type
Any lighting option can be done by hand. The main thing to know step by step instructions and accurately execute its processes.
How to "light up"?
Once you have decided on the type of lighting for the room and plasterboard ceiling, you need to choose a light source.
Of the currently existing light sources for a plasterboard ceiling, the following are suitable:
- neon lamp;
- flexible neon;
- LED and fluorescent spotlights;
- LED Strip Light;
- duralight;
- chandelier.
Note! Any type of lighting device can be installed with your own hands. True, for this you will need to understand a little about electronics and know the rules for connecting electrical appliances to the network.
All these light sources have their own level of energy saving potential. It is the largest for LED light sources. When using them, energy savings can reach up to 80%.
Each of the above light sources has its own advantages and disadvantages. In addition, they are suitable for a certain type of backlight:
- for open lighting, you should use a central chandelier, LED spotlights and fluorescent fixtures. In this case, you will receive high-quality and bright lighting of the room, necessary for a comfortable pastime;
outdoor lighting
- for hidden lighting it is better to use LED strip, duralight and flexible neon. With their help, you can create a romantic atmosphere or just make a beautiful night illumination of the room.
hidden lighting
By combining both types of lighting, you can create a control system and, if necessary, turn on either hidden or main lighting devices. Such a distribution is effective if there is a sufficient number of spotlights that form groups on the ceiling.
Thus, it is possible to highlight not only certain areas in the room, but also beautifully emphasize the especially successful bends of the ceiling.
The choice of lighting fixtures should be made according to the following criteria:
- purpose of the premises;
- features of its microclimate;
- lighting standards;
- technical indicators of the generated luminous flux;
- duration of work;
- energy saving properties;
- positive and negative aspects of operation at home;
- price.
Guided by these criteria, you will definitely choose an excellent light source for a plasterboard ceiling that will emphasize its beauty and sophistication.
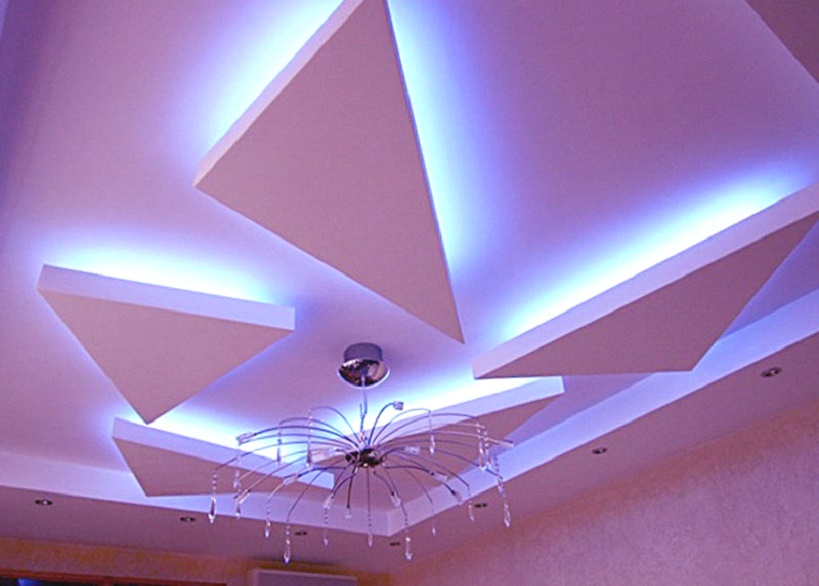
Variety of designs
From plasterboard today they make the most diverse ceiling devices in terms of complexity. And all of them are quite affordable for DIY assembly. For such a ceiling, you can do:
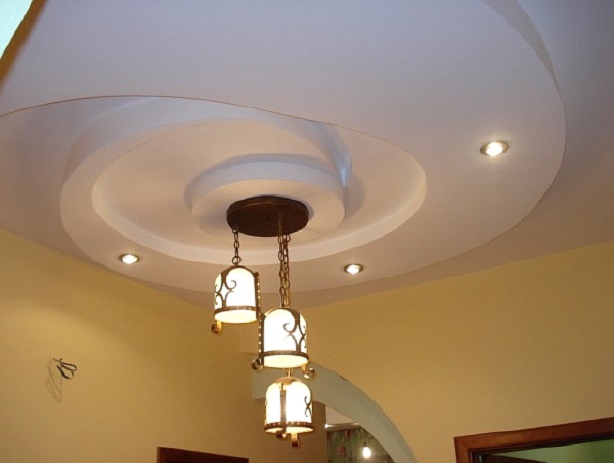
- one level. Suitable for lovers of rigor and simplicity. Such an overlap will perfectly fit into a room with low ceilings. Here you can’t really clear up the complexity and pretentiousness of designs, but you can recoup on lighting fixtures. Spotlights of LED or fluorescent models, as well as a central ceiling-type chandelier, will fit perfectly here;
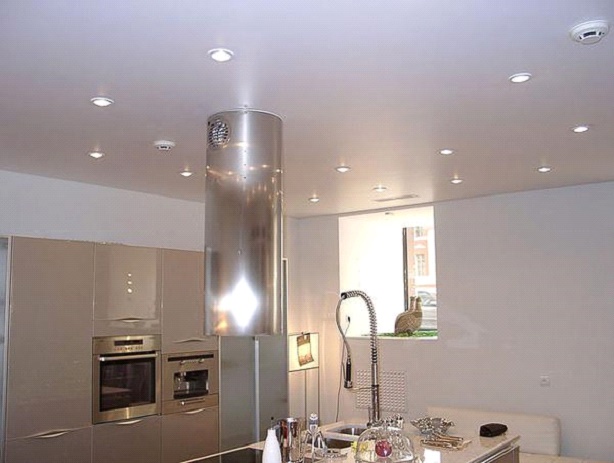
One level ceiling
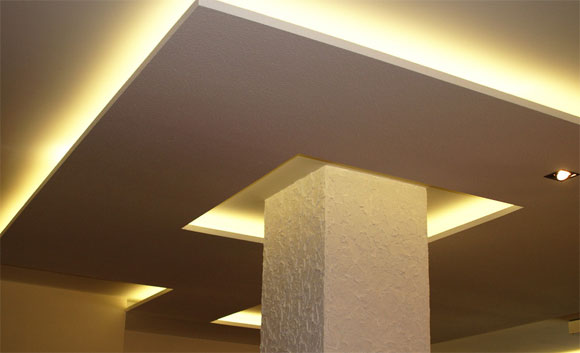
- two or more levels. This design is good for large rooms. This is suitable for hidden lighting in boxes or niches (placed between levels), as well as spotlights of any type;
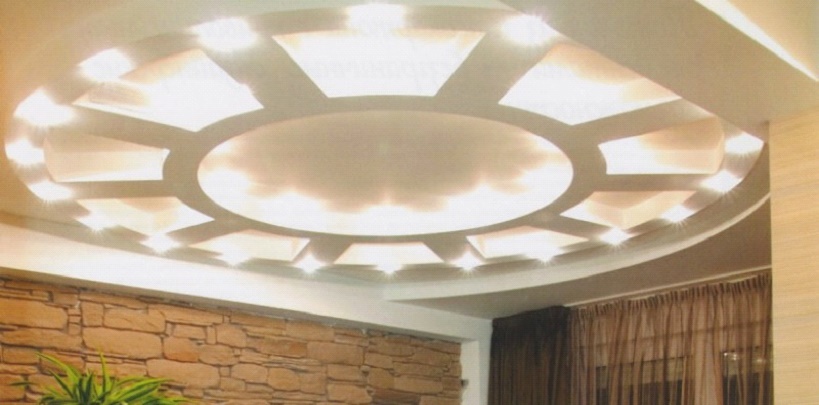
Multilevel ceiling
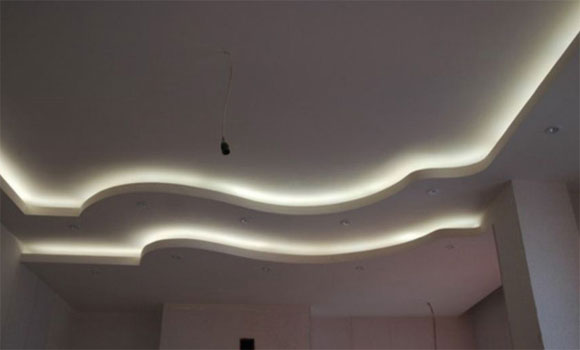
- curly. Such ceilings need decorative lighting their curly elements. As a result, a chandelier can be installed here in the center, and LED hidden lighting on the figures.
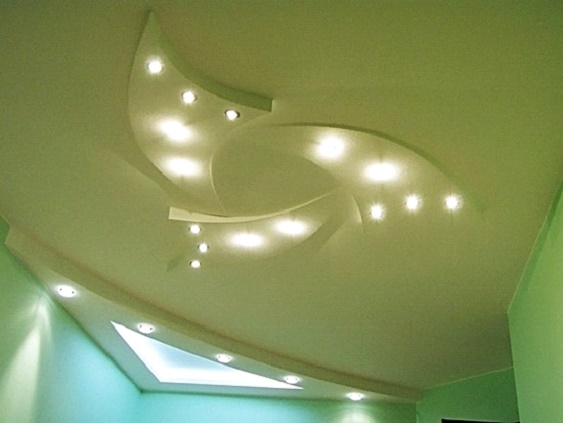
figured ceiling
Deciding what to do with your own hands - a single-level or multi-level type of ceiling structure should be based on the purpose of the room and its dimensions.
Room room strife
hall lighting
As you know, each room in the house has its own requirements for the level of illumination. So, consider the rooms in the apartment in this context:
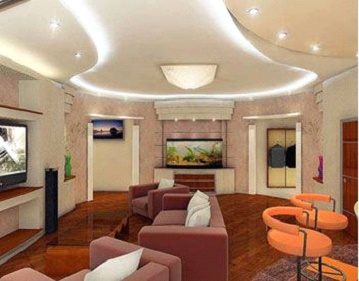
- hall or living room. This room is the most key in the whole house, so making a plasterboard ceiling and lighting it with your own hands here is especially important. In this room, you can combine all types of lighting and various light sources. LED strip and a two-level ceiling structure will be most appropriate here. It can be combined with a central chandelier and zone spotlights;
Lighting in the nursery
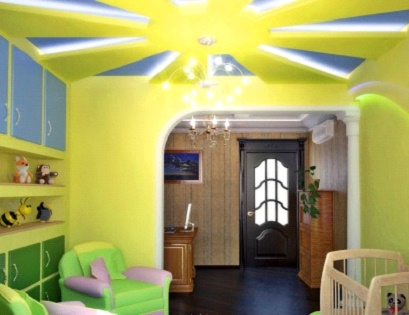
- children's room. Of all the rooms in the house, it is the nursery that should be best lit. Here, as well as in the living room, there is scope in terms of the design of the plasterboard ceiling and the combination of its elements with various types of lighting. Great solution there will be, for example, a starry sky created using small spotlights. In this case, an LED strip can be used as a night light;
Note! In the nursery, the work and play area should be well lit.
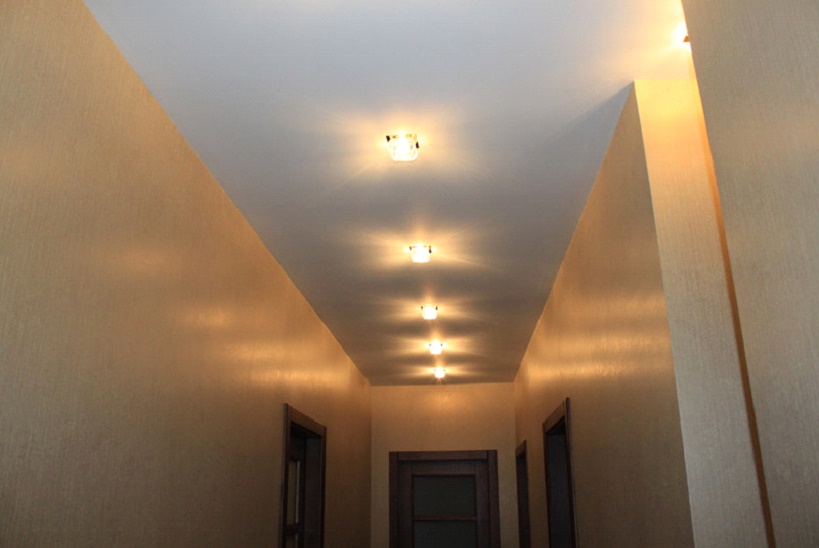
Corridor lighting
- the entrance hall is one of the difficult places in terms of assembling drywall structures and creating suitable lighting with your own hands. This is due to the fact that the corridor is often small and winding, and is also filled with cabinets. Here, simple single-level ceilings are most often used with spotlights scattered over its surface. The hidden type of lighting here is suitable as a night light. For the corridor, you can use LED strip, flexible neon or duralight;
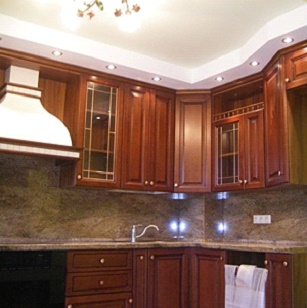
kitchen lighting
- kitchen, bathroom and toilet (combined or separate). Here both central and spot lighting will look equally good. But do not use bulky chandeliers here. They will not fit in these rooms even with large dimensions. Also, all lighting fixtures here must be waterproof, otherwise they will quickly fail;
- balcony and attic. Even such problematic rooms as a balcony or attic can be decorated with a plasterboard ceiling. There are the same requirements for lighting fixtures here as for a kitchen with a bathroom. But the ceiling itself here is likely to be single-level, so the best solution here is to install spotlights.

Balcony lighting
Plasterboard ceiling lighting always depends on the purpose of the room and its dimensions. Properly selected lighting fixtures and lighting method will give any room new shades and colors.
Nuances of choice
The choice of a light source for a drywall ceiling also depends on what kind of lighting you ultimately want to receive. In this case, you need to take into account the complexity of the installation, if you decide to do everything yourself.
Among the important nuances here it is necessary to highlight the following points:
- LED backlight, depending on the type of tape, can be single or multi-color;
- using with led strip optional equipment(controller and remote remote control) you will be able to adjust the degree of illumination of the room;
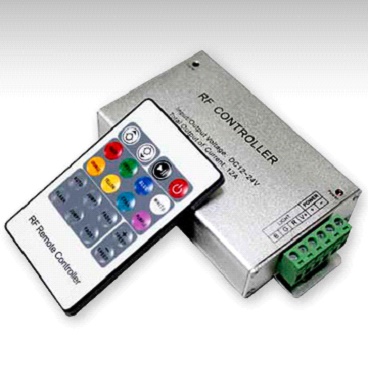
Tape controller
- spotlights for single-level ceilings can be used with a beautiful shade and several large dimensions. So you will avoid space congestion and decorate this simple design in the most effective and affordable way;
- a wide variety of lighting devices can be combined with each other to completely change the visual perception of space. Thus, it is possible to achieve expansion or, conversely, narrowing the space, as well as smoothing out the shortcomings in the room.
With the independent creation of plasterboard suspended ceiling structures, you can create a beautiful and unique lighting that will most favorably emphasize the existing interior in the room.
We advise you to read
 Psychological characteristics of children in adolescence
 Transferring a child to another school - the procedure and necessary documents Whether to transfer a child to another school
, diagnosis, treatment Treatment of urogenital chlamydia") Chlamydia urogenital - description, causes, symptoms (signs), diagnosis, treatment Treatment of urogenital chlamydia
Chlamydia urogenital - description, causes, symptoms (signs), diagnosis, treatment Treatment of urogenital chlamydia The benefits and significance of hydroamino acid threonine for the human body L threonine what

