- tutorial
Really, stop it. There are a lot of cool things for connecting a wide variety of wires, but all the same, the technology of “biting off the insulation with your teeth, twisting, wrapping it with electrical tape” is still alive.
About normal wiring
When I see this, I feel uncomfortable: 
And when I see this, I want to kill the author:

The fact is that it is by no means possible to connect copper and aluminum wires with a twist.
There are several reasons for this. The main one is the problem of aluminum wire oxidation in contact with copper wire - a galvanic couple is formed, which slowly but surely destroys the connection. And the faster, the more current goes through this twist.
Of course, after a couple of hours, such a connection will not fall apart, even if you turn on a heater or kettle through it. But over time, the resistance will slowly increase, which will cause the twist to heat up more and more. And if the load is not constant, but episodic, then constant heating-cooling cycles will worsen conductivity even more. Miscellaneous materials when heated, they expand in different ways, and turning the load on and off through such a twist will be tantamount to constantly jerking it back and forth. You understand, it will not lead to anything good.
Well, if it's just heating, it can usually be tracked by the characteristic smell of burnt insulation. But the sparking of the connection, especially next to the wallpaper or something flammable, can easily turn into a fire.
What solutions exist to solve this problem?
Polyethylene terminal blocks
Here is such a thing:
Sold in any hardware store, it costs a penny.
Inside is such a brass sleeve with two screws:

We push the wires into it, clamp it with screws:
<

I pulled it out on purpose for clarity. Together with the insulation, it will look like this:

Each segment can be cut. It seemed like the perfect choice. But there is a nuance
Although these nuances and shortcomings are a wagon and a small cart, do not be fooled by simplicity.

In general, it is advisable not to use such terminal blocks. If you use it, then only with single-core wires and for connecting something small - a light bulb, a fan (not industrial). And no aluminum!
It is also advisable to buy not noname China, but terminal blocks from normal manufacturers: Tridonik, ABB, Legrand, Verit
Cost: from 10 to 50 rubles.
TB Series Terminal Blocks

Hard black plastic pads. Already better.
Removable cover:

And here is the internal structure:

We unscrew, we put the wire, we clamp it.

Pros - it is not a screw that clamps, but a metal plate. We press to the lower steel plate. In addition, the upper part is not flat, but with a characteristic surface, which increases the clamping surface:
 .
.As a result, stranded and aluminum wires can be clamped. Aluminum, however, it is advisable to at least occasionally check for weakening of the clamp. I saw the pads themselves for currents of 25A and 40A.
Inconvenience - it is not cut and not divided, or buy a bunch of small ones (I have not seen less than 6 pieces), or even put one big one on two wires.
Cost: from 30 to 80 rubles.
Self-clamping terminals (WAGO or REXANT series 773 and their copies)
Or they are also called express terminals. Like these ones: 
Very handy stuff. I stripped the wire, put it inside to the end, you're done:
<

Inside there is a pressure plate (blue arrow) and a small shank (orange) made of tinned copper:

When wires are shoved into it, this is what happens:

The plate presses the wire against the tire, maintaining pressure all the time. And the design of the pressing part does not allow the wire to fall out. And it's hard to pull it out. In general, they are disposable, but if you really want to, then gently rotating the wire around its axis, you can pull it out.

Since the copper contact is tin-plated, it is possible to insert into such a terminal aluminum wire not afraid of problems. At the same time, constant pressure will not allow the aluminum wire to fall out.
White paste (in the next photo you can see a white mass on the contact) is quartz sand with technical petroleum jelly, especially for aluminum wires. Quartz sand is an abrasive that cleans off the oxide film from the surface of aluminum, and petroleum jelly prevents it from re-forming.

The same terminals, but transparent:

They do not differ in anything, except for the dye. Well, in transparent terminals it is more convenient to see the wire - whether it is stuffed to the end or not.
Plastic is non-combustible, melts when the temperature rises, without releasing harmful substances into the air.
Designed for 25 A, which is approximately 4 kW. Attention! Currents are indicated only for original WAGO terminals.
Rexant terminals (manufacturer - SDS group) use a different spring steel, which relaxes when heated. Accordingly, the maximum current is limited, except for lighting it is not recommended.
Here is a test in which they held 50A and did not even melt. Well, this is in ideal conditions - in the air, the cooling was good. And the terminals are original, yes.
Cost: from 2 to 6 rubles, depending on the number of contacts
WAGO series 222 terminals with levers. I saw only vagovskie, others do not produce.
For particularly difficult cases, when there are several types of wires, different thicknesses, aluminum, copper, etc. 
Raise the lever:

We push the wires, lower the lever:

If necessary, you can raise the lever, pull out the wire, insert another. And so many, many times. A great thing for those circuits whose wiring can change a bunch of times.
They eat everything. Current - up to 32A. Inside - a plate that presses against a common tire is connected to a lever.

Tricky design, in general.

Shank - tinned copper, as usual:

Cost: from 5 to 15 rubles.
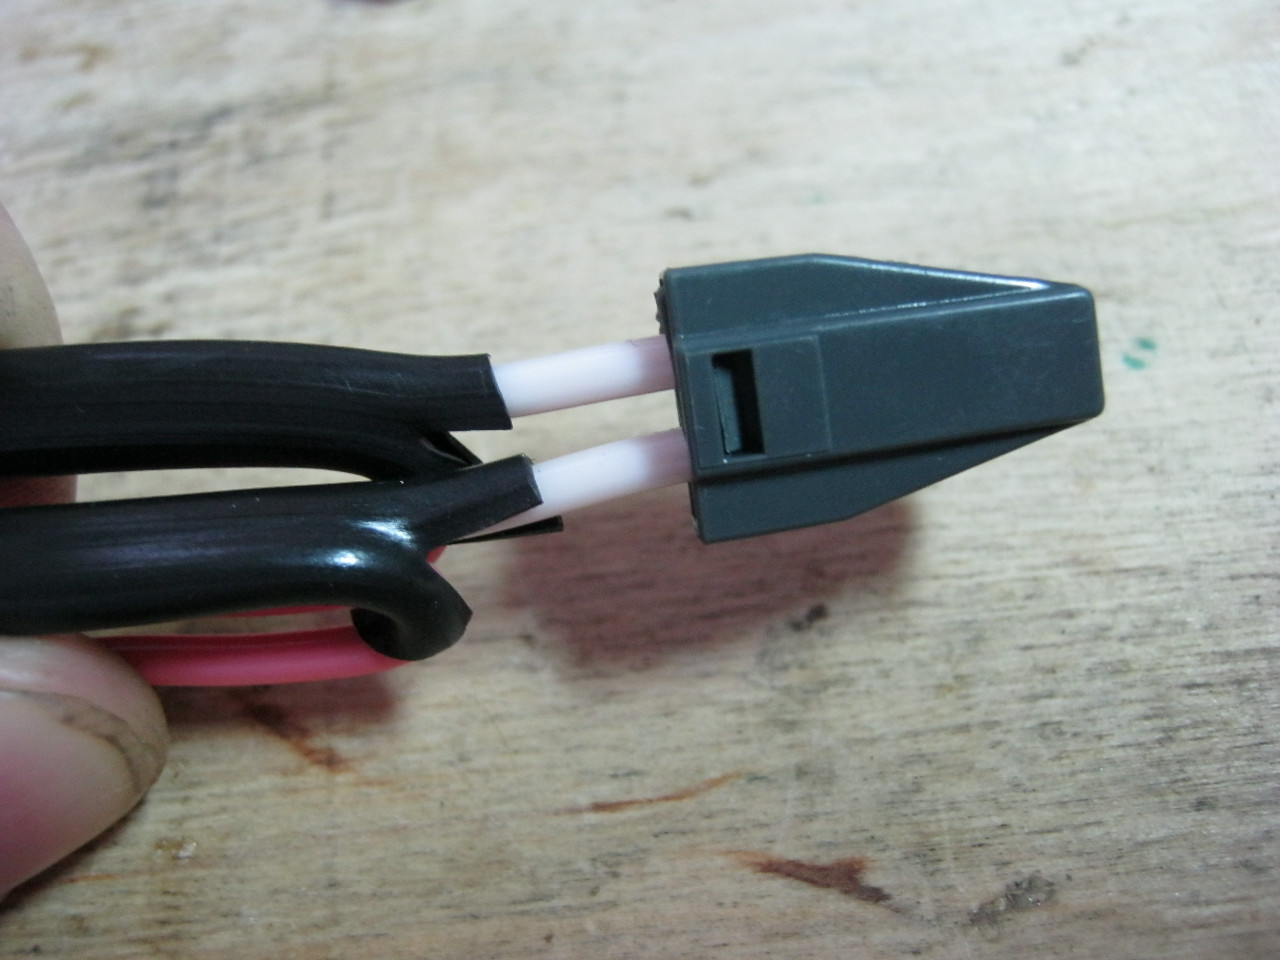
Scotch locks, ScotchLok, electrical connector with mortise contact.
This is for low current (network, telephones, LED lamps, etc.). 
The meaning is simple - several wires are stuffed into such a thing:

After that, it snaps into place with pliers or any pressing tool. No, there is of course a special tool, but I don’t see the point in it - it is a small pliers with flat jaws.
They are especially loved by installers of SCS and networks, for simplicity, cheapness, water resistance, and the absence of the need to remove insulation.

Inside - a hydrophobic gel that protects against corrosion, moisture, oxidation, etc. And a plate with a cutting-clamping surface:

Or two plates:

Here you can see what happens to the cable after termination:

Knives cut through the insulation, and firmly pressed against the wire. There is also a version for two cables at once, and the plates are a little thicker - quite suitable for lighting:

Of course, they are disposable and maintenance-free. It is necessary to replace - a piece of cable is bitten off with them, and a new one is put in.
Cost: from 1 to 4 rubles per piece.
For high currents
For such cases, there are sleeves: 
Above - a sleeve-connector of an aluminum and copper cable, below - universal copper tinned:

A wire (or several) is inserted inside, the sleeve is crimped with a special tool. Unfortunately, some bad person stole my tongs, so I won't show them. I found this image on google:

And this is how the crimped sleeve looks like:

A huge plus is that with the right size and the right crimp, the resistance does not decrease compared to conventional wire. And maintenance-free, which is sometimes important. This means that it can be walled up (after normal insulation, of course) into the wall, buried in the ground (taking care of waterproofing), and so on.
Sleeves with a flat end and a hole are mainly used for grounding, when the wire must be connected to the body:
How to connect several computers to each other and to the Internet, distributing the same speed to the Internet? Through such connections, you can not only use files located on another PC, the Internet, but also printers that are connected to any link in this network. Let's try to consider all the options for setting up a local network, from the simplest to the most complex.
We divide the sequence of actions conditionally into two stages.
To begin with, let's analyze and discard the option when you only need to share the Internet.
Internet connection of 2 or more computers in one apartment without creating a local network
You can solve this issue in several ways:
- Installing a router (router)- allows you to have access to the Internet to each of the computers without connecting the second one to the network. Since the Ip-address (the identification requisite of a computer on the network) is assigned directly to the router, you will have one tariff for the provision of Internet services, and you can use the Internet by two computers at once.
- wifi technology- wireless network connection. It is possible when using a special set of equipment and its settings.
1st stage. LAN setup
How to connect two computers in a network (Network Bridge)
One of the computers connects to the Internet, the second computer connects to the first. The main disadvantage in this case is that in order to access the network of the second computer, it is necessary that the first computer is also on the network. And also, if your Internet connection goes through a network card, then you need an additional network card to connect the second computer to the first one, because. the built-in network card is already busy (it accepts the Internet).
To connect two computers to each other and to the Internet via a Network Bridge, you will need:
1. Special cable (twisted pair) and possibly an additional network card.
Twisted pair can be obtained from radio markets or specialized stores. It is made independently, using a special tool called "crimping" and based on the required length of the cable itself. The pinout can be found on the Internet. And you can ask to compress the "vituha" directly on the radio market (tell the seller what you need to compress for the connection type "via network cards" or "comp-comp", there is also a "comp-switch") or buy a ready-made cable (if any), but it may be short. There is no factory assembly of such a cable, only a "comp-switch" is on sale, you can buy it, but then one end of it is cut and crimped.
A twisted pair is an 8-core cable (eg UTP-5) with RJ-45 connectors. The ends of the cables are crimped special. tool (special pliers) into the connectors in accordance with the colors of the ends. The order of crimping the network cable is as follows: BO-O-BZ-S-BS-Z-BK-K at both ends to connect to the hub. To connect a computer to a computer, one of the sides should be: BZ-Z-BO-S-BS-O-BK-K, where O is orange, Z is green, S is blue, K is brown, BO is white-orange, etc. etc. (do not go into too much detail, but give the cable to knowledgeable people for crimping).

Twisted pair ($2-2.5 - 3 m)

Crimp tool
So, with the help of "twisted pair" we connect computers card-to-card (connection type "comp-comp")!

Network card ($3-6)
2. After connecting 2 computers via cable, you need to configure them programmatically.
The computers must be in the same workgroup, in the same address range, and with different network names. The setting of these parameters is shown in the graphic diagram:

In this case, it is also desirable to set the IP addresses and the subnet mask manually (the subnet mask is generated automatically when the IP address is specified). IP addresses can be selected in the range 192.168.0.xxx. At the same time, on all computers on the local network, the IP address must necessarily begin with "192.168.0.xxx", and the last three digits (xxx) must be different (otherwise there will be a conflict, since this is tantamount to two different houses having the same same address) and be in the range 0 - 255. The IP address setting is shown in the graphical diagram:

2.2. Wizard Setup
To do this, go to "Control Panel" -> "Network Setup Wizard", and follow the instructions of the wizard.
You can also combine manual network setup and setup using the wizard, for example, after setting up the network using the wizard, specify the IP address.
After all this, you can give access (share) some folders in the folder properties, in the "Access" tab. Shared folders can be seen by going to "My Computer" and in the "List of typical tasks" select "Network Neighborhood". Or, through Total Commander, go to "Network and Plugins" (the rightmost drive button) -> "All Network" -> "Microsoft Windows Network".
3. Printer setup.
3.1. Sharing a Printer on a LAN
To do this, go to Start - Control Panel - Printers and Faxes. We find the printer connected to this PC, right-click on it and select "Sharing ..." in the context menu. After that, this printer will automatically be detected on other PCs connected to this local network.
3.2. Using a Shared Printer on a LAN
On other PCs, go to Start - Control Panel - Printers and Faxes. Click on "Install Printer", and then follow the instructions of the printer installation wizard.

I. Select "A network printer or a printer connected to another computer"
Let's move on to the next step.
II. We put the choice on "Overview of printers"
We do an overview of printers on the local network.

III. If you plan to use this printer frequently or permanently, set it to “Use this printer as default?” - "Yes".
This completes the setup.
We connect 3 PCs through network cards by the type of Network Bridge
It is not necessary to have a router or a switch to connect 3 PCs, it is enough to buy one more network card.
This option is cheaper than a switch, because. a switch is 3 times more expensive than a network card. To connect 3 computers, you need to select one of them and make it the master, the other two slaves. You need to put 2 network cards on the host computer. Then connect with 2 other twisted pair and create a Network Bridge. Then share the Internet and local folders, while the slave computer must be constantly turned on and connected to the Internet.
We connect 3 or more computers (up to 20 PCs) through an external hub (switch or network hub)
How to connect 3 or more computers to each other and to the Internet, provided that you need to distribute the same speed to each?

The simplest solution is to buy a switch (Hab), for 5 or more ports, N cables (taking into account the distance of each from the supposed location of the switch to each computer) with a comp-switch crimp (this has already been discussed above), where N is the number computers. After acquiring the necessary, you need to connect the computers to the switch. After that, we set up computers in the same way as with a connection between two computers.
We connect 3 or more computers (up to 6 PCs) through an internal hub (Hub)
We create a local area using an internal 5-port 100 Mbit hub
This option is perfect for organizing a network for a home and a small office (up to 6 computers) using a hub (or, as they say, a hub), for example, Genius GF4050C. The advantage of this PCI hub is that it is placed inside the computer like a regular expansion card. And for very little money ($45) you will get a 100 Mbps high-speed network in your office. But it should be noted that when the server (the PC where the hub is installed) is turned off, the network will not work. However, the hub does not require an extra power outlet and does not take up space on the table.

Internal hub
We connect 5-20 or more PCs through the Central PC server
We create a network with a central server computer that serves as a switch.
This option is designed for large offices and corporate organizations. More than 20 PCs can be interconnected. The central server computer with some server OS installed on it, for example, FreeBSD + switch, serves as a hub.
After exceeding the number of computers in the local area more than 20, you need to abandon the switch (hub) and install a central server, because. with so many PCs, data transfer will slow down the computer. This is due to the extra load on the processor when transmitting / receiving data, since there is a lot of processing, for example, when a movie is downloaded (resources are spent on creating packets where data is read, and parsing packets where data is received). All this leads to a slowdown in the performance of both computers: the one who reads and most of all the one where the data is read. If there is a center. server, then it is engaged in this business, and not client computers. That is why they put the central server. The switch takes care of some of the processing, but this is not enough with a large number of PCs connected to the network.
But it is better, of course, to use a server with a smaller number of computers, while there will be no braking, but in this case, you need to spend extra money on a server, i.e. to another PC. In addition, the server must be served by someone, for this there is such a position as "System Administrator". In general, if there is no money for an additional computer, you can run up to 20 computers through a switch.
Connecting lighting fixtures seems like a simple task. It would seem, what is so difficult here - to connect two wires coming from the ceiling? However, sometimes an unexpected problem arises before the home master: what to do if there are not two, but three wires in the chandelier? How and where to connect them? Let's try to understand this issue.
Required tool
For correct connection Chandeliers you will need:
- Indicator screwdriver or voltage indicator;
- Multimeter;
- pliers;
- Terminal block for three terminals;
- Insulating tape.
You will also need a stepladder or a stable stand, a marker, a sheet of paper and a passport for the lighting fixture.
Determining the purpose of the wires in the chandelier
The simplest is to use electric circuit, which can be found in the passport for the lighting device. It usually indicates the purpose of all the wires and the order in which they are connected. According to accepted standards, the color marking of wires should be done as follows:
- White or brown wire - phase;
- Blue wire - zero;
- The yellow-green wire is a protective ground wire.
If there is no documentation for the chandelier, and the color marking of the wires does not clearly indicate their belonging, it is necessary to determine their purpose using a multimeter.

Connecting a double-circuit chandelier to the mains
To properly connect a chandelier with three wires, two of which are phase wires, you need to inspect the switch and the wires coming out of the ceiling. The simplest case is when the switch is two-gang, and three wires come out of the ceiling. You can determine the purpose of these wires as follows:
- Take indicator screwdriver or voltage gauge.
- Turn on both keys of the switch.
- Alternately touch the voltage indicator to the stripped ends of all three wires. Upon contact with the phase wires, the lamp on the voltage indicator will light up.
- Mark the phase wires with a marker.
- Turn off the switch. Check all three wires again. The lamp should not light up!
- Connect alternately the phase wires of the chandelier to the marked phase wires of the electrical wiring, also connect the neutral wires. The connection is made using a terminal block or twisted using insulating caps or electrical tape.
- Check the operation of the chandelier, turning on both keys in turn.

If the switch is single-key and only two wires come out of the ceiling, then it is necessary to check them with the switch turned on with a voltage indicator and find the phase and neutral wires. The phase wires of the chandelier are connected to each other and to the phase wire of the electrical wiring, the neutral wires are also connected. Check the on and off of the chandelier.
If the switch is installed single-key, and there are three wires in the wiring, it is necessary to find out the purpose of the third wire. To do this, turn on the switch and check the presence of voltage on all wires. If the phase is found on two wires, then you need to replace the over-gang switch, and the chandelier can be connected in a three-wire circuit. If the phase is only on one wire, and the third wire has yellow-green insulation, then the connection is made as in the previous case: both phase wires of the chandelier are connected to the phase wire of the electrical wiring, and the ground conductor is insulated and removed.

Connecting a chandelier with a ground wire
If the lighting device has a metal case, it must be grounded. In new apartments, all electrical networks, including lighting, according to the standards, must have a yellow-green grounding conductor. If your network meets this requirement, then to connect the chandelier, it is enough to connect the wires with the appropriate color marking using the terminal block or twisting.
If the networks are old, and the insulation of all wires has the same color, then you should proceed in the following sequence:
- Determine the number and purpose of wires coming out of the ceiling. If there are two wires, then turn on the switch and use the voltage indicator to find the phase and zero. The switch is turned off and the wires are connected to the corresponding wires of the chandelier, and the ground wire at the chandelier is insulated.
- If there are three wires, then proceed in a similar way. If there are two separate circuits and a two-gang switch in the network, then the phase wires of the wiring are combined and connected to the phase wire of the chandelier, the neutral wires of the wiring and the chandelier are also connected, and the ground wire is isolated.
Safety
Care must be taken when connecting any electrical appliances. All connections and connections must be carried out only with the switch off after checking the absence of voltage on the wires. Places of twists are isolated using special caps or electrical tape. If you doubt that you can connect a chandelier with three wires correctly, it is better to entrust this matter to professionals.
First of all, you must understand that in different conditions may apply different types connections. And their choice depends on the specific task.
For example, it is much more convenient to connect wires of small cross sections up to 2.5 mm2 in a compact junction box with terminal blocks or clamps. But if we are talking about a strobe or a cable channel, then sleeves come out on top here.
Consider the three most simple and at the same time reliable types of connections.
 Let's start with a PPE type connection. It is decoded as:
- FROM connecting
- And insulating
- Z excitement
It looks like a simple cap. There are different colors. 
Moreover, each color means belonging to specific sections of the veins.
Cores are inserted into this cap and twisted together. 
How to do it right, first twist the cores and then put on a cap or twist them directly with the PPE itself, is discussed in detail in the article “.” 
As a result, thanks to PPE, you get the good old twist, only immediately protected and insulated.
On top of that, with a spring-loaded contact that does not allow it to loosen. 
In addition, this process can be slightly automated by using a PPE attachment for a screwdriver. This is also covered in the article above. 
 The next view is the Wago terminal blocks. They are also different sizes, and for a different number of connected wires - two, three, five, eight.
They can join together both monocores and stranded wires.
Moreover, this can be implemented as different types Vago, and in one single. 
For multi-wire, the clamp should have a latch-flag, which, when open, allows you to easily insert the wire and clamp it inside after snapping. 
These terminal blocks in home wiring, according to the manufacturer, can easily withstand loads up to 24A (light, sockets).
There are separate compact specimens on 32A-41A. 
Here are the most popular types of Wago clamps, their marking, characteristics and for what section they are designed:
Series 2273 Series 221-222 Series 243 Series 773 Series 224


There is also an industrial series for cable sections up to 95mm2. Their terminals are really large, but the principle of operation is almost the same as that of the small ones. 
When you measure the load on such clamps, with a current value of more than 200A, and at the same time you see that nothing is burning or heating, many doubts about Wago products disappear.
If your Vago clamps are original, and not a Chinese fake, and at the same time the line is protected by a circuit breaker with a correctly selected setting, then this type of connection can rightly be called the simplest, most modern and easy to install.
Violate any of the above conditions and the result will be quite natural. 
Therefore, you do not need to set wago to 24A and at the same time protect such wiring with an automatic 25A. The contact in this case will burn out during overload.
Always choose the right vago terminal blocks.
Automatic machines, as a rule, you already have, and they protect primarily the electrical wiring, and not the load and the end user.
 There are also enough old view connections, such as terminal blocks. ZVI - insulated screw clamp.
In appearance, this is a very simple screw connection of wires to each other. Again, it happens under different sections and various shapes.
Here they are specifications(current, section, dimensions, screw torque): 

However, ZVI has a number of significant drawbacks, due to which it cannot be called the most successful and reliable connection.
Basically, only two wires can be connected to each other in this way. Unless, of course, you don’t specifically choose large pads and shove several wires there. What to do is not recommended. 
Such a screw connection is well suited for mono-core, but for multi-wire flexible wires- No.
For flexible wires, you will have to press them with NShVI lugs and incur additional costs. 
You can find videos on the network where, as an experiment, the transient resistances on different types of connections are measured with a microohmmeter.
Surprisingly, the smallest value is obtained for screw terminals.
But we should not forget that this experiment refers to "fresh contacts". And try to make the same measurements after a year or two of intensive use. The results will be completely different.
Combination of copper and aluminum
Often there is a situation when it is necessary to connect a copper conductor with aluminum. Because Chemical properties copper and aluminum are different, then direct contact between them, with the access of oxygen, leads to oxidation. Often even copper contacts on circuit breakers subject to this phenomenon. 
An oxide film is formed, resistance increases, and heating occurs. Here it is recommended to use 3 options to avoid this:

They remove direct contact between aluminum and copper. Communication occurs through steel.

The contacts are separated from each other in separate cells, plus the paste prevents air from entering and prevents the oxidation process from developing.

 The third simple way to connect conductors is crimping with sleeves.
GML sleeves are most often used for joining copper wires. Deciphered as:
- G ilza
- M single
- L narrowed


To connect pure aluminum - GA (aluminum sleeve):


For the transition from copper to aluminum, special GAM transitions:


What is the pressing method? Everything is quite simple. Take two conductors, strip to the required distance.
After that, on each side of the sleeve, the conductors are inserted inside, and the whole thing is crimped with press tongs. 
With obvious simplicity, there are several rules and nuances in this procedure, if not followed, you can easily ruin a seemingly reliable contact. Read about these mistakes and rules on how to avoid them in the articles ” ” and ” ”.

To work with conductors of large sections 35mm2-240mm2, a hydraulic press is used. 
Up to sections of 35mm2, you can also use a mechanical one with a large span of handles. 
The sleeve must be crimped two to four times, depending on the cross section of the wire and the length of the tube. 
The most important thing in this work is to choose the right size of the sleeve.
For example, when connecting monofilament, the sleeve is usually taken to the size of a smaller section.
And in this way, you can connect several conductors at the same time at the same point. In this case, only one sleeve will be used. 
The main thing is to completely fill its internal space. If you are crimping three conductors at the same time, and you still have voids inside, then you need to “fill in” this free space with additional pieces of the same wire, or conductors of a smaller cross section.

Sleeve crimping is one of the most versatile and reliable connections, especially when it is necessary to extend the cable, including the lead one.
In this case, the insulation turns out to be almost equivalent to the main one, while also using the outer tube HERE as a casing.
Of course, you will not use either PPE or Wago for these purposes, but the GML sleeves are the very thing! At the same time, everything comes out compactly and easily decreases even in a strobe, even in a cable channel.
Welding and soldering
 In addition to all the above connection methods, there are two more types that experienced electricians rightfully consider the most reliable.
And not always, even with its help, it is possible to connect an aluminum solid wire with a flexible copper stranded wire. In addition, you are forever tied to an outlet or extension cord.
And if there is no voltage or generator nearby at all? 
At the same time, elementary press tongs, on the contrary, are present in 90% of electrical installers. It is not necessary to purchase the most expensive and fancy ones for this. 
For example, batteries. Convenient of course, go and just press the button.
The Chinese counterparts also cope well with their task of crimping. Moreover, the whole process takes no more than 1 minute.
How to connect wires? Soldering or welding? Long and uncomfortable. Need to find a soldering iron welding machine. But I'll tell you a secret that the best connection is welding, then comes soldering. Twisted wires? It's good, but not aesthetically pleasing. And according to the new rules, it is forbidden to use it, except perhaps on the sly in the country. Currently, special wire connectors have been invented that make life very easy for electricians and electricians. We will just talk about them in this article.
How to connect wires correctly and quickly
Connecting screw terminal
It is used very widely in production, as well as in the household for connecting two wires to each other. Sold in cassettes of 10 or more. How much is required, we cut off and use as needed. It is mainly used for connecting copper wires. Not recommended for aluminum. Aluminum wires have the property of fluidity. This means that after some time the clamped aluminum wire will “spread” out from under the clamping bolt and the connection will loosen.
The advantage of connecting terminal blocks is that they are very cheap and allow you to connect two wires together without problems in a matter of seconds. The main thing is to find a suitable flat screwdriver.


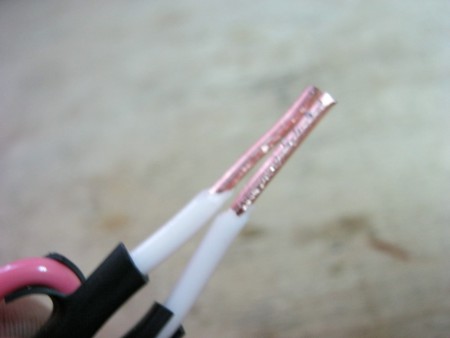
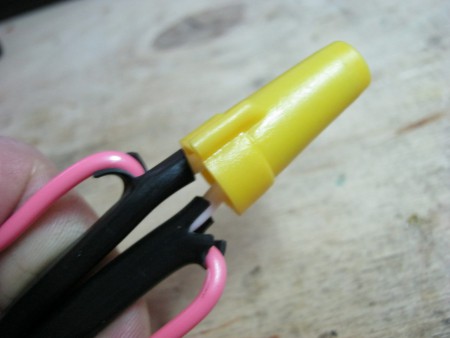
PPE caps

PPE - it is a connecting insulating clamp. Used to connect single-wire lived wires with their subsequent screwing clockwise. PPE caps are very convenient, but still not very reliable. Therefore, if you have a critical part of the electrical wiring, then it is better to give preference to the steeper competitors of PPE caps.
As you may have noticed, there is a spiral inside the cap, which, when screwing the cap, compresses the connected wires.
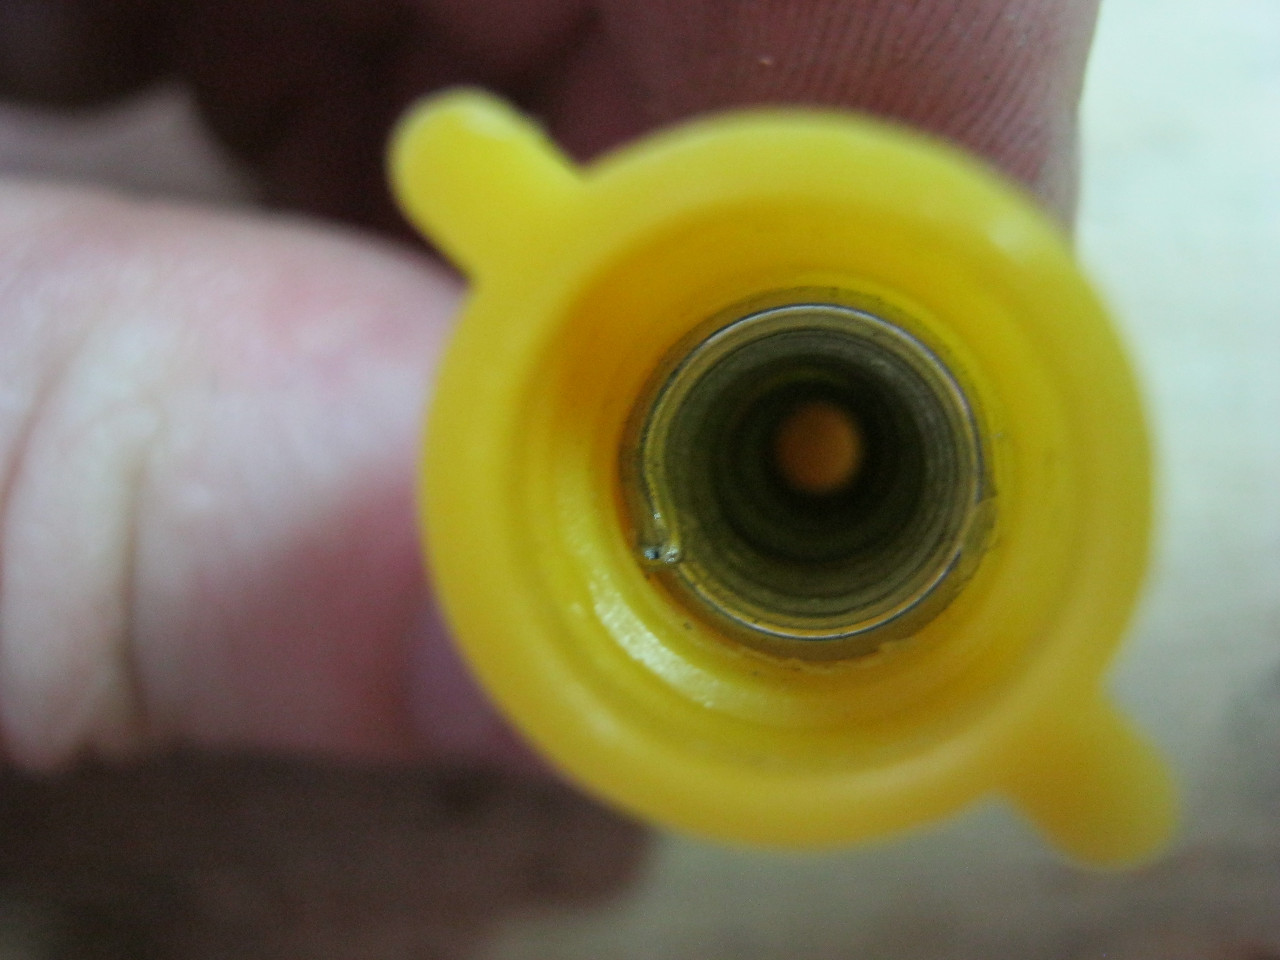
In practice, all this happens something like this: we clean two wires, and then screw the PPE cap on them
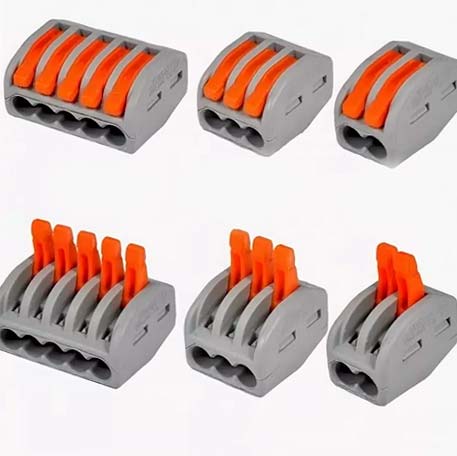
Terminal blocks VAGO (WAGO)
Vago terminal blocks are currently the most top-end wire connectors. Although they also have their drawbacks - this is the high cost and weak switched current. The photo below shows the principle of operation of the Vago terminal blocks.


Conclusion
At present, the blue electrical tape can already be shelved. If earlier with the help of it they built Soviet Union, now it is no longer needed. It is much easier to go to the nearest store and buy wire connectors. It won't hit your pocket hard. As a result, your wiring will be much stronger and safer.
Also, do not forget about the current strength for which these connectors are designed. For example, you should not use VAGO terminal blocks for various electric boilers and powerful energy consumers. In this case, they may not survive heavy load, which will lead to even worse consequences.
We advise you to read
 Healthy eating scenario "Vitamins visiting children
 How to quickly and easily wake up in the morning - easy and effective tips
 Psychological characteristics of children in adolescence
 Transferring a child to another school - the procedure and necessary documents Whether to transfer a child to another school