One of the serious stages of the internal arrangement of a two-story private house is the construction of a flight of stairs designed to climb up. Here the homeowner is faced with a choice: hire experienced craftsmen for this work or take up the manufacture himself. The second option is supported by cost savings and conscientiousness with which the owner will get down to business in his own home. It remains only to fill the gap in knowledge and understand how to make a staircase to the second floor with your own hands, having carefully studied our recommendations.
Schemes of stairs for climbing to the second floor
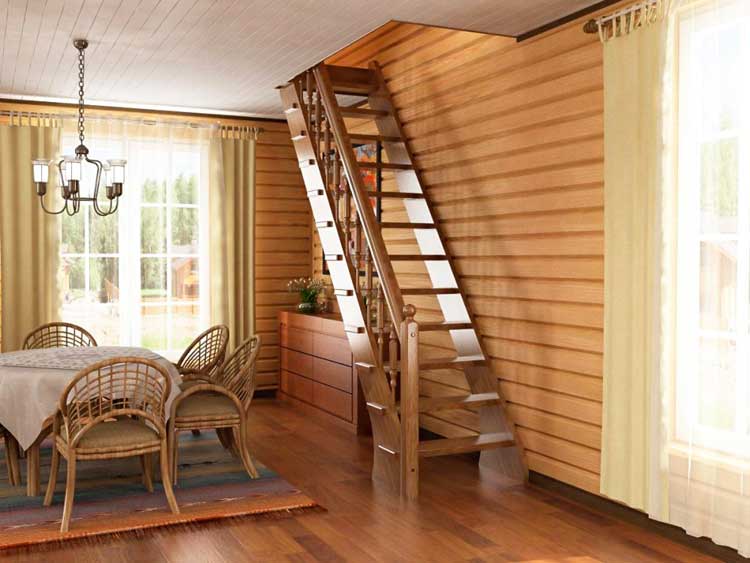
To independently build an interfloor passage, you need to choose a suitable design that will fit in the allocated area and at the same time be safe to use. But first, you should understand the names of the elements and details of the stairs:
- bowstring (otherwise - kosour) - a longitudinal beam that serves as a support for the steps;
- tread - the upper plane of the step;
- riser - an opening between two treads;
- a support post is used in some designs for mounting stringers or steps;
- baluster - a vertical support for the railing.
Straight staircase 1 flight
To organize the ascent to the upper floor of a private house, it is customary to build 4 types of stairs:
- Direct march with or without a transition platform.
- Swivel 90 or 180° with winder steps.
- Screw.
- Compact ladder "goose step".

Reference. To save usable space and building materials the listed structures are located along the walls. An exception is a screw structure, located in any convenient place, even in the middle of a hallway or hall.
A simple staircase to the second floor consists of one flight with a railing. It is not difficult to make it, but with a ceiling height of more than 2.5 m, the building will take up a significant area. To save space, it would be more correct to make an ascent according to the scheme with two marches and a transitional platform, as shown in the photo above.
The device of rotary (winder) steps allows you to effectively use the entire length of the stairs and thus reduce the size of the span. The assembly of such a structure is somewhat complicated due to the installation of a support column and the manufacture of figured wedge-shaped steps.

Turning staircase drawing
If there is very little space in the house or in the country, then it makes sense to build a spiral staircase or a goose step structure shown in the photo. In the first case, all the steps are winders and are attached at one end to the support post, and in the second they are cut in width so that you can put your foot on only one side. It is quite difficult to make a screw structure from scratch, but the goose step ladder is built using the same technology as conventional marching climbs.

Note. Typically, homeowners buy metal, wood, and glass spiral staircases as prefabricated kits that are assembled on site. Now on sale it is not difficult to find beautiful products that are in harmony with any interior, but you cannot call such a pleasure cheap.

This is what a steep goose step staircase looks like
To finally choose a suitable staircase scheme to the second floor, you should calculate the size and number of steps.
Calculation of interfloor stairs
For calculations, you need to know the height difference between the clean floors of the first and second floors, as well as the size of the area that you are ready to allocate for a conditional staircase. The calculation method does not depend on the chosen design and is based on the following requirements that ensure convenience and safety during its operation:
- tread width - at least 26 cm;
- step height - no more than 20 cm;
- the slope of the flight of stairs should be in the range from 27 to 42 °;
- railing height - from 900 mm;
- the minimum span width is 90 cm.

Advice. In order to correctly calculate the parameters of a flight of stairs and decide on its design, it is recommended to solve the problem graphically. Make your own mini-project by drawing freehand or computer drawings of the stairs in plan and side views.
The essence of the calculation is to determine the number of steps and the total length of the lift, taking into account the slope of the homemade ladder. The order of calculations is proposed to be considered on the example of a country cottage with a height difference of 3 m:
- So that the rise does not come out steep, we take the most convenient height of the riser - 15 cm. The number of steps is calculated by dividing the total height by this value: 300 cm / 15 cm = 20 pcs.
- Taking the width of the tread equal to 30 cm, we calculate the span length: 30 cm x 20 \u003d 600 cm or 6 m.
- Having drawn a sketch of such a staircase made of wood with a side view, we will determine the slope angle - 27 °.

Calculation scheme of a straight march with a slight slope
The 6 m long structure shown in the picture will not fit into every house, so its design will have to be adjusted. Option one: break the rise into 2 marches of the same length and make a transition platform. Given its size, equal to the minimum span width, the length of the ladder will be 3.9 m, which is also a lot. To some extent, sacrificing amenities, the dimensions of the stairs can be optimized as follows:
- reduce the step width to 26 cm;
- increase the height to 18 cm;
- push the tread forward 3 cm.

Schematic of an optimized staircase
Using the instructions above, we calculate the new parameters of the flight of stairs and get the number of steps 17 pieces, the angle of inclination is 37 °, and the total length is 3.7 m. can be reduced to 3 m, and this is quite acceptable. You will receive more visual information about the calculation of flights of stairs by watching the video:
An important point. All home buildings, including interfloor stairs, must be safe for small children. Provide gaps between the balusters according to the age of the child, so that he cannot squeeze between them and fall.
Construction materials
The best material for making stairs with your own hands is wood. It is not only easy to process, but also fits well into any interior. Metal structures are more durable, but also heavier and more difficult to assemble, not to mention the cost of iron elements. Dried wood of the following species is suitable for construction:
- ash;
- aspen;
- conifers: spruce, pine, larch.
Advice. For building inside the house, you should not use birch, as it quickly dries out and loses its appearance.
For the manufacture of stringers, you will need a board with a thickness of 40 mm or more of the required length (it is unacceptable to splice a bowstring from pieces). The width of the board should be 25-30% more than the calculated tread width. A wooden bar with a section of 10 x 10 cm or more will fit on the extreme and intermediate posts for the railing, depending on the length of the supporting part and the weight of the structure.

The appearance of a wooden staircase largely depends on the design of the balusters. In order to beautifully decorate the railing, it is better to order the manufacture of balusters somewhere at the factory, where, according to your drawing, they will be machined into lathe. If you own wood carving, then you can do the design of the racks yourself. Also, do not forget to purchase fasteners - self-tapping screws, metal studs or dowels for installing balusters, nails.
Installation guide
Recently, wooden stairs to the second floor, equipped with turning steps, have gained popularity. They take up little room space and are relatively easy to assemble, so we will give step by step instructions for the erection of such a structure. First of all, prepare the necessary tools and a ladder or a simple ladder for temporary access to the second floor. Then proceed in this order:
- Mark the blanks according to your drawing. For convenience, you can make a wooden template to draw cut lines along the stringers one by one. Cut out the pieces with an electric jigsaw.
- Install the support post and attach as shown in the picture below. Make grooves in it for attaching winder steps and bowstrings.
- Fasten both stringers - screw the first to the wall, and the second to the vertical pole and the end of the interfloor ceiling.
- To support the winder steps, install horizontal bars on the wall. Mount 2 bowstrings for a short march - the entrance to the stairs.
- Mount all the steps, moving from the bottom up. Mark on them the attachment points of the balusters.
- Fasten the balusters on the dowels or studs, put the railing.

The scheme of fastening the central support and the assembly of the flight of stairs
Advice. Do not cut 3 turn steps from one array. It turns out that the fibers of the first of them will be located across the length of the tread, which is why the step will break at the slightest load.
It makes sense to make the risers of a homemade staircase closed if you plan to sew up the space under the march (for example, for a pantry). In other cases, the openings between the steps do not have to be sealed. To extend the service life, finish the flight of stairs - treat the wood with an antiseptic composition and varnish it. How to properly assemble the turning ladder yourself is described in the next video:
Conclusion
When building a wooden staircase, pay special attention to the preliminary stages - calculation, marking and cutting out parts. If you make a mistake here, then it can be difficult to eliminate it during assembly, up to the alteration of the stringers. Think about the design of balusters and railings, study the existing options from photographs and choose the most interesting and suitable for the interior of your home.

Structural engineer with over 8 years experience in construction.
Graduated from East Ukrainian National University them. Vladimir Dal with a degree in Electronic Industry Equipment in 2011.
Related posts:

Low-rise construction, when it comes to residential buildings, involves the construction of at least two-level buildings. Therefore, to move to the second floor, you cannot do without an internal staircase. The purchase of a ready-made kit, firstly, will be quite expensive (at least 35,000 rubles), and secondly, it must be adapted to specific premises before installation, or be reconstructed (re-planned). And this is an additional cost and time.
In most cases, it is more expedient to make a staircase to the second floor with your own hands, especially since it will turn out to be approximately the same in terms of time. The simplest and most inexpensive option is wood construction. This article will explain in detail all the nuances of choosing lumber, drawing up a staircase drawing and the features of its assembly.
In relation to a private house, two are most common - a spiral staircase and a mid-flight staircase. The first option is quite complicated, and it is unlikely that it will be possible to implement it with your own hands, without practical skills and experience in this area. You will have to make specific engineering calculations, which means that you cannot do without the help of a professional at least at this stage of preparation. Focusing only on the schemes available on the Internet is not entirely correct. They do not take into account the specifics of a particular structure, so they will definitely have to be processed taking into account the characteristics of its dimensions, layout and a number of other factors. And the installation of a spiral staircase itself, especially a wooden one, is far from a simple process.
For DIY assembly the optimal solution is a mid-flight wooden staircase. Based on the height of the premises on the first floor, there can be one or two spans (swivel structure).

But in the details, even completely identical stairs can differ greatly. And this is easily explained by the fact that making with your own hands implies an element of creativity. Since all private houses differ in many ways (dimensions, ceiling heights, layout, internal content), then following a single standard is a hopeless business. By the way, the author has already drawn the attention of the reader to this. Therefore, further - only general recommendations, which will help to correctly draw up a drawing of a wooden staircase, taking into account all the features of the structure, and install it in place.
general information
There are several options for the execution of mid-flight stairs. Their main varieties are shown in the figures below. It is not difficult to decide which modification to choose for installation with your own hands, knowing all the features of the house and the premises of the first and second floors.

When describing any product or prefabricated structure, one cannot do without special terminology. The following drawings explain well what the main elements of the stairs are called.

Preparation of materials
- When choosing a tree species, if you focus on a reasonable combination of quality / price, it is recommended to give preference to pine or larch. The latter is even better, as it is less prone to decay. In addition, when the liquid is absorbed, it only becomes stronger. Since there will definitely be evaporation in any living space, it is more than relevant, especially if there is a kitchen in the adjacent room. All other species - cedar, oak and a number of others - are unlikely to be budget options for a wooden staircase.
- The durability of the structure largely depends on the degree of drying of the lumber. If the wood in this regard is not sufficiently processed, then such a ladder will “lead” quite quickly. Drying the boards with your own hands is a process that is both troublesome and complicated. You will need not only a place for their storage, but also knowledge of all the features of the methodology. You will have to ensure the constancy of temperature, high-quality ventilation, and so on. The conclusion is unequivocal - it is not advisable to save on the material for a wooden staircase. That is, if you buy boards, then only a high degree of drying, although they are more expensive.

Calculation of the main parameters of the stairs

Width
When determining this parameter, one should be guided by such moments. Firstly, whether it will be convenient to move up the stairs at the same time, towards each other. Secondly, will it be possible to transfer oversized cargo from floor to floor (furniture, household appliances and so on). For a private house recommended width of the internal stairs – 130±20.

Ladder height
When calculating this parameter, inexperienced "home masters" are guided by the ceiling of the first floor room. This is not true. When drawing up a staircase drawing, not only this parameter is taken into account, but also the total thickness of the ceiling and floor of the second room (together with the finish). That is, the last step should be on the same level with it.

span height
The distance between the steps and the ceiling of the second floor (ceiling) is implied. It is clear that moving up the stairs, constantly bending your head is not an option to save space. Basically, the masters are guided by 200. This is enough, since rarely anyone has growth that exceeds this value.

Steepness of a wooden staircase
A slope of 40 ± 5º is considered optimal. Exceeding this value will complicate the climb to the second floor for the elderly, young children, as well as those whose physical capabilities are limited for some reason. But even a more flat design has a number of disadvantages. The consumption of wood is increasing, and much more space will be needed for its installation. Here you need to choose the most suitable option for a particular house.

steps
- Tread. You should focus on the 45th size of a person's foot, then it will be convenient for everyone to walk up the stairs. Based on this, the recommended step width is within 28 ± 2.
- Riser. The optimal value, regardless of design features wooden stairs, 18±2. It will be convenient for both children and a tall person to move along it.
- Number of steps. This requires a calculation. The distance between adjacent ones is simply determined - the thickness of their board + risers. When a fractional value is received, it is rounded up to an integer value. It remains only to divide the height of the stairs by it.

What to consider:
- The dimensions of all steps of the flight ladder must be identical. That is, it is enough to make calculations for only one.
- If there are more than 18 steps, then it is recommended to provide a platform in the design of the stairs (hence, at least 2 marches). It is called differently - viewing, turning, intermediate - but you need to mount it. Another question - where exactly should it be located - strictly in the center of the span, closer to the top of the stairs? Here it is worth thinking, in accordance with the features of the house and the convenience of moving to the second floor.

Ladder length
This is the last step in the calculations. The initial data are the parameters of the steps and their number. As practice shows, when drawing up a drawing of a staircase on its own, it often does not fit in terms of the estimated length to the premises of the first floor. How to proceed? There are several options:
- Add one march. This solution is more complicated, since it will be necessary to mount an additional platform, and, therefore, to re-perform the main calculations.
- Provide for several turning (winder) steps in the design of the stairs. The option is simpler and more convenient for doing it yourself. It is he who is most often implemented.

Features of mounting a wooden staircase
Regardless of its design, all basic technological operations are identical. If you understand the nuances of building a single-flight staircase, then it will not be difficult to assemble it according to any other scheme.
The specifics of the preparation of components
Steps. For them, board segments are selected that do not have any defects in the form of chips, cracks, curvature. Their recommended thickness, taking into account the expected loads, is 35 ± 5. More impractical, since both the consumption of material and the total weight of the structure increase. Less undesirable for reasons of safety when moving up stairs (taking into account the loads carried).

At the stage of preparing the steps, it is necessary to round off the sharp edges of the fragments of the boards in order to eliminate the risk of injury. In addition, their front surface and ends must be carefully sanded - no chips, burrs, and so on. Here you will be most welcome. The length of the steps is selected depending on the chosen scheme of the wooden staircase. But their protrusions beyond the stringers by more than 3 (cm) are undesirable.
Riser. They are not load-bearing elements, and often play only a decorative role. Here you can save a little on them using a board for 10 or 15. By the way, some wooden stairs are assembled without them. Such structures look even more impressive, and, in addition, the cleaning of spans is greatly simplified.
Kosoura. These are supporting elements for the entire staircase, so the lumber for them should be chosen especially carefully. Particular attention is paid to the equality of all parameters. Both stringers should be like "twin brothers", otherwise the staircase after assembly will turn out to be asymmetric, with distortions, curvature, and so on. The figures show some variants of stringers.

The feasibility of making do-it-yourself fencing elements is in question. Well, if it is possible to process balusters, handrails on machine tools. Otherwise, it is better to purchase ready-made samples. Given the fact that it is they (especially with a side view) that are the first to catch the eye, such costs are fully justified.
The nuances of installing a wooden staircase
Kosour fastening. Fixing the extreme on the wall is possible only if the base is strong enough (a house made of bricks, timber, and so on). In other cases, the entire staircase structure is mounted on racks.
To prevent movement of the lower part, a support bar is installed on the floor of the first floor. The top of the span is attached to the ceiling itself (you will need to make a cutout in the beam along its width) or “fastened” to it with anchor bolts. The stringers themselves must also be fastened together so that they are not “led” during the drying process of the wood. For example, yes.

Riser. If it is decided to use them in the staircase scheme, then they are mounted on stringers.
Steps. In order not to be mistaken, their installation begins from the bottom of the structure. Side mounts - on the support beams, if there are risers, then at least at one point (in the center) on them.
Balusters. First, only two are mounted - the upper and lower. A cord is stretched between them. Focusing on it, it is easy to install stairs along the flights and align all the others.
Handrail attachment. When it comes to a wooden staircase, this does not a priori mean that these elements must also be made of wood. It is quite difficult to make them from it with your own hands. Here you will need not only experience, but also the appropriate tool. Options for handrails - plastic or metal.
Final stage
After checking the symmetry of the structure, the reliability of all connections, a number of measures are taken:
- Grinding of all structural parts.
- Impregnation with special / compositions (from fire, rot, wood-boring insects).
- Surface finish. The painting option is not for a private house. It is advisable to treat the stairs with a tinting compound, and on top or with a wax-containing solution. But this is at the discretion of the owner, depending on the general style of finishing the room.
Building a staircase to the second floor is a rather complicated procedure, but with experience and good walkthrough you can handle this on your own. The main difficulty in this case is that the dimensions of the span and the angle of inclination of the structure must be calculated with the utmost accuracy, since both the durability of the structure and the convenience of its operation largely depend on this. A reliable and aesthetically pleasing staircase is a great chance to test yourself and gain valuable experience for subsequent work in your private home.
First, you should decide what role your staircase should play in the overall interior. Such a design can serve decorative element or be invisible; moreover, the staircase can become the central element of the whole design, according to which the whole room will be designed. But before choosing a specific option and starting directly manufacturing, it is necessary to find out how this kind of staircase is arranged in general, and determine its required dimensions.
Construction - what are interfloor stairs made of
And they consist of a large number of structural elements. You definitely cannot do without some, while the rest, on the contrary, may be absent in some variations of the described design.

To begin with, steps must be present in the structure, as well as supports supporting them - these are the main elements of any interfloor structure of this type. The step itself is an element consisting of two parts perpendicular to each other. In professional terms, from the riser and the riser. The latter, by the way, serves as a kind of support under the approach, but you can often do without it.
As for the supports, they can be of two types:
- kosour (this is a special beam that supports the steps from below);
- bowstring (a similar beam for steps, only it supports them at the ends).
The next structural element is the railing. They are extremely important, although they are not available on all types of construction. And if elderly relatives or children live in your house, there is certainly no way without a railing.
Finally, balusters are special vertical supports for railings, often necessary not only for practicality, but also for decoration. Different materials can be used for balusters, and the shape of the elements is also different.

Note! Due to the wide variety of stairs, they may have such details that are required exclusively for this design. Let's get acquainted with them.
- Boltsy. By them are meant special bolts intended to support the steps. They can be attached both to them and to the walls themselves. They are not often used, but only for some versions of the stairs.
- Racks. Such elements are used in the construction of spiral staircases. Steps are attached to one such rack with an appropriate step, having a special shape and forming a spiral, which rises to the second floor from the first.

Which version of the stairs to the second floor to choose for the house?
So, first we determine which ladder we need, and make the appropriate calculations. As a rule, in private houses there are metal, concrete and wooden stairs.
According to their design, they can all be:
- screw;
- rotary;
- straight.

There are, by the way, combined options with varying degrees of complexity, but we will not dwell on them.
Concrete stairs require a very strong foundation, and the construction itself takes a lot of time, but the finished structures are very durable and strong. Installing a metal staircase is nothing complicated, but provided that you know how to work with welding machine. But everyone can build a wooden structure if you familiarize yourself with the algorithm of such a process.

The simplest in construction is considered to be a direct mid-flight structure - a not very complicated staircase to the second floor with your own hands. It is quite compact, does not include too many details, and complex calculations are not required in this case. If free space is limited, then the best option is a spiral staircase, which, although it looks elegant, is not always convenient to use. For example, it will be difficult for you to lift something heavy or bulky on it. More difficult to install structures that consist of several spans, but they are the most suitable option for buildings with long distance between floors.

Stairs to the second floor with their own hands made of wood single-flight
This design consists of the following elements:
- stringers;
- risers;
- tread;
- railing.
With what each of these elements represents, we have already figured out, so we immediately move on to the main thing.

So, the height of a single-flight staircase to the second floor should be the same as the distance between floors + floors. To simplify the calculation, it is first necessary to determine the dimensions of the steps themselves. If children or elderly relatives live with you, then it is desirable that the steps be 15 centimeters high, in other cases this height can be 20 centimeters. It is undesirable to exceed the latter value, since the ascent will turn out to be steeper, and it will not be so convenient to climb.

As for the width of the steps, it should vary from 20 to 30 centimeters - the specific value depends on how much free space is allocated under ladder structure. After all, the wider the steps, the more space will be required. Select the required dimensions, proceed to the calculation of the length of the base and the number of steps. Take the total height of the entire structure and divide by the height of one riser, and round the number you get to the nearest integer and multiply by the tread depth value. For example, the entire staircase to the second floor with your own hands will have a height of 300 centimeters, and the height of each riser will be 20 centimeters.
This will require 15 steps, because:
300:20=15
And if the width of each step is 25 centimeters, then the base should be 37.5 centimeters long (15x25 \u003d 37.5).
Step-by-step instructions for making stairs to the second floor
Having finished with the calculations, start making everything necessary elements designs. Stringers must be made of hard and dense wood, since they will bear both the weight of people and the weight of the entire staircase. Cut out a template from thick cardboard, making cutouts corresponding to the dimensions of the steps, while the slope should be the same as the angle of inclination of the stairs itself. Cut out grooves on the ends of the stringers, through which they will be attached to the ceiling and base, and then mark up in accordance with a pre-made template.

To cope with the subsequent work, you must prepare:
- electric jigsaw;
- a hammer;
- grinder;
- drill;
- level;
- and finally anchor bolts.
Take a jigsaw and use it to make protrusions on the stringers in accordance with the markings, then carefully sand both sides. Next, cut out the mounting holes in the floor beams or, alternatively, install metal supports. In the place where the first step will be located on the first floor, install the support beam, fixing it with anchor bolts. Then install the stringers, without fail checking the slope through the level. Secure the stringers at the top/bottom with the same anchor bolts.
Now you can make the stairs yourself. Take dry boards whose thickness is at least 3.6 centimeters; the width at this time should be similar to the width of future steps or even slightly larger.

Note! When making risers, you can take boards 2 centimeters thick.
As for the length of the blanks, it should be the same as the width of the entire structure (that is, within 80-120 centimeters).
When finished cutting, carefully sand each piece to remove roughness and sharp cuts. The installation process itself is nothing complicated: coat the lower cutouts on the stringers with wood glue, attach the risers and align everything around the edges. Next, fix them using self-tapping screws, and lay the steps themselves on top. If you do not use glue, then wooden parts will create squeaks when loaded.

Lay all the steps in the same way, and then start attaching the railing. Balusters for railings are made from square bars or, alternatively, figured wooden blanks. You can mount on each step or through one (it all depends on what the characteristics of the span are). Fasten with screws, do not forget to close the caps with decorative caps. If the stairs to the second floor with your own hands will be located approximately in the middle of the room, you can equip the railing immediately on each side.

At the end, sand the finished staircase well and treat with an antiseptic. Then paint the wood or open it with varnish. It is important that the final surface is not too smooth - the roughness of the steps will significantly increase the safety of the inhabitants of the house. Apply the top coat in two or three layers, and before each new layer, the previous one must dry completely.

Straight concrete stairs
If your house is spacious enough, and the interfloor ceiling in it is made of concrete, then you may well build a concrete staircase. As a rule, people often build one of two design options:
- monolithic;
- combined type (here only the stringer is made of concrete).

Note that option #2 looks much more attractive. However, a concrete staircase requires formwork in any case, as well as a sufficiently strong base that can withstand such a weight.
To get started, prepare everything you need, in particular:
- moisture resistant plywood (can be replaced edged board, upholstered with PET film);
- concrete;
- strong bars 10x10 centimeters in cross section;
- self-tapping screws;
- fittings or special knitting wire.
Note! The thickness of the board for the construction of formwork should be 3 centimeters, and plywood - at least 1.8 centimeters. Calculate all the necessary dimensions in the same way as for the design from the previous paragraph of the article, however, the strength characteristics of the base are required to be maximum.
Start work with the construction of formwork: take plywood or boards, knock them down in accordance with a pre-drawn drawing, avoiding cracks and observing the required slope.

When the formwork is ready, install it between floors and fix it with the same bars. Then lay out the reinforcement bars inside the formwork, tie them with steel wire. Where the railing will be installed, fix the wooden plugs, and only after that fill the entire box with the prepared concrete solution. It is important that the formwork be filled immediately, in one go, otherwise the solidity of the future structure will be broken.

After the concrete has set, dismantle the box, and moisten the formed steps with water from time to time, otherwise their surface may crack. Start finishing only when the concrete gains strength and dries completely. During the construction of stairs of the combined type, stringers are poured in the same way, and the formwork should be narrower (which is typical, the installation of steps should be taken into account here).

You can finish the finished monolithic structure with stone, wood, decorative tiles and other finishing materials. Before proceeding directly to the cladding, consider the weight - for example, the same tile will put a much greater load on the foundation than wood. You can attach any steps to concrete stringers, but they will look especially attractive with a tree.

Video - Self-made stairs
How to build a metal staircase
It is not so difficult to assemble such a structure, but this will require skills in working with a welding machine and metal elements in general.

So, to get started, prepare the following materials and equipment:
- grinder with a grinding nozzle;
- channel number 10;
- file;
- iron corners;
- metal in sheets;
- actually welding.
First, take a channel, cut it into segments and assemble a frame from them of such dimensions as the stairs to the second floor will be with your own hands. Next, take the corners and weld them to the ends of the resulting frame with the same step equal to the height of the steps. It is important that all corners are exactly perpendicular to each other. To facilitate the installation of the structure, you can weld the steps after the frame has been mounted and fixed.

Attach the upper elements of the frame to the upper ceiling with high quality, using anchor bolts for this purpose. Attach the lower ends to the floor of the lower floor. After that, weld the steps made of sheet metal, and install the railing. When finished with the assembly, carefully grind the joints with a special nozzle or, alternatively, with ordinary files. At the end, treat the entire structure with an anti-corrosion primer.

How to make a spiral staircase

The main advantages of a spiral staircase are excellent decorative properties, as well as the fact that such a design does not take up much space. For example, a staircase 2.5 meters high will consist of 16-17 steps, while the base will be approximately 2 meters in diameter. One of the most popular ways to build spiral staircases to the second floor is to “string” triangular / trapezoidal steps onto a central axis. In this case, the width of the wide part will be from 30 to 35 centimeters, and the narrow one - only 15 centimeters.

For self-manufacturing stairs to the second floor will need:
- two steel pipes 5 and 5.5 centimeters;
- primer mixture;
- wooden slats with which the template will be made;
- file;
- corners;
- welding machine.
A pipe with a smaller diameter will serve us as the main rack, therefore, its length should be the same as the interfloor distance. It is also recommended to concrete the staircase near the base to make it more stable (do not forget to set the structure vertically in advance). A large pipe must be cut into cylinders, the length of which is approximately 15 centimeters. Make sure all cuts are at a 90 degree angle, otherwise you won't be able to align all the steps horizontally.


Note! Cylinders should be put on the main pipe as tightly as possible, and there should not be any backlash. If the docking turns out to be loose, you will have to use sealing rings.
To make steps, you will need a template made from wooden slats. Glue the latter in such a way that the corners placed in the frame form steps of the required dimensions.

Weld each rung to the corresponding cylinder, then sand thoroughly. When all the necessary elements are ready, begin to assemble the entire structure. Put the steps on the axle, set the corners and weld securely.
The last step is the installation of railings and the final finishing of the entire structure. For the manufacture of railings, you can use:
- fittings;
- thin profile;
- chrome-plated pipes of small diameter.
Forged railings will also look very impressive. At the same time, do not forget that all metal surfaces must be carefully sanded, treated with a primer mixture and painted.

The spiral staircase to the second floor is assembled in a similar way, for which wooden steps are used. Wood blanks should be made in the form of trapeziums, after which a hole with a diameter of 5 centimeters is made in the narrow part. Further, using special seals, the steps must be strung on the axis and fixed there. At the end, railings are attached, the wood is primed, painted and decorated with decor.

Features of assembling stairs to the second floor on the rails with your own hands
As a result, one more interesting option should be considered on how a staircase to the second floor is built with one's own hands. In this case, we will talk about the design on the bolts, which got its name from him. Bolzen, which translates as "bolt". In other words, we are talking about a structure that is fixed on special bolts. Although in reality these are not even bolts, but fasteners made in the form of pins, at the ends of which there is a thread. Thanks to the bolts, the railings and steps are interconnected and also attached to the wall. As a result, we get an airy and light staircase that can decorate any a private house. Moreover, in this case there are no risers at all.


Among other things, stairs of this type are both quite compact and stretched on a specific section of the wall. Despite the fact that these structures seem light, in fact they are strong and durable, they can easily withstand several hundred kilograms, which is why, in fact, they have become increasingly popular in recent years.

Note! It is quite obvious that it is impossible to install such a staircase in the center of the room, because, as we have already found out, the fastening is carried out to the wall. But most importantly, for the construction you need to use only high-quality and durable materials.

It is extremely difficult to calculate such a ladder with your own hands, but it can be purchased ready-made or ordered by specialists in individual project. For more details on the installation of this design, see the video below.
That's all, good luck and warm winters!
Video - How to install a wooden ladder on the rails
The construction of stairs in the house is not an easy process, but doable. The main difficulty lies in calculating the angle of inclination and span parameters, because not only ease of use, but also the durability of the structure depends on this. A solid and beautiful staircase to the second floor with your own hands is an opportunity to test your strength and gain experience for further home improvement.
First you need to decide on the type of stairs in order to correctly make calculations. The most commonly used stairs in the house are wood, concrete and metal; according to the configuration, they are straight, rotary and screw. There are also combined designs of varying complexity.

Concrete products require a very strong base and a lot of time to manufacture, but at the same time they are the strongest and most durable. The installation of metal structures will not be difficult for those who know how to use welding, and anyone who is familiar with the technology of this process can make a wooden staircase.

A direct flight staircase to the second floor is considered the easiest to install; it consists of a small number of parts, takes up little space, does not require complex calculations. Screw structures are used where there is little free space; they look very elegant, but are not always easy to use. It will be problematic to lift something large and heavy along such steps. Multi-span structures are more difficult to build, but they are ideal for houses where there is a large distance between floors.

simple wooden staircase
A single-flight staircase consists of stringers, railings, treads and risers. The tread is the horizontal part of the step, the riser is the vertical part. Stringers are load-bearing structural elements with special cutouts along the upper edge for fastening steps. Instead of stringers, bowstrings are often used - load-bearing beams with grooves for steps. Riser and railings are optional, but for convenience and safety, it's better to have them.

The height of the stairs is equal to the distance between the floors plus the thickness of the floors. To simplify the calculation of the length of the span and base, you first need to determine the parameters of the steps. If elderly people and children live in the house, the optimal step height is 15 cm, for the rest, a height of 20 cm will be more convenient. It is not recommended to make the riser even higher, as the rise will be too steep and less comfortable.

The width of the step is 20-30 cm, and here a lot depends on how much space can be taken under the stairs. The wider the steps, the more space the structure takes up. When suitable dimensions are selected, the number of steps and the length of the base can be calculated. To do this, divide the height of the stairs by the height of the riser, round the resulting value to an integer, and then multiply by the depth of the tread. For example, if the total height is 3 m and the height of the riser is 20 cm, 15 steps will be required:
3000:200=15
With a step width of 25 cm, the length of the base is 15x250=3750 mm.
Manufacturing technology
When the calculations are made, you can begin to manufacture the elements of the stairs. For stringers, very dense hardwood is needed, because they must support not only the weight of the structure, but also people. A template is cut out of thick cardboard, on which the cutouts correspond to the size of the steps, and the slope is equal to the angle of the stairs. At the ends of the stringers, grooves are cut out for attachment to the base and upper floors, after which they are marked according to the template.

For further work you will need:
- jigsaw;
- grinder;
- building level;
- anchor bolts;
- drill;
- a hammer.
With an electric jigsaw on the stringers, protrusions are made according to the marking, then they are processed on both sides with a grinder. Holes for fasteners are cut out in the floor beams or metal supports are installed. On the floor of the first floor, along the line of the lower step, a support beam is installed and fixed with anchor bolts. After that, the installation of the stringers is carried out, be sure to check the angle of inclination with the help of a level. At the bottom and at the top, the stringers are fixed with anchor bolts.
The next step is the manufacture of steps. To do this, take dry boards with a thickness of 36 mm; their width should be equal to the width of the steps or be slightly larger. For risers, boards with a thickness of 20 mm or more can be used. The length of the blanks must correspond to the width of the stairs - from 80 cm to 1.2 m.

After trimming, each workpiece must be sanded to remove sharp cuts and bumps. The installation process of the steps is very simple: the lower cutouts of the stringers are coated with carpentry glue and the risers are applied, leveling along the edges. Fix them with screws and lay on top of the steps. Glue is needed so that the wooden elements do not creak under load.

Alternately laying all the steps, proceed to the installation of the railing. Railings consist of balusters and handrails; for the manufacture of balusters, a square beam or figured blanks made of wood are used. Balusters are installed either on each step, or through one, depending on the slope and length of the span. Self-tapping screws are used as fasteners, which are often closed with special plugs for beauty. If the staircase to the second floor is located in the center of the room, the railing can be installed on both sides.

The finished structure is polished again and treated with an antiseptic primer. After that, you need to cover the tree with varnish, paint or other composition that does not form a too smooth surface. If the steps are rough, this will increase their safety for the household. The coating is applied in 2 or 3 layers, with each layer being completely dry before applying the next.

In a spacious house with concrete floors on the second floor, you can make a concrete staircase. Most often, two types of structures are mounted in houses - monolithic and combined, in which only the kosour is concrete. The second option looks more attractive and elegant. For the manufacture of a concrete staircase, formwork and a very solid foundation are required.

In the process of work you will need:
- edged board, upholstered with a film, or waterproof plywood;
- durable timber 100x100 mm;
- knitting wire and fittings;
- self-tapping screws;
- concrete mortar.
Formwork boards are chosen with a thickness of 3 cm, the thickness of plywood should not be less than 18 mm. All dimensions are calculated in the same way as for a wooden staircase, but the base must be as strong as possible. They start with the formwork assembly: boards or plywood are knocked down according to the drawing, observing the angle of inclination and preventing the formation of cracks.

The finished formwork is installed between floors and fixed with wooden bars. After that, reinforcement is laid out inside the frame, tying the transverse rods with wire. In places where the railings are installed, corks made of wood are fixed, and then the formwork is poured with a ready-made mortar. You need to fill the frame immediately, otherwise the solidity of the base will be broken.

When the concrete sets well, the formwork is removed, and the surface of the steps is periodically moistened to avoid cracking. You can start finishing only after complete drying and hardening of the concrete. For the manufacture of a combined staircase, the kosour is poured in exactly the same way, but the formwork is made much narrower and takes into account the installation of steps.

For finishing a monolithic structure, wood, stone, tile and other materials are used. When cladding, the weight of the material should be taken into account, because tiles and stone put a greater load on the base than wood panels. Any steps can be attached to a concrete kosour, such a base goes especially well with a tree.

For the manufacture and installation of a direct metal staircase to the second floor, you will need:
- steel channel No. 10;
- metal corners;
- welding machine;
- sheet iron;
- file and grinder with a nozzle for grinding.

The channel is cut into pieces and a frame is assembled from them according to the size of the stairs. Corners are welded to the side faces of the frame at regular intervals equal to the height of the step. All corners should be parallel to each other. To make it easier to install the structure, the steps are welded after mounting and fixing the frame.
The upper ends of the frame are securely fixed with anchor bolts to the ceiling of the second floor, the lower ends are fixed to the floor. Next, sheet metal steps are welded and railings are attached. Upon completion of the assembly, the joints are ground with a nozzle or processed with a file, after which they are coated with an anti-corrosion primer.

This design takes up little space and looks more decorative. With a height of 2.5 m, you will need to make about 15-17 steps; the diameter of the base will be about 2 m. The most common way to mount spiral staircases is to string trapezoidal or triangular steps onto the central axis. The narrow part has a width of 15 cm, the wide one is 30-35 cm.

To make a spiral staircase yourself, you will need:
- steel pipe with a diameter of 50 mm;
- pipe with a diameter of 55 mm;
- wooden slats for the template;
- corners for steps;
- welding machine;
- file;
- primer.
The smaller diameter pipe is the center post, so its length must correspond to the distance between the first and second floors. For greater stability of the structure, it is recommended to concrete the rack at the base, after setting it vertically. A pipe of larger diameter is cut into cylinders about 25 cm long. The cuts must be strictly perpendicular, otherwise the steps cannot be aligned horizontally.
It is very important that the cylinders fit tightly on the central tube and do not form backlash. If tight docking does not occur, seal rings will be required.
For the manufacture of steps, it is convenient to use a template from the rails. Wooden slats glued together so that the corners inserted into the frame form a step of the specified parameters.

Each stage is welded to its cylinder and carefully polished. After the manufacture of all the elements, you can begin to assemble the structure. The steps are put on the axial pipe, set the angle and tightly welded to the axis.
The final stage is the fastening of the railing and finishing. Railings may consist of fittings, chrome-plated tubes, thin profile; wrought iron railings look very elegant. All metal surfaces must be sanded and treated with a primer, painted.

Similarly, a spiral staircase to the second floor is assembled from wooden steps. Wood blanks are made in the form of a trapezoid, in the narrow part of which a hole with a diameter of 50 mm is drilled. With the help of special seals, the steps strung on the axis are fixed on the central rack. Next, railings are installed, the tree is primed and painted, decorated with decor.
Video - How to make a staircase to the second floor
Video - Do-it-yourself wooden staircase
The construction of the staircase structure in a private house is not only necessary, sometimes it is extremely necessary. Multi-level, two-story houses, attics, attics and porches in most cases require special access.

It can be done only with the help of an auxiliary ladder. Choosing wood as the starting material for construction, you will immediately kill two birds with one stone:

For most owners of cottages and their own land, the pricing policy of the product will be decisive. It should be noted right away that wood is not the cheapest of materials, it requires maintenance, which will constantly need cash infusions. A good solution would be to build the structure yourself. Thus, you will significantly save money on installation and design services.

Design choice
After deciding to independently engage in the production of stairs for personal use, you should choose a design that will be optimal for your purposes. It is worth determining the type of structure: screw or marching. For self-construction, it is better to use mid-flight structures, they are easy to install and do not require special knowledge of an engineering house, but if you need to save space in the room, you won’t be able to do without spiral staircases.

The marching staircase can be straight and rotary. Rotary or two-march structures will allow you to change direction and save a little space, but you need to do them as carefully as possible so as not to violate the technology that will be described below. Steps can be based on one or more methods. Usually, a bowstring or kosour made of wood or metal is used.

Winder steps are used in mid-flight, rotary structures; for a straight staircase, such a step design is not required.

A spiral staircase is a cause for concern only if you decide to make it yourself. Its main difference from the marching one is that you can create a unique structure, of any height on 1.5-2 m 2 area. The design is quite complicated in execution and installation. It is necessary to take into account the general building rules, which will be decisive in the convenience and safety of use.

Self built
To get started, you will need some essential tools. It cannot be said that it will be possible to cut out any structure with improvised means, but if you have dealt with wood processing, the equipment will definitely be in the tool box. For self-construction of stairs made of wood, you will need:
- Boards and timber;
- Electric jigsaw or wood saw;
- Construction corner and tape measure;
- Level;
- Chisel and hammer;
- Sandpaper and grinder of any type;
- Drill and perforator with nozzles;
- Anchors, mounting angles and other consumables.
Construction and details
The appearance of even stairs of the same design may differ. The obligatory presence of columns, balusters and railings can significantly transform your brainchild.

The use of risers is not always appropriate, although they will fit the stairs quite noblely into the overall interior of the building. Small carved details can become both an additional security system and just a decorative element.

In order to pre-determine appearance and the complexity of the design, it is necessary to sketch out a drawing by hand, which will be important in further actions. In the drawings, it is imperative to draw all the elements and details of the structure .

The height, width of the stairs and steps, the features of the feet and the height of the step are taken into account.

Elementary calculations can be made using information from open access on the Internet.
Simple mathematical formulas make the design task much easier. Designs with the same and clear drawings are much easier to perform and assemble.
step by step
It's time to consider the step-by-step installation steps, as promised earlier. Accurate fulfillment of the requirements is, first of all, the safety of a person during ascent and descent, therefore, in no case should you miss even the smallest details. . Let's consider step-by-step actions in the installation of the simplest design: a straight marching staircase.


Railing installation may vary. In some cases, the distance to the wall allows installation directly to it or to fasten the structure to the staircase itself. Similar supports can also be independently made from wood or metal. It would be useful to buy ready-made railings with beautiful balusters and handrails. If the space and design of the stairs allows, you can install two pillars at the beginning and end of the flight of stairs, on which the handrail will be fixed, but in such cases the handrail will rarely be able to perform decorative functions.

If the scenery is no less important to you, take on the manufacture of beautiful carved balusters. You can come up with a design yourself or buy a finished product. Their installation will be carried out on a horizontal or vertical plane. You can use both steps and balusters for fixing, but this must be taken into account in advance so as not to harm the installation of the entire structure.

If the staircase is not installed indoors, but outdoors, you can independently erect two concrete slabs, to which the handrail will be attached. There are a lot of options for installation and how to implement them, so you should not focus on one of the options, it is better to consider all possible options in advance and choose the one that suits the interior and exterior of the building.


Photo and video installation of spiral staircases
For general education, before starting to draw up a plan, you may need a brief photo or video editing tutorial.
Having received at least the basic concepts of how the workpiece is made and the connection of the material, it will be much easier for you to draw a picture in your head, which is very important. A craftsman who knows what the finished product looks like can do a job much better and faster than a person who has no idea about the upcoming lessons.

Information is especially important for those who decide to build a spiral staircase. The usual description for this is not enough, you need to consider the options on a specific example, with a description of all the preparatory and installation work. Video tutorials on carpentry here will have a special impact on a person and, you see, a self-created design of a spiral staircase will please the eye, and no one will be interested in where you got the information from.
Step-by-step instructions on how to make a wooden staircase with your own hands - video, how to build steps from wood to the house, to the second floor, building a spiral staircase - installation photo, how to make a railing, assemble your staircase - design and details
Message
sent.
We advise you to read
 Healthy eating scenario "Vitamins visiting children
 How to quickly and easily wake up in the morning - easy and effective tips
 Psychological characteristics of children in adolescence
 Transferring a child to another school - the procedure and necessary documents Whether to transfer a child to another school