The need to install sockets is unlikely to raise doubts for anyone. Such an element is present in absolutely every home. Hardly a day goes by without this connector being used. In addition, there are electrical appliances that simply need to be constantly connected (for example, the most famous and popular household appliance is a refrigerator). The article will discuss how to install an outdoor outlet.
It is probably difficult to find a person who would not know what a socket is, but not everyone can carry out an independent installation. After all, this work is associated with a risk to life, so you should be very careful in this matter. First of all, you need to carefully study the installation technology and the typology of sockets.
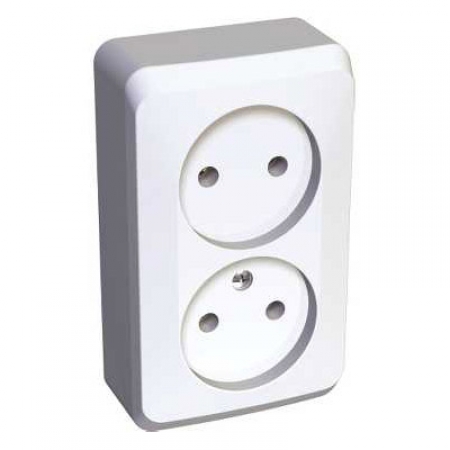
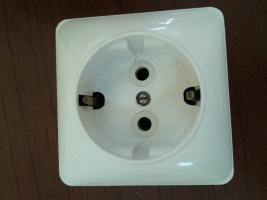
Outdoor plug socket

- The rosette got its name from a similarly named decorative element, which, in turn, became so named because of its similarity to a rose. The element was fixed on a wall or ceiling, and over time, any product fixed in this way began to be called that way.
- Today electrical sockets used to connect various devices that require electricity to operate. The main feature of the connector is that it provides almost instantaneous access to current. Devices in such a device are easy to insert and remove due to the fact that they have a cord with a plug (or plug) at the end, and the socket has holes for these pins.
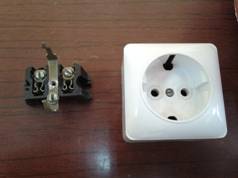
- The connector is arranged quite simply. It is equipped with a housing (front panel), a base and conductive elements (spring contacts, terminals). It can be fixed both inside the wall and outside (the so-called consignment note or external socket, the fixing of which will be discussed).
Device for outdoor sockets
So, in order to understand how to fix the connector on any surface, you need to understand its device. Most often, the installation site of the element is a wall, but installation is allowed on absolutely any plane, including on the floor, ceiling, or on an interior item, for example, in decorative fireplace or built-in closet, as well as outdoors. The main elements of the outlet are three components:
- base;
- conductive mechanism;
- front panel.
Base
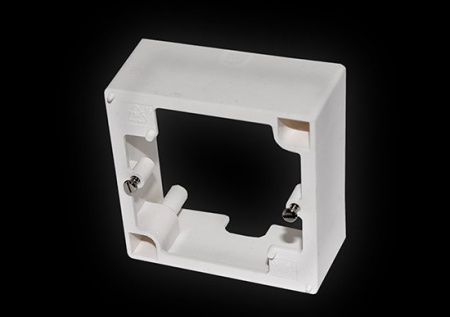
- This is an element that is fixed on a plane, and conductive parts and an upper decorative cap are connected to it. It can be made of ceramic or plastic. Each material has its own advantages and disadvantages. So, the ceramic part will not support combustion, which is very important when it comes to electricity, and it also dissipates heat very well. But its significant drawback is that it is very fragile and should be handled with care, as there is a high probability of damage. It is recommended to install such sockets only indoors.
- Of course, modern plastic can also have non-combustibility properties, but be sure to pay attention to this when buying, since ordinary plastic ignites very quickly, melts and emits an unpleasant odor, and also releases harmful chemicals into the air (when burned). The non-combustible element is made of polycarbonate, which has special additives. Such material is very durable and does not support combustion processes. Perhaps this is all you need to know about the base, since for the outlet it is not the main element and serves only to fix the entire structure on the wall and to connect other elements to it.
Conductive mechanism
- The most important part of the device is the conductive mechanism. It can be made in three modifications:
- brass without coating;
- tinned brass;
- bronze.
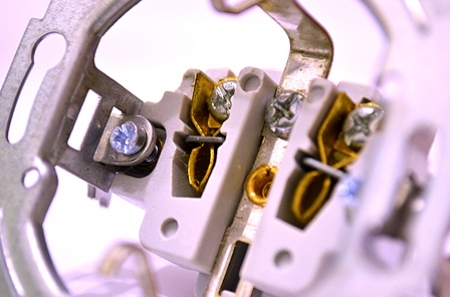
- There are also varieties in which the brass parts on top have an additional coating. It should be noted that contacts made of uncoated brass are considered the least reliable. This is manifested in cases where there is an environment of high humidity, and the contact itself is in contact with aluminum wires. As a result, the oxidation process occurs and the conductive capacity decreases.
- Another disadvantage of this material is that after a short time the parts do not spring well, which looks like a loose socket when used. Sometimes, in order to prevent this process, manufacturers additionally install spring washers on the contacts, which do not allow the petals to diverge to the sides, but hold them together.
- Tinned brass contacts are more reliable. Outwardly, they look like white matte metal and are less susceptible to oxidation and corrosion. The pins of the plug are securely fixed in such an outlet and do not hang out.
- Bronze contacts are considered the most reliable, but very few manufacturers make this element from this metal. Outwardly they have more dark color and their main advantage is the reliable fastening of the plug in the connector, since even after a long time they do not become loose, but have excellent spring qualities.
One of necessary elements the conductive part of the outdoor socket is grounding.
Its presence will avoid many problems, since there are a sufficient number of household appliances for which grounding is a paramount point. Such techniques include:
- heating appliances, for the reason that they emit a lot of power (for example, electric furnaces);
- equipment in contact with water, since moisture is an excellent conductor (washing machines);
- equipment with a complex device that has microcircuits, since such devices are sensitive to static electricity (computers).
The ground contact almost instantly diverts the resulting free electricity to the ground, as a result of which the discharge does not hit the equipment or even a person. When purchasing an outlet, it is imperative to find out if it has grounding elements. Externally, products without grounding have a shallower depth, and their cost is slightly lower than products with grounding contacts.
The wires are fixed in the connector by means of a screw connection or a special clamping mechanism. The difference between them lies in the fact that the screws may loosen during operation and will need to be tightened to avoid heating the socket with an increased electrical load. The clamping structure does not require additional effort on the part of users, as it is a self-adjusting device, that is, it has the ability to tightly press the wire and provide reliable contact throughout its entire service life.
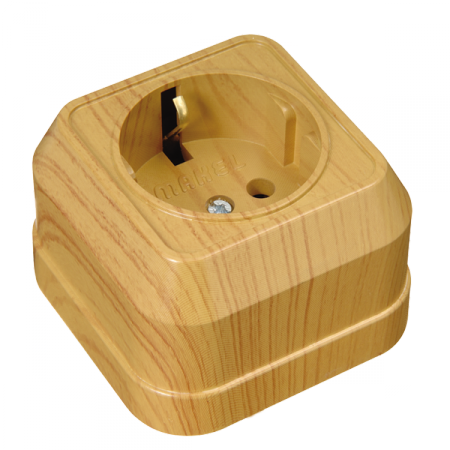
Outlet front panel
- And the last element that is part of the outlet is the front panel. This part defines appearance products. It is made of polycarbonate, which belongs to low-combustible materials. But this is far from the only choice, modern manufacturers offer products where the front part is made of wood, metal or glass. Thanks to this variety, it became possible to perfectly match the socket to any interior.
Outdoor socket photo
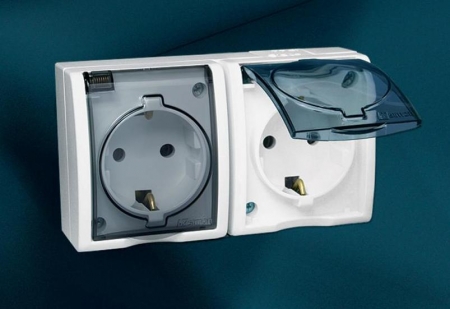
- The front panel of the external outlet has a special cap that securely closes the device itself and protects it from dust and moisture.
Installation of an external socket
All sockets available today are divided into two main types of installation: internal (that is, hidden or built-in installation of the product inside the wall) and external, in which the socket remains on top of the surface and usually the wires also do not hide in the wall, but go along it. In this case, the cable can be installed in a corrugated pipe or in a cable channel. But a secretive arrangement of wires is also practiced, in special strobes or cavities inside the wall.
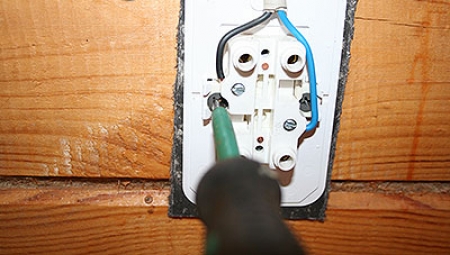
- So, how do you install an outdoor outlet? The first step is to de-energize the power cable. To do this, you just need to turn off the corresponding lever in the electrical panel. But even after this step is completed, you should definitely make sure that there is really no current. To do this, use an indicator screwdriver to check the presence of voltage in the wiring at the installation site.
- Next, you should disassemble the outlet into its constituent elements. To begin with, the top cover opens, this is required in order to press the latches that secure the front panel to the base. This is done quite easily, usually they are on the sides, just press them, for example, with a screwdriver (since it must be present during the installation process) and separate the product into three components - the base case, the mechanism and the front panel with a cover.
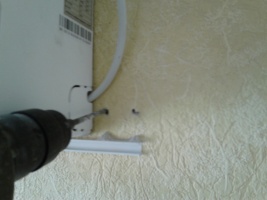
- Then the places where the mounting holes will pass are marked. To do this, put the base to the installation site, align it, preferably in level and mark the holes for fasteners, as a rule, there are two of them, located diagonally, but there may be more, depending on the design. Marks are left on the wall with a pencil or a sharp object and holes are drilled along these marks, or if the base is wooden or into which screws are easily screwed, it is allowed to use a screwdriver immediately. Otherwise, fastening is done on dowel-nails.
- Typically, the socket housing has an inlet closed with a plug. Therefore, before pulling the wiring, you should free this hole. Various products have various options such plugs, some manufacturers even offer specially selected sizes for different cable diameters. Having cut out the desired size, the cable is pulled into it, if it is in a corrugated pipe, then it should also be slightly stretched. If you plan to install a hidden cable, then the hole is drilled on the back of the case.
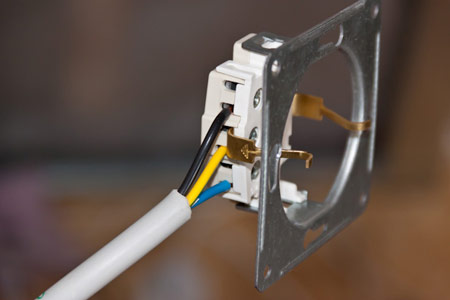
- The insulation of the cable inside the socket is removed, and the exposed wires (cores) are stripped by about 1 cm. The cores have different colors, the following marking is accepted in Russia:
- L - phase, usually white or gray wire, but you also need to keep in mind that the phase wire can be of other colors, for example, black, red or brown;
- N - zero, neutral - blue or blue wire;
- PE - protection, grounding, has a yellow-green color.
- In order to connect the power, the neutral (blue) and phase (gray) wires should be placed in the outer terminals, and the ground wire (yellow-green) should be installed in the central terminal. Sometimes you have to determine the phase yourself, for this you can use indicator screwdriver. It is necessary to approach this process very carefully, and follow all safety regulations.
- After the wires were fixed in place, it was time to install the conductive mechanism into the housing. This is as easy to do as pulling it out, just press it to the attachment point, and it is securely held on the base.
- The last thing to do is to install the front of the product, which is pressed by a special mechanism. Next, power is connected and the operation of the connector is checked.
Manufacturers of outdoor sockets
You should purchase only those goods that have all the appropriate certificates and are able to work efficiently in the territory Russian Federation. The price of an outdoor socket varies depending on the manufacturer. The best way The products of the following companies have proven themselves:
- Jung;
- Legrand;
- Schneider Electric;
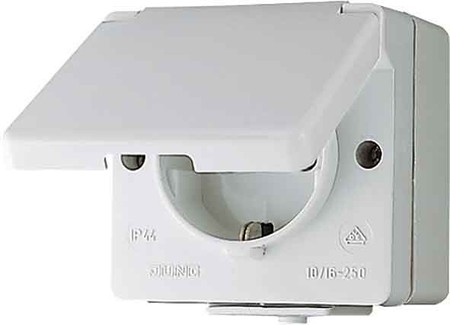
Jung outdoor sockets
- This German company has been known throughout Europe since 1912 as a reliable supplier and manufacturer of electrical installation products, switches and sockets. All products are of excellent quality and the necessary reliability. The elements of each manufactured product have been tested and have the appropriate confirmation and guarantee, which means that we can say with full confidence that such a purchase will last a long time.
- At the manufacturer's factories, such a thorough control is carried out that not only the functionality is checked, but also the layer paintwork. In addition, 220v outdoor sockets are tested for the number of on / off cycles, and if the indicator does not match the declared one, then the entire batch is removed from production.
- Every year, technologists try to expand the range of products, doing it together with designers, who bring attractiveness and increase the ergonomics of products. The best-selling outdoor sockets of the company can be called products of the series Jung WG 800, Jung WG 600, Jung AP 600.
- Some models go immediately in combination with switches. In addition, double outdoor sockets and even triple sockets are available. The choice of model range is huge.
- The cost varies from 1000 rubles. and up to 7000 rubles. That is, you can find a product for every taste and opportunity. At the same time, the price is formed only depending on the functionality and does not affect the quality, since all products deserve attention.
Outdoor outlets legrand
- A French corporation that was founded back in 1866. Today it is the world leader in the production and sales of electrical products. The company has representatives in 70 countries around the world. In 2007, close cooperation with Russia begins, after the acquisition of the Kontaktor company.
- On the territory of our country, products under the brand name "Legrand" appeared in 1980. The official representative office was opened in 1993, along with the start of production under the Leten brand.
- The most reliable overhead sockets are products "Legrand Urbano" and "Legrand Plexo", their cost is approximately 1.5 thousand rubles. - 3 thousand rubles.

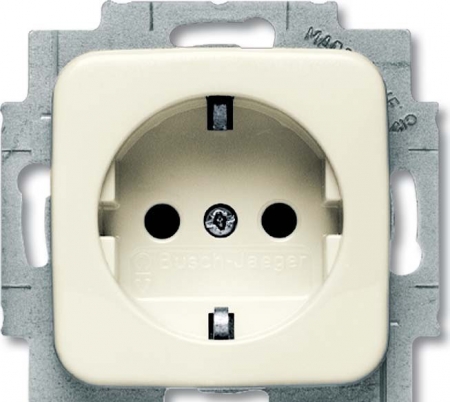
ABB outdoor sockets
- The history of the company began in 1988, when the two companies merged into a single corporation. It was the Swiss "BBC" and the Swedish "ASEA", which have been known since the end of the 19th century. The head office of the new combined company operates in the city of Zurich (Switzerland). Sockets and switches are manufactured by ABB's companies Busch-Jaeger and Niessen.
- More than a century of experience of the company allows it to create the highest quality and reliable products, in addition, the product is distinguished by increased safety, which is very important, given that its work is carried out under constant voltage.
- There is also a variety of color solutions, due to which you can choose sockets for almost any modern interior. The most popular and best-selling products are the series "Ocean" and "Busch-Duro".
Schneider Electric outdoor sockets
- The company was registered in France in 1836 and has since become a leader in the production of electrical equipment. Several companies are merged into a single corporation. various companies: "Square D", "Merlin Gerin", "Telemecanique", including the Russian enterprise CJSC "Schneider Electric".
- Cooperation with our country began back in 1974, and for 40 years now you can see high-quality and reliable switches and sockets under this brand on the Russian market. The company's innovation was the use of sockets with a special lever for an easier process of removing the plug from the socket. The most demanded model is the product of the series "Etude", the price of such sockets is in the range of up to 500 rubles.
Of course, these are not all manufacturers of outdoor sockets; you can also find products under the brands:
- "Bticino";
- D.K.C.;
- Fede;
- Gira;
- "Merten";
- Simon.
Outdoor outlets are usually installed in places where reliable protection against moisture and dust is needed, for example, in the bathroom, in the kitchen, in the cellar or in the garage, as well as on the street, in gazebos and even in the garden. Their main difference is the presence of a protective cover that opens and closes conveniently. Usually they have a high degree of protection (marking IP 55). The cover reliably protects from penetration of moisture, dirt and other foreign objects.
Such products are not afraid of any weather conditions, they are sufficiently resistant to any temperature conditions due to the fact that only high-quality materials are used in their production. In addition, it is much easier to mount an outdoor outlet than a conventional one with hidden wiring.
-
Merten products combine high quality and modern design, often ahead of the leading fashion trends. The main range of Merten - sockets and switches for various types interiors - from luxurious classics to brutal loft.
Merten products are a combination of technological advances and intelligence. The line includes more than 175 functions, for which 7 types of design have been developed with a wide selection of natural frame materials: glass, metal, wood, stone, brass, gold.

-
Unica is a Spanish series with a wide color palette of frames.
In the Unica, Unica Chameleon, Unica Quadro collection you will find many colors and fashionable finishes, from discreet and simple to modern and sophisticated with deep metallic colors.
Unica Top and Unica Class are the choice of creative and ambitious people who value quality and style. Products are made of natural materials: wood, glass, leather, stone.
The frames snap into place with a simple push, ensuring a snug fit even with uneven walls.

-
Turn on your style. Decorative series Odace Touch has round mechanisms white color and aluminum colors and frames made of natural wood and metal.
- Sedna - Sleek design meets powerful functionality
- W59 - To match the character. Frame series W59 with classic design. It has 8 colors of mechanisms and frames, which gives freedom of choice.
-
True French design, reliable German mechanism and Russian production traditions - all this is combined in a series of electrical installation products Glossa.
Thanks to Glossa you can create an interior that reflects your personality and suits your lifestyle.
- Duet - A good solution for the city and cottages. The range includes various sockets, switches, dimmers, degree of protection IP20 and IP44 in hidden and open installations. Monoblock series in five colors: white, beige, grey, pine and beech.
- Etude - A good solution for the city and cottages. The range includes various sockets, switches, dimmers, degree of protection IP20 and IP44 in hidden and open installations. Monoblock series in five colors: white, beige, grey, pine and beech.
Very often, customers ask us what installation products to choose, that is, the sockets themselves, switches, etc. Everyone has different tastes and therefore it can be very difficult to offer something specific. Customers have to be directed to specialized stores, where the stands show sockets and switches of various series and manufacturers. By clicking the keys and reviewing several options on the spot, people are already calmly choosing the models they like.
Today, installation products are produced in a variety of designs, colors and, accordingly, have different prices. In this article I want to show the Unica series from Schneider Electric. This is a beautiful and very reliable product. They are also quite easy to mount in place, which I really like as an electrician.
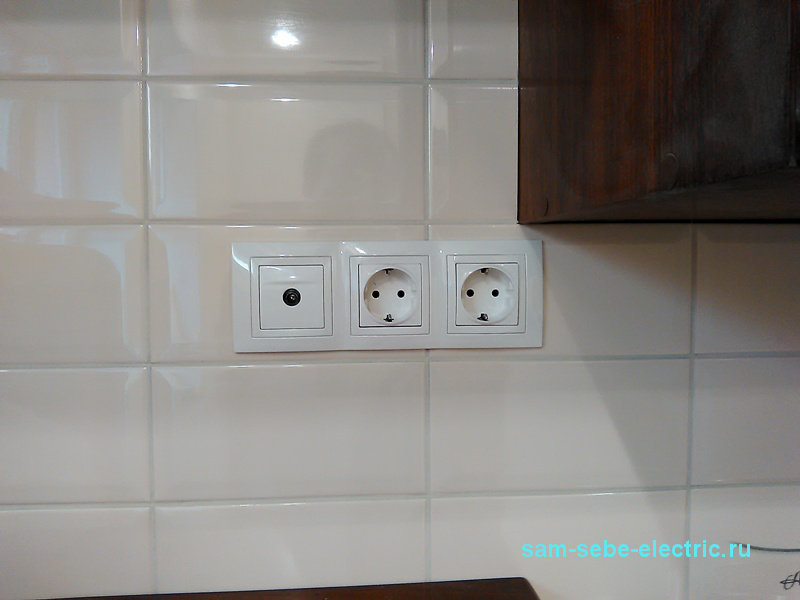
Below you will see photos of the Unica series from Schneider Electric during their installation. Also, already installed products in their places will be presented here. Such photos help to better consider this series and decide whether it is worth buying. I hope you find these photos helpful in choosing your installation products and that I didn't waste time taking them.
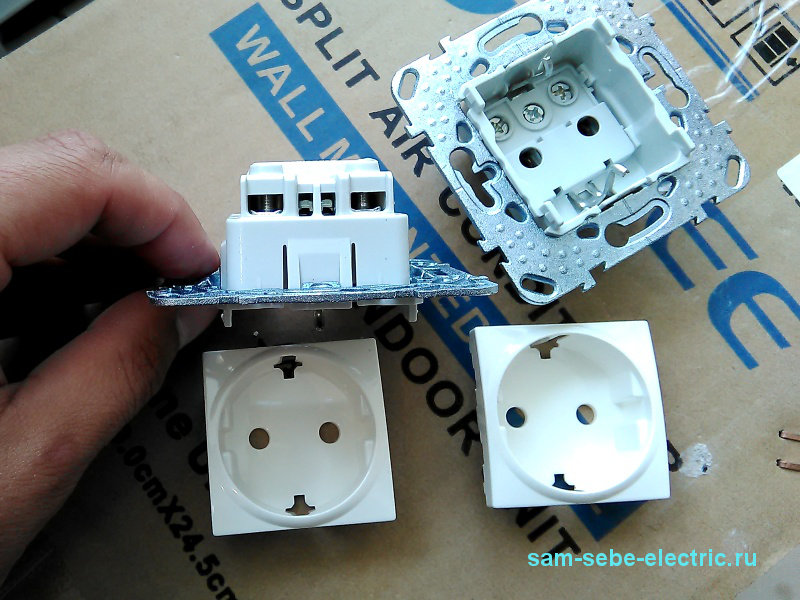
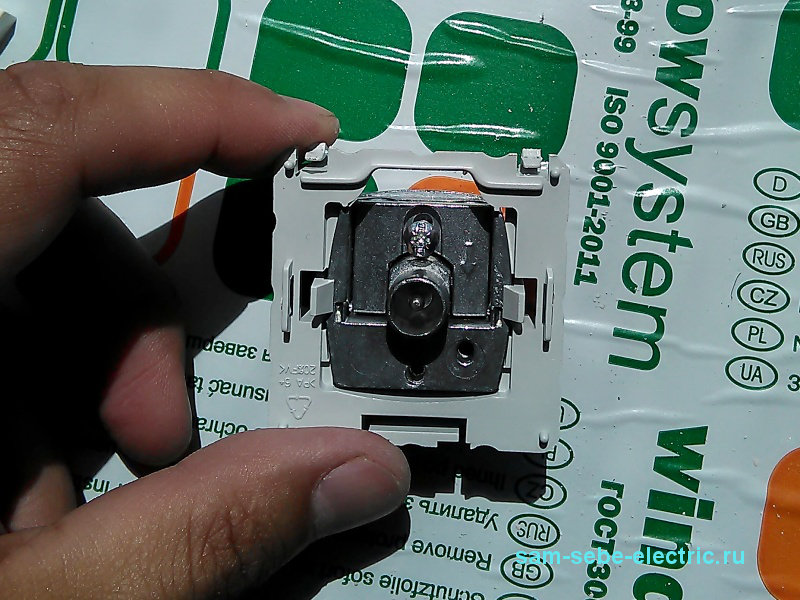
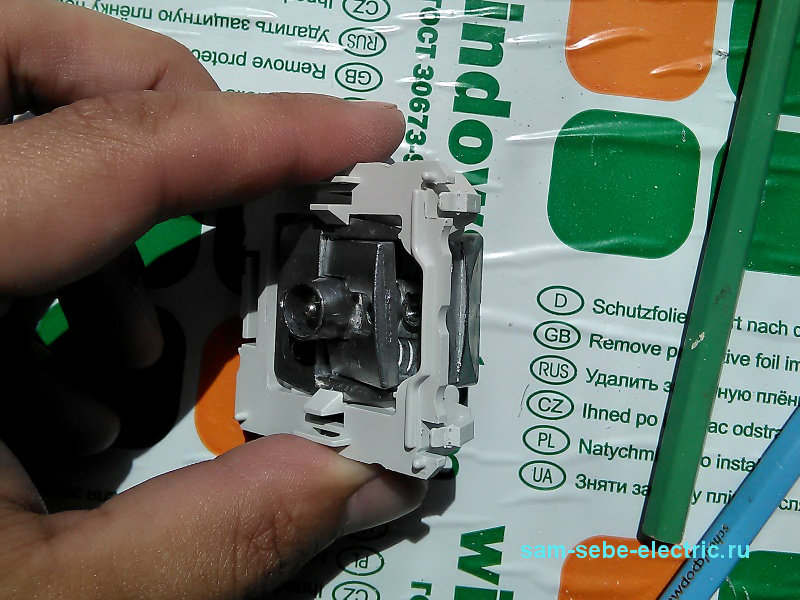
The most common installation products are sockets. They are sold only in a single version and look like this.
The white caps fit snugly but can be easily removed. You just need to pull them towards you.
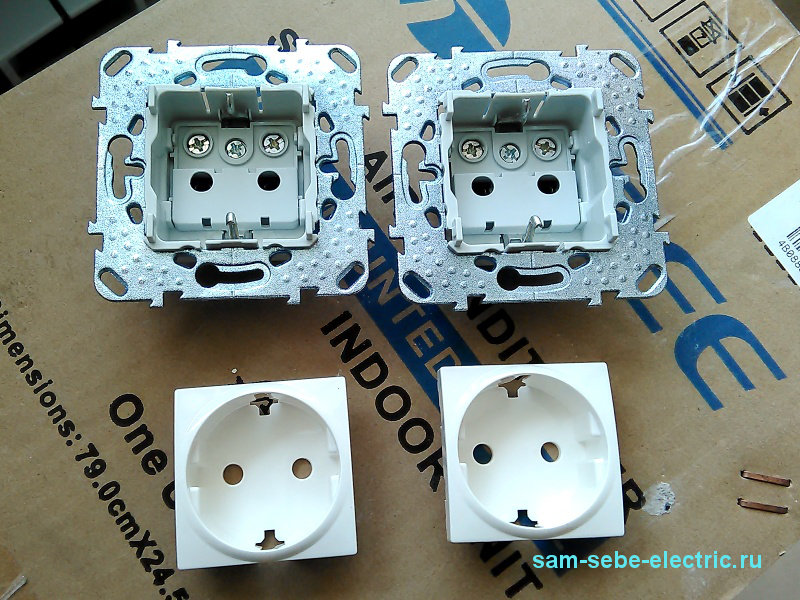
The socket contacts are very good. They do not diverge when tightening, which makes it possible to press the cable to the conscience. The metal frame with which the socket is attached to the socket is thick enough. It does not play or bend during installation.
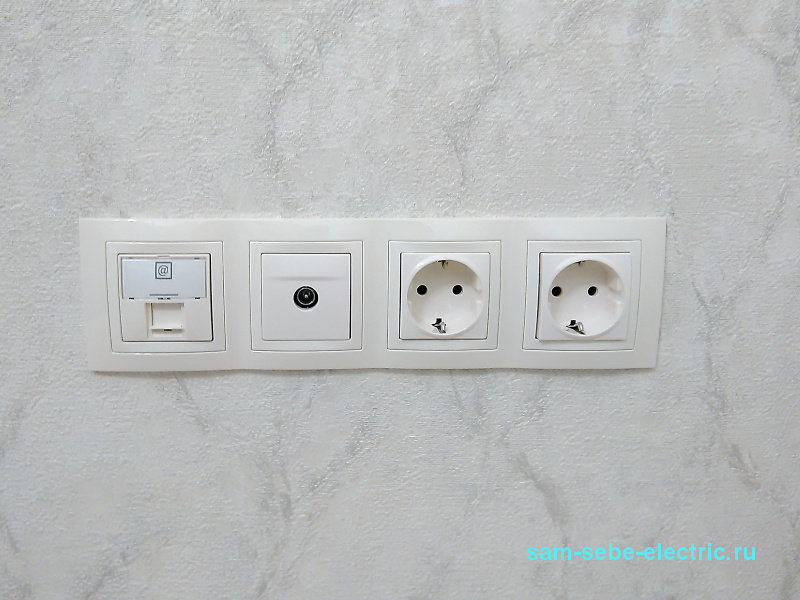
The computer socket or Ethernet socket also has a solid base. The mechanism for connecting the FTP or UTP cable is very convenient for installation. Here you need to lead the cable through the hole, dissolve the cores, arrange them by color and lay them in their grooves.
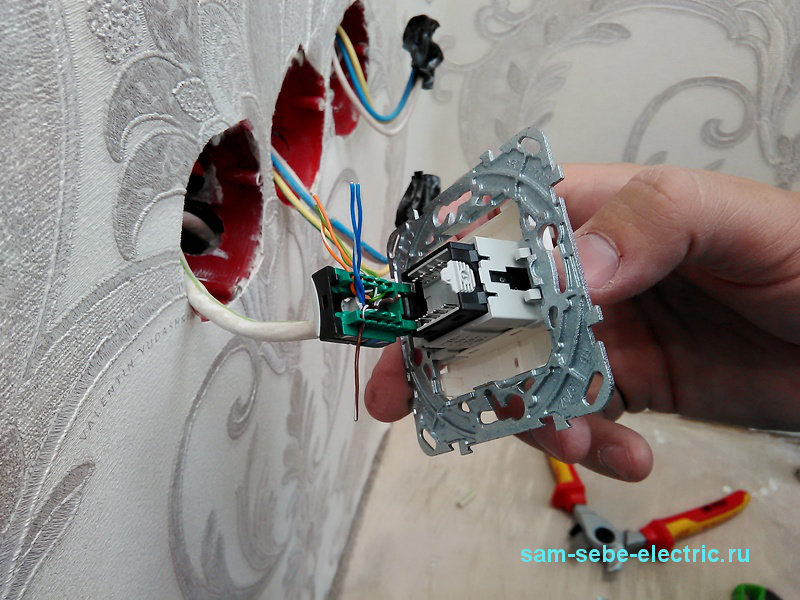
Excess parts of the veins are bitten off.
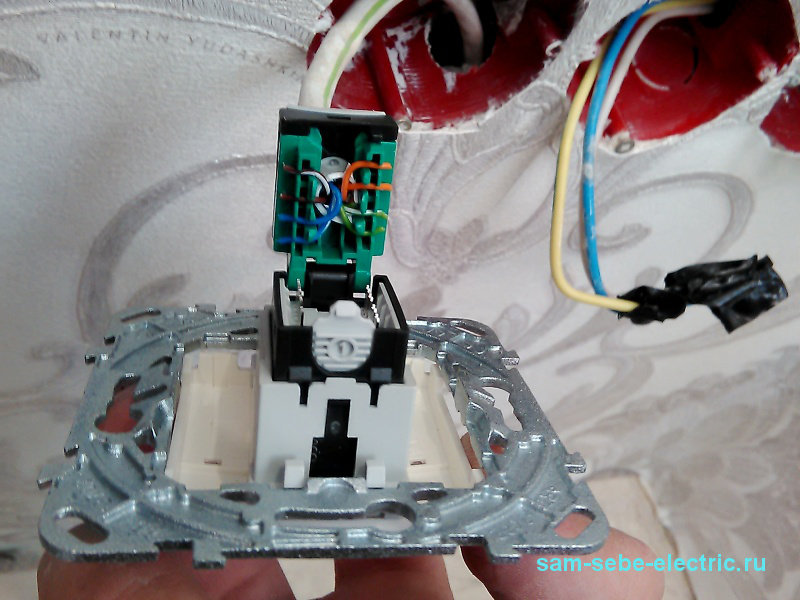
Then the cover of the connection mechanism is closed.
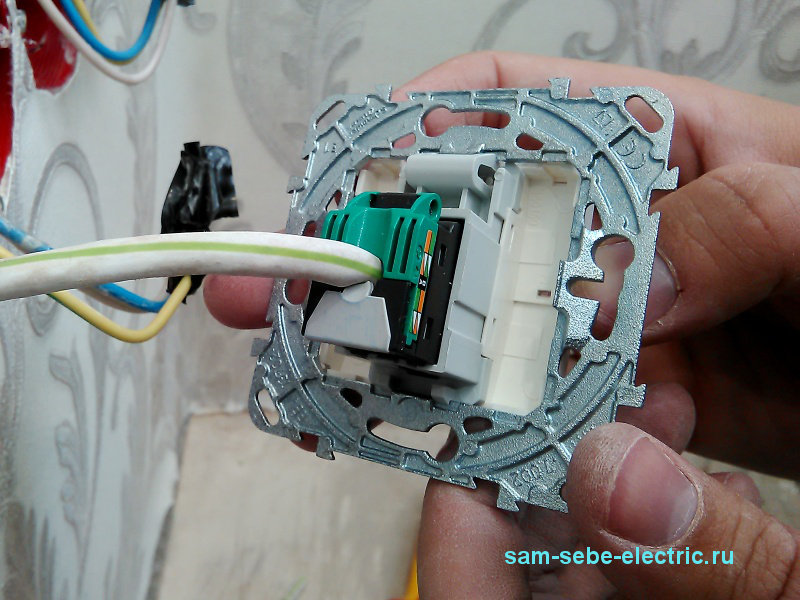
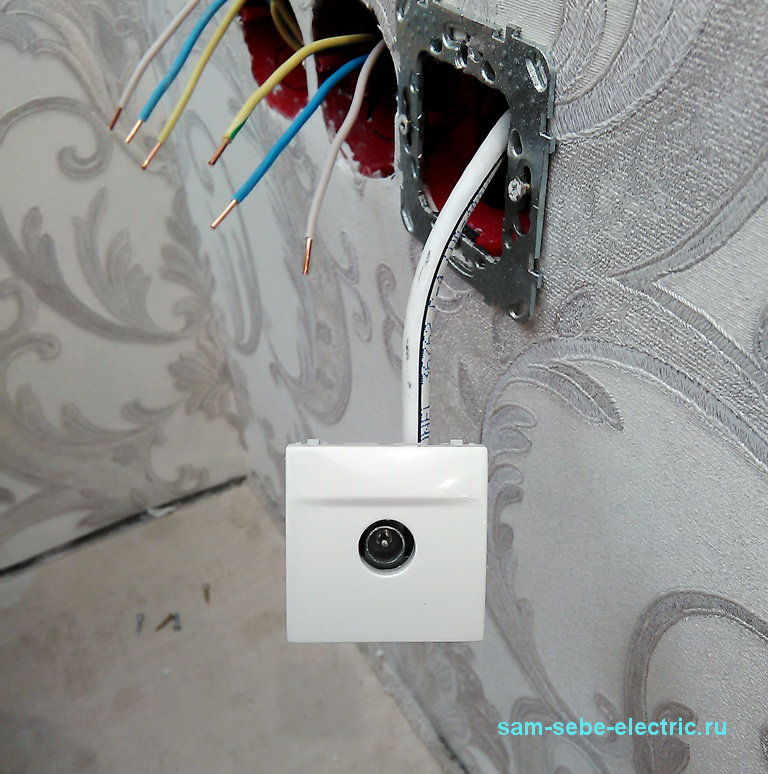
In the end, it will look like the following photo. The twisted pair will already be securely clamped and will not go anywhere during the installation of a computer outlet in the socket.
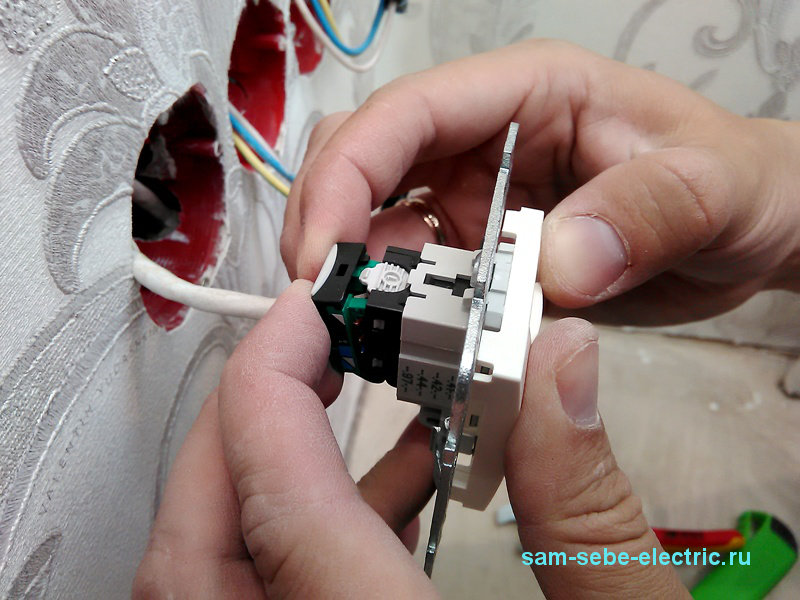
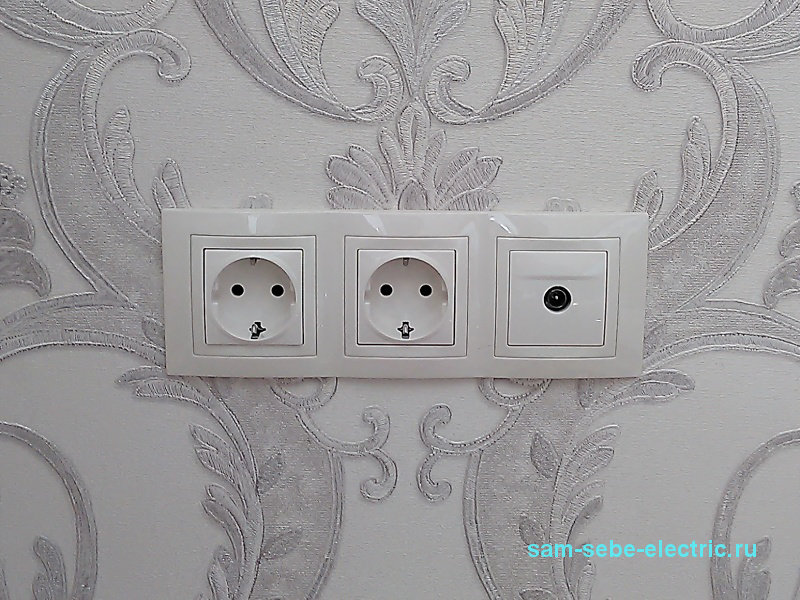
TV outlets have the ability serial connection cable. They also have a metal base. It is missing in the photo, as it was removed during the cable connection.
Connection mechanism television cable made of metal. In order to bring the cut cable into place, you need to unscrew one bolt.
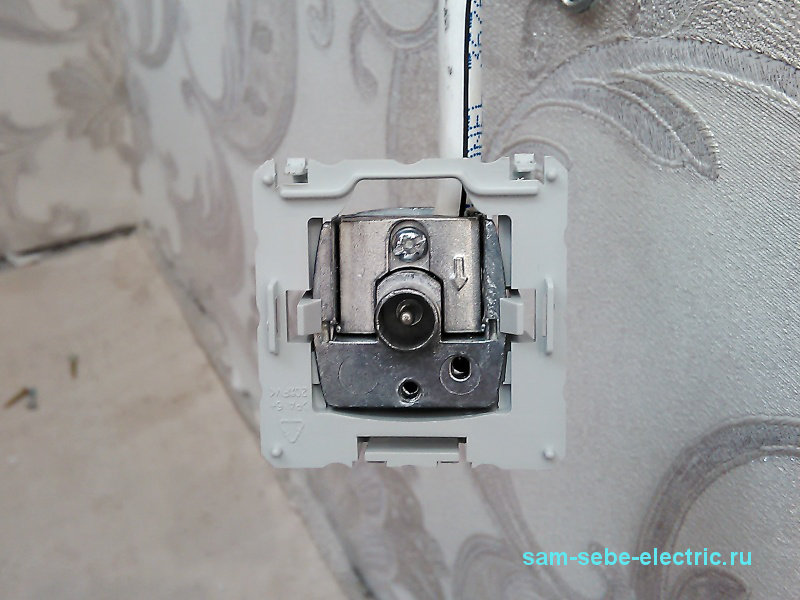
The next photo shows that the metal base is already in place, and the mechanism itself with the cover is hanging on the connected cable.
After mounting all the products in place, a frame is placed on top of several positions. The frame is simply applied from above and snaps into place when pressed.
![]()
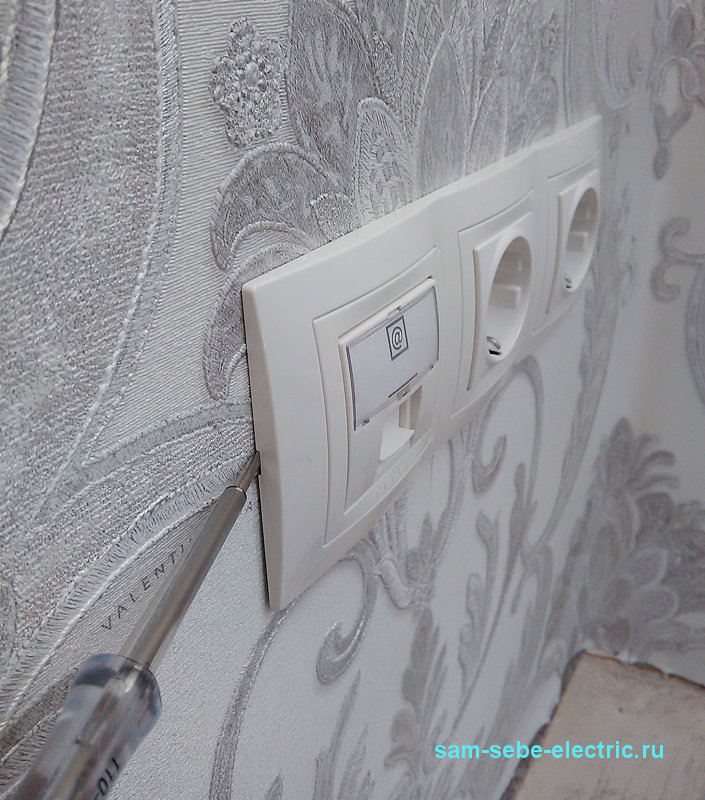
In order to remove the Unica frame and gain access to the sockets, you need to pry it from the side with a thin flat screwdriver. There is a special groove there.
In the next photo, the name of one person is visible on the wallpaper under the screwdriver. The surname was hidden under the frame. Guess this name, write it in the comments and get a 10% discount on the complete electrical installation of your apartment in Samara)))
This is how ready-made blocks look like from different sockets of the Unica series from Schneider Electric.
Below is a two-gang switch on the back. Here the cables are very easy to connect. You just need to strip the core to the desired length and stick it into the hole. In order to disconnect the cable from the switch, you need to press the lever on top and simply pull it. Where the incoming phase is connected is signed on the mechanism itself.
In two-key switches, there is one mechanism for each key. They are not electrically connected to each other. Therefore, here it is necessary to make a jumper as shown in the following photo.
![]()
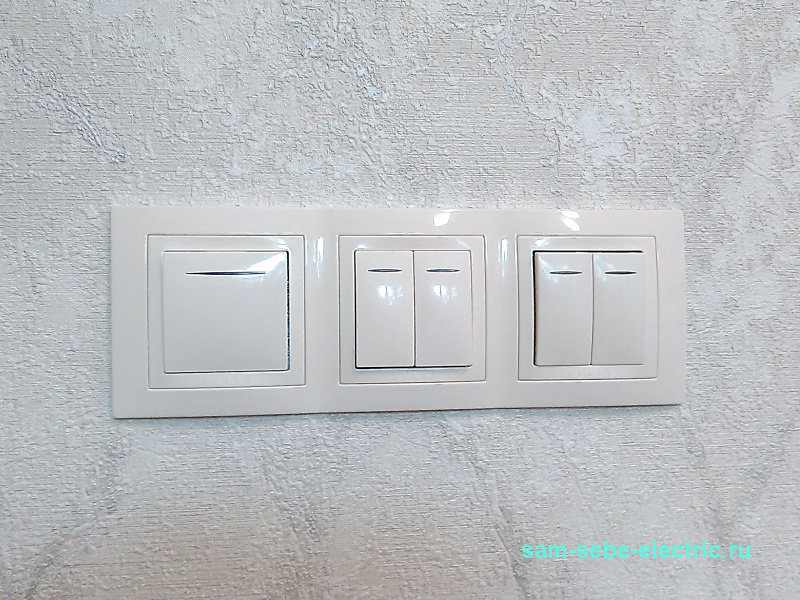
This is what Schneider Electric's Unica series switches look like. There are switches with and without illumination. The backlighting is very nice, blue color. In the dark, it looks very beautiful and is not conspicuous, unlike bright red LEDs. In the next photo, the glow is not visible and the whole effect is not transmitted.
And what series and manufacturers do you use installation products?
Almost every room has in its interior such an element of electrical equipment as sockets. Without them, nowhere, because whatever you take - an iron or a computer, you need to turn it on somewhere. Due to the ever-growing number of supposedly necessary household appliances, the same sockets became catastrophically lacking.
In this regard, a certain type of device will be considered below, which is successfully used not only in closed residential premises, but also outdoors in a humid environment.
We are talking about outdoor outlets. They are also called - outdoor, for open wiring.
Features of sockets for open wiring
How do they differ from the usual ones, which can be seen much more often than the first. Their main difference is a rather thick body. It covers the inner part - ceramic fittings and a group of contacts. Unlike internal sockets- which require a mounting box deeply recessed into the wall, outdoor ones do not require such laborious work as chiselling concrete and other types of walls. This greatly simplifies the installation and installation of one or more outlets at home.
Degree of protection
There are outdoor sockets for open wiring with varying degrees of housing protection against moisture and other substances.
Important! When choosing electrical fittings, pay attention to the degree of protection IP. Especially if it is installed in a damp room.
Devices with protection IP 21 do not have a housing sealed on all sides. The back side is open and during installation it leans against the plane of the wall.
Mainly for wet and other hazardous areas, open-wired outdoor sockets with an absolutely closed housing with protection class from IP 44 to IP 68 are intended.
Such devices have, as already mentioned, a molded plastic case, a cover for insulating live parts and rubber inserts for better sealing. All this should protect a person from defeat. electric shock and fire - inside and outside the building.
Mounting Features
Sockets for outdoor installation are mainly used in tandem with outdoor wiring: that is, when the wires are not laid in the wall, but outside: on ceramic insulators, in a metal hose, plastic corrugation or plastic box.
Important! Installation in a metal corrugation provides for its grounding, which is not always possible. It is preferable to use plastic corrugation.
Such installation, of course, can spoil the interior, but making wiring in this way is much easier and faster. Also, for such installation, special equipment is not required, for example, a grinder and a puncher with a crown for socket boxes.
Mounting
Now, in practice, we will consider how to do the wiring and connect an external outlet. The first thing to do is choose an outlet. So, if you plan to install it in a dry room, then we choose an outdoor one with a small protection class, for example, IP 21. This will cost less and will be slightly smaller in size than with higher protection.
Use of sockets with a high degree of protection.
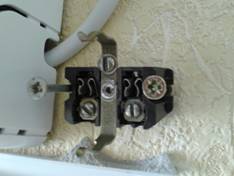
In the case of a fully sealed socket, when the top cover is unscrewed, the inner ceramic part will open in front of you, on which there are contacts and wire clamps.
This interior can be easily removed, which makes it easier to connect the wires. The main thing to do is to attach the case exactly to the wall and make markings in the mounting holes with a pencil or marker. Now we remove the case and, according to the marking, we drill two holes for the dowels. Most often, these are dowels 6 * 40 mm. Moreover, we insert the plastic part of the dowel into the hole immediately, and fasten the cover with the metal part. When the lid is firmly attached to the wall, you can say half the battle is done. Next, we connect the wires to the terminals of the inner part and insert it into the already nailed case. Screw on the lid.
Installation of a socket with protection class IP 21.
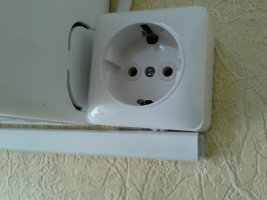
Now consider the installation of an open wiring socket with an open back. Here it is needed to connect the air conditioner. As in the first case, unscrew the lid. In front of you is the inner part with eyelets for fastening on the sides. As you can see, the installation was carried out in a box with subsequent laying of wires in it. We find a suitable place for fastening and fit the inside to the wall.
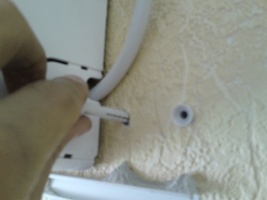
Important! It is not necessary to fasten this part close to the box, otherwise the lid will not rise after. When trying on, apply assembled with the cover fastening screw unscrewed.
After applying, holding the inside, carefully remove the lid. We make marks in the eyes and drill holes in the wall. Next, we insert the plastic parts of the dowel into the holes and, having threaded the metal part of the dowel into the socket eyes, twist it. Now the contact part is already on the wall.
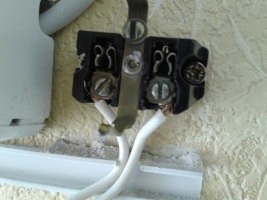
Let's move on to wiring. Here, a mounting box was nailed to the wall with dowels in advance for laying wires.
We connect the wires and start them in the box. Having tightly laid them in the box, we snap the lid.
The box must be chosen in such a size that the number of wires can easily fit in it, otherwise it will be a complete torment.
In the cover we cut a recess for the exit of the wires. The slot should be sufficient, but not too large, to look aesthetically pleasing. We put on the cover and tighten the screw. On the other side of the box, connect the wires.
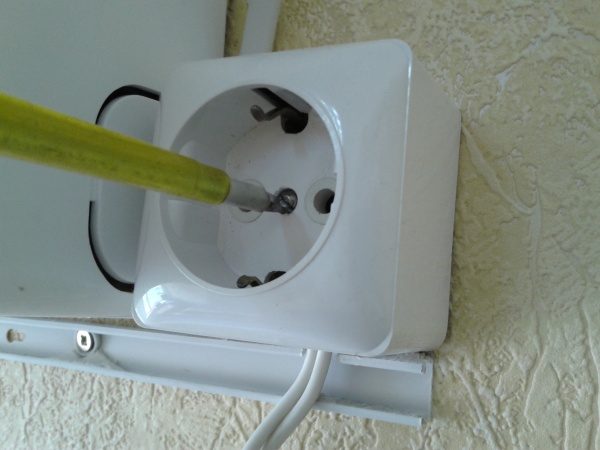
Important! Before connecting the wires, check the circuit for a short circuit.
You can do this with a tester or dialer. If the circuit does not ring short, connect the ends and apply voltage. We check his presence.
Important! Find the "zero" contact, and connect one end of the voltage indicator to it. With others, touch the grounding pin of the outlet. If it shows 220 V, see if the hair of the wire inside the device has got from “phase” to “ground”. If this happens, fix it immediately. Otherwise on the body electrical appliance there will be dangerous potential.
We advise you to read
 Psychological characteristics of children in adolescence
 Transferring a child to another school - the procedure and necessary documents Whether to transfer a child to another school
, diagnosis, treatment Treatment of urogenital chlamydia") Chlamydia urogenital - description, causes, symptoms (signs), diagnosis, treatment Treatment of urogenital chlamydia
Chlamydia urogenital - description, causes, symptoms (signs), diagnosis, treatment Treatment of urogenital chlamydia The benefits and significance of hydroamino acid threonine for the human body L threonine what

