6209 0 0
Do-it-yourself children's bed: drawings, photos, manufacturing material
It is difficult to overestimate the importance of adequate sleep for the health of the child. Therefore, it is so important to get a comfortable and safe bed. By the way, it is not necessary to buy furniture for arranging a children's bedroom, because you can assemble it yourself. Read on to find out how to do it right.
Crib elements
Before proceeding with the manufacture of a children's bed, let's decide what distinguishes it from adult counterparts. Among the distinguishing features:
- Dimensions. Mattresses for children's beds are shorter and narrower than their adult counterparts (see table of standard sizes for sleeping mattresses).
- Number and location of beds. The bed in children's furniture is not made double, more often these are single structures. If you need to accommodate two children, a two-tier structure is going to be built.
- Operational safety. High-quality furniture for a children's room does not have sharp corners and traumatic parts.
- decorative design. Furniture for a children's room should be boring and visually attractive to the child.

Let's summarize the above points. A children's bed is made from the same elements as adult counterparts, that is, it uses a supporting frame around the perimeter, mattress holder slats, a mattress, etc. But, all these elements are smaller and made of environmentally friendly materials.

Elements in the design of children's furniture are rounded at the corners and painted in bright colors. Important point- High sides are used in the design of most children's beds to ensure safety. The use of such elements is mandatory in cribs for children under the age of 3 years.
Deciding on a model

The choice of the design of the children's bed determines:
- Children's age. The dimensions of the bed depend on age - the older the child, the larger the bed.
- Amount of children. For one child, a single-tier bed is built, and with an increase in the number of children, the number of tiers increases.
- Gender of the child. The gender of the child affects decorative design furniture.
- Room features. In a spacious nursery, you can install several single-tier beds, and in a cramped room, the structure is built in several tiers.
- Project budget. Material possibilities determine what materials furniture can be assembled from.
Basic details of wooden beds
The design of a single single-tiered children's bed consists of a supporting frame, which is assembled from boards and encircles the product around the perimeter. At the corners of the supporting frame there are vertical supports that act as legs and the function of side holders.

In the upper part of the supports, horizontal boards are fixed - sides. Bumpers for older children are installed on three sides of the bed, and for younger children on four.
Along the inner perimeter of the frame, lamellas are fixed, on which the mattress will be held. At the bottom of the bed there is a free space in which there are drawers for storing linen and bedding.

The design of a bunk bed repeats the design of a single-tier structure with the difference that two beds are held on the same supports. In order to make it easy to climb to the second tier, a ladder is used in the design. To ensure safety, the side of the second tier is located on four sides.
materials
| Illustrations | Materials and their description |
 |
Solid wood lumber. Boards, timber, furniture panels are all-wood environmentally friendly materials that I recommend primarily for assembling children's furniture. |
 |
Metal. Children's beds can be assembled from rolled metal, provided that the welds are neat. |
 |
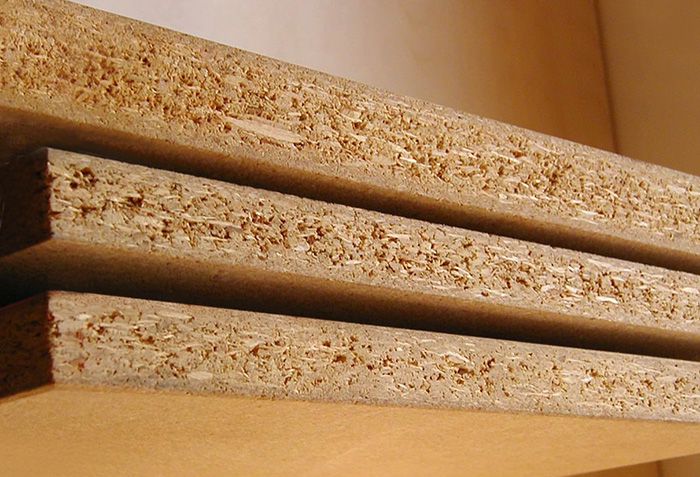
Chipboard (chipboard). Particle board - not the best option in terms of environmental safety. But due to the affordable price, laminated chipboard is still the most popular and sought-after material to this day. |
 |
Oriented Strand Board (OSB). In terms of environmental safety, OSB is worse than chipboard, since the formaldehyde content in these boards is higher. If OSB is used for the manufacture of furniture, then provided that the surface is covered with several continuous layers of varnish. |
 |
Fiberboard - auxiliary material. Fibreboard (Fibreboard) is used as a structural material, which drawers are lined from below or covered with a bed on top. |
About fasteners

If you are making a bed from lumber or particle boards, you will need confirmations for fastening - universal fasteners in the form of screws with an increased thread pitch. In order to ensure greater strength for mounting on confirmations, you can use dowels - wooden chopsticks that are driven into pre-drilled holes.

You will also need l-shaped corner perforated plates and self-tapping screws to fix them.
On sale are ordinary corner mounts and reinforced with scarves on the fold, as shown in the photo. When choosing, we prefer reinforced plates, as they are stronger and more reliable.
About fittings

A baby bed is a simple structure, where the list of special fittings is limited to guides for folding the front wall, a pendulum mechanism for rocking cradles, etc. With self-assembly, you can limit yourself to rollers for drawers, as well as hinges and latches for a folding front wall.
Required Tool

The choice of tool depends on what the furniture will be assembled from. To work with lumber, you need a basic set of carpentry equipment, including a drill, a screwdriver, a jigsaw, a milling cutter, a 5 mm hex wrench, and a measuring tool. You will also need free space on which you can cut out the necessary parts and then assemble them together.
wooden bed

After we have decided on the choice of materials, fasteners and accessories, we will consider how to assemble wooden furniture for a children's room with our own hands. As an example, I offer assembly instructions for a typical bunk bed shown in the drawing.

The design, assembled according to the proposed scheme, is durable, neat and at the same time budget in terms of materials. Most importantly, it is easy to make such a bed yourself, even if such work is done for the first time.
| Illustrations | Making a crib with drawers |
 |
Materials and tools. To assemble this bed, you need pine or beech boards with a section of 35 × 100 mm and 25 × 100 mm. Woodworking requires Miter saw, milling cutter, drill, key for confirmations, screwdriver. |
 |
Cutting out the details. From the board 35 × 100 we cut 4 blanks 1900 mm long, 4 blanks 1810 mm long and 4 blanks 800 mm each. On blanks 1810 mm long, we make grooves 35 × 100 mm as shown in the photo. |
 |
We make legs (supports). As shown in the photo, in the grooves of the vertical supports we attach the transverse crossbars, which will be the head and foot of the bed on the upper and lower tiers. |
 |
Bed assembly and ladder installation. After the end nodes of the bed are ready, we attach the longitudinal boards of the safety barriers. In the inner perimeter of the upper and lower beds, we install lamellas - mattress holders. We assemble a ladder from a board and a rounded bar; if there is no round bar, a step can be made from a board. |
 |
Installing drawer fronts. We assemble the boxes from the board as a rectangular frame, along the bottom of which the bottom is fixed. For convenience and safety of operation, we make the facades of drawers without handles with recesses, as shown in the photo. At the bottom of the drawers we attach roll-out rollers. |
Let's take a closer look at the operations that you will encounter during assembly.
| Illustrations | Assembly process details |
 |
We screw in confirmations. To screw the confirmation, we drill a hole - for this we use a drill with a special cutter. If there is no special drill, we drill a hole with a length of confirmation and a diameter of 3 mm. Then we expand the edge of the hole made to 5 mm to a depth of 5 mm and get a sweat under the head of the confirmation. We screw the confirmation so that its head is completely recessed into the wood. Subsequently, the mounting hole will be closed with a decorative plug. |
 |
Dowel holes. To install the dowel, holes of the appropriate diameter are drilled in the parts to be joined, most often 6 or 8 mm. The depth of the hole in each of the connected parts is 15 or 20 mm (depending on the length of the dowel). The dowel is driven into the wood with or without preliminary application of glue. |
 |
Making the base for the mattress. To install an orthopedic mattress, you can purchase ready-made lamellas, like those shown in the photo, or you can cut the same pieces of boards yourself. Along the inner perimeter of the bed, a barrier is made from a bar, on which prepared lamellas are laid.
|
 |
Installation of hinged facades. As an alternative to drawers, hinged fronts can be installed at the bottom of the bed. Installation of facades is carried out on conventional adjustable hinges. |
 |
Bed decoration. Finished furniture can be stained and varnished if it is wooden. In other cases, painting is the preferred option. Alternatively, a bed made of wood or chipboard can be upholstered with a fabric with pre-glued foam rubber. |
Homemade car bed
| Illustrations | Assembling the car bed |
 |
load-bearing frame. From furniture board a rectangular frame is assembled - a box. Gaps imitating a radiator grill, headlights, etc. are cut from one of the ends of the box with an electric jigsaw. |
 |
Imitation windshield. Openings are made on the sides of the body through which the child will get inside the structure. At the distance at which the hood is supposed to end, we fasten the frame assembled from the rails. |
 |
Installing the drawer lid. On the piano hinge in front of the bed is attached to the lid of the bedding box, imitating the lid of the hood. At the same stage, wheel disks are attached to the sides. |
 |
Mattress holders. A plywood sheet is installed inside the assembled box, on which the mattress is laid. |
 |
Priming and painting. After the bed is assembled, the surface is primed and painted. Given the complex design of furniture, to work with paintwork materials it is preferable to use a brush. The choice of paint is unimportant, the main thing is that it is completely dry before use. |
Summing up
Now you know how and what to make a baby bed. If according to the proposed step by step guide If you have any questions, ask them in the comments to the article.
All parents know that a baby bed must be comfortable for the child to feel comfortable. This is especially true of beds for a newborn baby. During sleep, the child should feel good. For this reason, the choice of this subject should be treated with special responsibility but do it yourself. Moreover, a do-it-yourself children's bed will be the pride of the parent, because it is made with special love and warmth, which means that it will be comfortable first of all. How to make a bed for a child? Consider a detailed manufacturing scheme.
Drawings and diagrams
It is advisable to draw a drawing yourself in advance, a diagram on which the future project of a crib for a girl or boy will be displayed. If you plan to make a bed a house or a dolphin, then everything will be much more complicated. It is better in these cases to use ready-made photos and drawings. The photo shows all the necessary measurements and the location of each element. In the manufacture of schemes, everything should be observed exactly to every millimeter, the strength and appearance of the bed will depend on this.
Assembling a crib for a girl and a boy with my own hands This is a rather difficult task that requires a lot of responsibility. Therefore, many prefer to purchase a finished product. But still, you can do it yourself much better, for this the main thing is to follow the entire manufacturing scheme and do not forget to use the drawings. And if you show imagination, you can make a bed a house or a car.
Drawing

 Side Diagram
  Scheme of a children's bed with drawers
 Materials and tools
To work, you will need a number of materials and tools, as well as important details which should be stocked up in advance.
materials
Baby cribs are too expensive, and sometimes their cost depends on the appearance and purpose depending on the gender - for a girl or a boy, so it's better to make it yourself. Before you start making this piece of furniture, you need to develop a project, purchase necessary material. The main thing is to have an idea about the structure of this element. With initial dexterity skills, you can make premium furniture, while spending a small amount of money, which would be enough to purchase a simple MDF or chipboard bed. It is desirable to perform a preliminary drawing, project. Drawings and a project will help facilitate the entire process of assembling a product for a child.
Before you start a project for making a baby crib, you need to purchase materials:
- edged boards - they must have a coniferous wood base: spruce or pine;
- bars that have a section size of 50x100 mm. These elements will be required for the manufacture of the main frames and legs;
- rails with cross-sectional dimensions of 20x20 mm. These components will be needed to make the filling;
- be sure to purchase plywood. Its thickness dimensions should be approximately 5 mm.
What kind of bed was not made for a house, a car, you need to remember an important rule - bars and slats should be chosen from wood of special strength. The quality and further wear of the product depends on them.

Required Tools
The crib has a very simple design, it is possible for a beginner to assemble it in this matter, but it is still worth preparing the necessary set of tools, without which the entire work project will be impossible. Be sure to prepare the necessary equipment for making a crib for a girl or a boy:
- you need a jigsaw electric control or a saw for cutting boards and beams;
- grinding machine;
- you will need a manual type milling cutter that has many nozzles;
- it is advisable to purchase a file designed for woodworking;
- drill or screwdriver;
- tools for measuring work - tape measure and level;
- clamps are required, with the help of which the blank elements will be glued;
- brushes and rollers for finishing work - painting, varnishing and decorating.
 Tools
Tools  Application manual router makes work easier
 Details
In addition to the basic materials, you need to purchase related items. Without them, the work of making a crib would be simply impossible. So, what you need to purchase from related materials:
- need to buy screws. Preference should be given to products of a phosphated type, which are designed for woodworking;
- prepare wood glue;
- special putty mixture for finishing work on wood;
- corners made of durable steel, which are needed to fasten all parts;
- be sure to buy a wood stain to impregnate the wood and protect it from moisture. Otherwise, the product will not last even a year;
- you will need varnish for painting furniture or paint for finishing interior work.
Do not forget about decoration, it is desirable to decorate it, as you can see in the photo. You can make a bed for a house, a dolphin, a car. It can be decorated in the form of these products. If the crib is for a house, then you need to purchase the appropriate decoration elements and textiles. If the product is made under a dolphin, then preference should be given to blue decoration elements. If it is intended for a girl, then it can be decorated with various pink ribbons, flowers, and along the edges you can hang a pink canopy made of multi-colored textiles with drawings. If for a boy, then you will need to use the same ribbons, only blue, light blue, green.
You need to buy a mattress. It is better not to save on it, the further comfortable stay of the child in bed depends on it. It is advisable to purchase an orthopedic product in specialized stores. It renders beneficial effect on the formation of the spine of a growing organism.
 accessories
  Furniture ties and a special drill are required to assemble the parts.
 Manufacturing instructions
To get a high-quality and functional product, we advise you to follow the instructions below in detail.
frame
The frame of the crib consists of the backs and the base itself, on which the mattress will be laid in the future. The width of the frame should be calculated based on the size of the mattress. The frame is made of two crossbars. These crossbars are made from edged board. He calculates the length of the crossbars on his own, it all depends on the age until which the crib for a girl or a boy will be used. Usually the standard length is 120 cm.
How to make a frame:
- we measure the desired length of the crossbars with a tape measure and make notes with a pencil;
- with help electric jigsaw we saw off the boards for the crossbars of the desired length, there should be only two of them;
- from the edges of the crossbars, you need to put a 25x50 mm bar on the glue and screws;
- it is 10 cm shorter in length, so we leave dimensions of 5 cm at each end;
- under the screws you need to drill a hole, it should be drilled close to the edge so that the tree does not burst;
- with the help of corners we connect the frame with the headboards. Fasten with screws and glue. We fix in 4 corners;
- at the end of the fastening place, we cover it with a putty mixture for wood.
 frame
frame  Location of fasteners
  foot board
 Base
Next, the base is made, on which the mattress and other bedding will be laid in the future. It is desirable to use as it a material of good strength, capable of withstanding heavy loads.
How to make a base:
- from slats 20x20 you need to cut boards that will serve as filling the base;
- they should be cut so much that they completely fill the entire base. It is not worth saving if there are few of them, in the future they will quickly break down;
- they should be attached to the slats of the frame. You need to attach them with an emphasis;
- the installation step should be 10 cm, 2 screws should be used for each bar;
- For the installation of each self-tapping screw, a hole must be pre-drilled. During the tightening of the self-tapping screw, its cap should completely go into the wood;
- holes should be coated with a putty mixture for wood;
- after the putty dries, everything needs to be sanded.
 Plank fastening scheme
  Installing the planks
  Cutout under the foot of the bed
  Attaching cross bars
 legs
Instructions for the process of making a crib for a child are not complete without making legs. The legs of the crib are made according to the scheme:
- from a bar 50x100 you need to cut blanks. Under the head they should be long, and under the footboard shorter;
- you need to complete 4 blanks. 4 for the head and 4 for the foot;
- using glue, you need to glue the blanks in pairs. To do this, you need to take one blank, attach it to another and make sure that they are inserted evenly;
- twist them with self-tapping screws;
- when fastening workpieces with self-tapping screws, the screw heads should be sunk deep into the wood so that they hold on tighter;
- we close up the places of fastening with putty for wood;
- when everything dries, the surface of the wood should be carefully sanded.
 We coat the boards with glue and fold in pairs
  Finished legs
 Dowel holes
For the headboards, you will need boards that have a groove with a width of 25 mm. If a milling cutter is available, then these holes can be cut and machined by yourself or in a carpentry shop. Holes for dowels must be drilled at the ends of the planks with grooves. During drilling, it is necessary to determine their distance from the edge with particular accuracy - they must be strictly on the same level on all planks.
The holes should have the same depth, which is half the length of this piece of wood. These holes must be drilled with a drill. And in order not to be mistaken, on the drill you need to mark the size of the recess and stick a piece of paint glue.
 Dowel holes
 headboard
The headboard should be made according to the instructions:
- from boards of edged type it is necessary to cut boards having the same length dimensions. They are needed to fill the headboard and footboard;
- the groove for inserting the planks under the headboard must be filled with glue in advance;
- insert the boards into the grooves and fix them evenly;
- holes should be drilled in the leg for dowels. It is better to attach the back and mark the insertion points with a pencil;
- drill holes in the marked places and pour glue there;
- we plant the back in these holes, this should be done tightly so that there are no cracks and distortions;
- making a second back.
An important point regarding the gluing of parts. After gluing, all elements will be movable, so it is important to set everything exactly at 90 degrees and leave to dry. Otherwise, in the process of further assembly, you can simply damage the entire structure.
Headboard diagram
The shape of the headboard can be any
Decorative headboard with legs
Finished bed sides
Assembly
After all the elements of a baby bed for a girl or boy are ready, you need to check for chips and various defects. Features of preparing bed elements for assembly:
- if there are any chips, then they must be repaired with a putty mixture;
- when everything is dry, all elements need to be sanded;
- after grinding, the components must be treated with a primer or stain. This will protect the material from moisture and retain its properties for a long time;
- when all the elements dry everything needs to be painted. The color of the paint depends on the gender of the child, for a girl, you can use gentle tones - pink, red, white, light green, yellow. And for a boy, blue, blue, green, yellow are suitable;
- paint all the elements with paint, you can apply multi-colored staining. Perform this step as you wish;
- if the bed is made under the house, then you need to show imagination and draw all the necessary elements. If the bed is a house, then you need to note the windows, the roof and other important elements. If the dolphin, then you need to show all your artistic skills and paint in the form of this animal;
- after drying, on a bed for a girl or boy, you need to purchase textiles of the desired color and pattern.
 Attaching the backrest to the foot of the bed
From the first days, I want to surround the child with all the best, safe, reliable, and most importantly, such that it will serve faithfully for many years until the baby grows up.To do this, as a rule, natural materials are chosen that are not able to lay a “mine” for future oncological diseases, thereby protecting the child from the first days.
Parents always want their children to grow up in a healthy environment.
The crib is the baby's first fortress. It is there that he sleeps, enjoys life, begins to explore the world, studying everything that surrounds him.But how can you be sure that the covering and materials of the baby bed are safe? Just make it with your own hands.

It is very important to protect a fragile organism from the harmful effects of the external environment.
Smart dads with their hands in place know very well- You can only be sure of something when you have tried it and done it yourself. This is the main advantage of the product. Why is that? Let's do a little comparison.
| Factory | Homemade | ||
| Advantages | Flaws | Advantages | Flaws |
| Do not waste time - go, buy or order | Not always good quality | Do you know what it's made of? | Manufacturing is laborious and time consuming. |
| No guarantee of structural integrity | Robust design - tested by myself | ||
| Coating is not always of high quality | High-quality coating - I chose it myself | ||
| Often the surface of the product is not processed | The surface is carefully cleaned - after all, the child will “crawl” on it | ||

If you have certain skills, you can make a bed with your own hands.
Baby crib design and construction
The comfort of the room, how the child will like it, its convenience and the rational distribution of living space depend on the appearance of the children's bed.

Thus, design and construction are interconnected.
We all want something original and unusual, unusual for everyday life. But let's be realistic. Why complicate life with a fancy design of a baby bed in the form of a car, airplane, baby elephant or steamboat, if they are difficult to make? In addition, if there is no specialized tool, such as a thickness gauge, milling machine with CNC, band saw and other? By choosing such a design, you can ruin all the wood without achieving what you want.

Let's dwell on a classic crib without frills and tricks, which, although difficult, is quite realistic to make from solid wood with your own hands.
The best material for a baby bed is solid wood
Wood is the most preferred material, has no contraindications, is absolutely inert. While chipboard, fiberboard, OSB, MDF and plywood include fillers that adversely affect the body, as well as poorly tolerate mechanical stress.

Wooden furniture is always a noble, natural and cozy accent in the interior.
The main feature of all these materials that negatively affect the use is the presence of formaldehyde, a chemical compound used in medicine for disinfection.As you can see, it is not for nothing that we advise you to choose a wood array. Prerequisite - well dried. Do not use damp boards, they will look back, you won’t have time: the structure will fall apart, the material will crack and unscrew. It is optimal if the wood has dried on the racks for three to four years, in a shaded place, sheltered from moisture.

But if there is none, then a machine-dried tree will do.
In addition to the boards you will need:
- Self-tapping screws, bolts (for fixing parts);
- Metal corners (will give additional rigidity to corner joints);
- Timber, slats (for a mattress stand);
- Lamels - flexible boards 15-20 mm thick, made of hard wood (oak, acacia).

Before starting a baby crib project, you need to purchase materials.
Tools - a reliable assistant to the master
The complexity of the work depends not only on the design of the product and materials, but also on the availability of tools. Having, in your arsenal, a real carpentry workshop, you can easily make any product. But what if there is nothing but a garage and a workbench? Can I get started?
No problem! Everything that is necessary for any man. And we need:
- Drill, with a set of drills for wood;
- Planer for cleaning wooden blanks;
- Hacksaw for cutting;
- A set of needle files for grooves.

A necessary set of tools, without which the entire project of work would be impossible.
The presence of a manual milling machine will greatly facilitate the work of assembling a crib, but if it is not there, we will get by with the listed ones.

The use of a manual router makes the job easier.
Some features of joinery
To make the furniture reliable, special carpentry joints are used in its manufacture. Unlike the usual nail or self-tapping fasteners, such fasteners are more resistant to loosening, do not “break apart”, and resist mechanical damage well.

The main task of choosing a connection method is decorative, the desire to make it beautiful, inconspicuous.
Such a connection consists of a blind or through groove and a shank that freely enters the groove. Fasten them with wood glue. The size of each groove and shank is selected individually, based on the thickness of the wooden workpiece (rail, beam, board).

When such a connection is made taking into account the location of the wood fibers, its texture, it seems that the product is made from a single piece of wood.
First, mark the boundaries of the groove or shank with a pencil. Then, with a hacksaw, an incision of the required depth for the shank is made, the groove is drilled with a drill. With the help of a chisel, excess wood is removed. The edges of the product are leveled with needle files.If there is a milling cutter, set the cutting depth and mill the necessary details. In addition, using the copying ring that comes with the machine, you can easily make grooves of the desired size.
Making a crib with your own hands
- We determine the size of the product. It is necessary to build on the dimensions of the mattress on which the child will sleep. We take a standard size - 1200x600 mm.

The frame of the crib consists of the backs and the base itself, on which the mattress will be laid in the future.
- The lower part of the crib is defined so as not to interfere with the child to climb onto the bed. For children from 4 to 6 years old - this is 35 cm.

Diagram of the footboard of the bed.
- Surface treatment. It is necessary to make the parts of the product, bringing them to the same size. The support frame will be a timber cut into 6 identical blanks with 25 mm grooves attached to secure the lamellas.

The basis of the bed will be 4 boards 35 mm thick and 7 mm wide.
- We calculate the calculation of the back. To do this, add the thickness of the board to the width of the bed. If there is a railing, we make a tolerance of 25 mm, taking into account their volume.

The scheme of the headboard of a children's bed.
- The rods for the back are made of a 20x20 mm rail. For fastening at the ends, we make a studded connection.

Decorative headboard with legs for a children's bed.
- Assembling the frame. Boards, bed bases are interconnected with the help of shanks and grooves. For reliability, we strengthen the corners, metal corners by fastening them with bolts or self-tapping screws.

The holes should have the same depth, which is half the length of this piece of wood.
- The base of the mattress is fastened with spiked joints to the bed frame.

Before assembling the bed, you need to check the parts for chips and various defects.
- We insert the slats into the prepared grooves on the base of the mattress.
It is not worth saving if there are not enough of them, in the future they will quickly break down.
- We attach the sides and back to the frame.

After assembly, we clean the surface and varnish it at least three times.
Note! All studded joints are attached with wood glue. Under its influence, the tree is not only fastened, but also swells, securely fixing inside the groove.
Bed house - a cozy fairy tale
We all remember the unique feeling and mystery of huts made of bedspreads. So why not pamper the baby and improve his bed, "building" his own house for him, in which it is so comfortable to sleep?

To do this, during the manufacture of the back of the crib, we will make some adjustments.
Namely, by making the railing a little larger, after cutting off their tops at an angle of 75 0 with a hacksaw or end saw.We attach the bases of the "roof" of our house to them. It is better to fasten the connection with spikes, but given the complexity of such a product, self-tapping screws are also suitable, the main thing- don't forget to glue.

The last step will be the fastening of the ridge beam, which will connect the base of the frame of our "house".
Thus, the baby will receive a personal “fairy tale” made by the caring hands of the father, and the veil thrown over by the mother will serve as a reliable roof.

Put maximum effort, care and love into your product, and such a bed will give your child good dreams, and you - joy and satisfaction from the work done.
Of course, what we have described does not reflect all the subtleties of the process of making a children's bed with our own hands. During work, you will encounter many obstacles, you will have to think out the nuances more than once. However, we hope that the instructions for making simple furniture that can raise paternal authority to a new level will be useful to both the young dad and the head of the family with many children.
VIDEO: Do-it-yourself bed-house.
According to psychologists, it is good if children have the opportunity to have their own space during the game. So why not organize a bed-house for them?
The house is a favorite place for children to play until about adolescence, although numerous treehouses abroad indicate that solitude is also important for a teenager. Unfortunately, this is not an option for Russian latitudes, apparently due to long cold winters.
But when the baby grows out of his bed with a railing and begins to realize the possibility of a new bed in his life, he often wants to participate in choosing her himself. And if there is a furniture store nearby with beautiful children's furniture, boys very often choose a car bed, and girls choose a house.


Varieties of bed-houses
Manufacturers are trying to diversify the models of beds-houses, so that children would be interested in them not only to sleep, but also to spend time:
- With play area. This is a two-level bed that combines the play and sleeping areas. Depending on the design, the play area can be with shelves and swings. On the second tier there is usually a playground;
- teenage. It is a comfortable design with a study area, a bed and places for sports and games. As a rule, the roof in such a house is made of slats, and the walls are hung with fabric. The bed is placed at a height of 1.6 meters from the floor;

- princess model. An interesting design is usually decorated in delicate pastel colors, ruffles and lace, with a canopy. The original house-bed becomes an unusual decoration for a children's bedroom. A wooden house can withstand weight up to 100-120 kg;

- universal. This model is suitable for girls and boys. Textiles in the house-bed create a false wall. The free area of the bed is filled at will with mirrors, swings, sports equipment.

How to choose a children's bed-house?
Unfortunately, not all brands responsibly and seriously perceive the desire of children to have their own "shelter" for games. The Internet is literally replete with reviews of strange, supposedly cribs made of toxic chipboard with sharp corners and rough surfaces. Of course, the question arises, what were the parents thinking when they bought this “luxury”? After all, today everyone can read reviews on cribs and choose the one that caused little criticism or has only positive characteristics!

We tried to study some reviews and made such conclusions. So, for example, some modifications of the Legend beds made in St. Petersburg have a beautiful display case, but in reality, it turns out that the furniture brought from the warehouse emits an unpleasant smell of glue and is completely made of laminated chipboard. Most reviews of this furniture contain negative characteristics.
The Austrian factory Egger has improved children's loft beds made from high-quality chipboard, and some of these "Funky Kids" are supplemented at the top with a bed, at the bottom with a work table and a multifunctional locker. Describing their beds, the manufacturers claim that they have strengthened the frames as much as possible, no longer use plastic, and have made other changes and additions.

Bed-house Kyura from Ikea - the best choice
After analyzing a hundred or two Internet pages, we came to the conclusion that the most popular among consumers is the Kyura bed-house from Ikea. It is made of natural, high-quality processed pine, does not have protruding sharp corners, like many products from Ikea, has the ability to transform, and appearance resembles a two-story house without a roof. But the manufacturers also came up with a roof! It is an awning stretched over arcs made of washable fabric. There is also an awning option in the form of a house. Sleeping area at the request of the owners, it can be equipped on the first floor, and a house under an awning - on the second. You can do the opposite. Both options are popular with kids.
Many who have bought a house bed from Ikea have improved the product by providing it with fabric "walls" with windows cut into it. Awning and mattress are purchased separately and have standard sizes, which is convenient for purchasing bed linen. Up to six years, the child can sleep, being fenced with bumpers, after six, part of the bumpers can be removed. Some argue that the crib can be used until the age of ten or twelve, if the child understands that the structures are not designed to jump on it.


What should be the bed-house?
Many loving parents, not trusting the manufacturers too much, make bed-houses on their own, acquiring solid wood for this and using either light slats and bars for decorative and functional elements, or carefully rounded fragments. Fathers who love and know how to make things make entire palaces of princesses or fairy-tale huts. Such "real estate" is perceived by children with great enthusiasm.

A child's dream - a cozy house with windows and the possibility of dolls and toy animals living in it - must be absolutely durable and safe for the child and for the mother, who regularly covers fresh linen, wipes dust, and washes dirty surfaces. In its manufacture, toxic glues and dyes should not be used. All surfaces must be carefully treated. Otherwise, splinters and burrs cannot be avoided. No protruding screws or the like metal parts must not be! The child must confidently grab the ladder if he has to climb to the second floor. And if the stairs lead to the first floor, it should be as comfortable as possible. There should not be any unnecessary details that clutter up the space and contribute to unnecessary accumulations of dust.

Those craftsmen who make the house spacious enough act wisely, making only hints-contours of the roof from natural laths. Having hung the “walls” with a cloth for the duration of the game, the children will play in such a house, and when cleaning is required, the cloth can be easily removed, and the walls of the house do not cause a huge number of bumps on the head and bruises on the body.

Experts recommend, when choosing children's beds "attic", "teremok", "house", to dwell on those options where the bed is a full-fledged place for a night's rest, and not an auxiliary folding sofa. The bed should not be cramped. For its manufacture, natural materials should be used. If the nursery space allows, the bed should, first of all, fulfill its main purpose. The house can be made independently from almost any children's bed, providing it with a light canopy that is easy to wash.

You should not save on a mattress, choosing it according to the weight of the child. If the main conditions and wishes of the "little master" or "lady" are met, be sure that children's house will give its owners a lot of positive emotions!

Children's bed house. Photo


Sometimes it's nice to do something for your children yourself. In this case, it is possible to do something non-standard, for yourself and as you like. The children are growing up and it was time for them to give up their bedroom - a small room. To save space, we decided that there would be a bunk bed. And then the wife began to throw off links to cots-houses. I want that! Their prices are quite decent. I looked, figured, read about the material. And I came to the conclusion that I could make such a bed myself and much cheaper. I made a model, taking into account the standard lumber from Leroy, wrote down the quantity and dimensions and went to buy. I work in a small firm and we have, so to speak, a small room for creativity. The boss allows you to do something for yourself there, and you can borrow some tools. Therefore, I made a crib after work and on Saturdays.
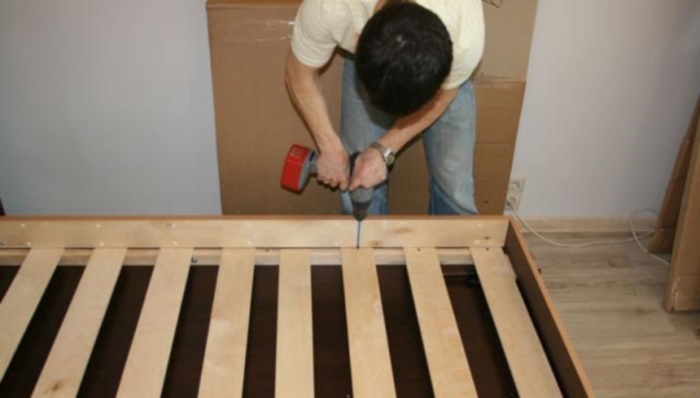
Well, the work began. We mark, we saw, we plan.
We make grooves in the right place.

Here we try on, we customize.

Marking the facade in place and subsequent sawing.

Trial assembly of the entire structure.

After that, I no longer photographed the process itself. But everything was assembled, 2 orthopedic bases were purchased separately. Completed roof and stairs. There is a sunroof on the roof near the head so that it does not get hot there. Initially, a box was conceived under the crib and blanks were sawn, but so far it has not been done. Then everything was disassembled and painted. I packed everything and brought it home. At home, it took 2 evenings to assemble and this with the help of my daughter (4 years old).
The younger also periodically twisted something with a screwdriver, sometimes trying to break the coating.

Here's what happened. Looking at the result, I would change something, but in general, the children are happy (and this is the main thing!) And they sleep and play there with pleasure. The daughter still sometimes says thank you for the house and tries to help her younger brother climb to the second floor.
What I want to say. There is nothing complicated in this, you just need to want and do it. The eyes are afraid, but the hands are doing. Good luck to all!
We advise you to read
 Agricultural technology for growing peas in the open field Fertilizers for peas in the open field
 Eggplant formation in a greenhouse: stages, bush formation scheme
 Healing water infusions on stones Purification of water using shungite filters
 Aphids on cucumbers from the bottom of the leaves - how to fight, drugs and folk remedies Vinegar in the fight against aphids

