If you want to start doing something with your own hands, if you want to make money on it, you feel that it can work out, but you don’t know what exactly to focus on, then you can start by making a chandelier with your own hands. Firstly, it is profitable, and secondly, it is exciting.
A master class with a photo of a chandelier with your own hands will not take you much effort. It is quite simple to make it and it will not be difficult even little child. First you need to buy a blank for a chandelier, then come up with and buy what you will decorate it with. Good options for this are satin, wire, plastic, toys, artificial butterflies.
Think over everything to the last detail, you can even draw a sketch of the future chandelier on a piece of paper. And our site with dozens of master classes on making chandeliers will help you. This helps a lot with design. Do not be afraid to start with a piece of paper, this will greatly facilitate your work.
Originality is in trend right now, so don't be afraid to let your imagination run wild. A do-it-yourself chandelier is not only an unusual piece of furniture, but also a great gift for your friends, relatives and loved ones.
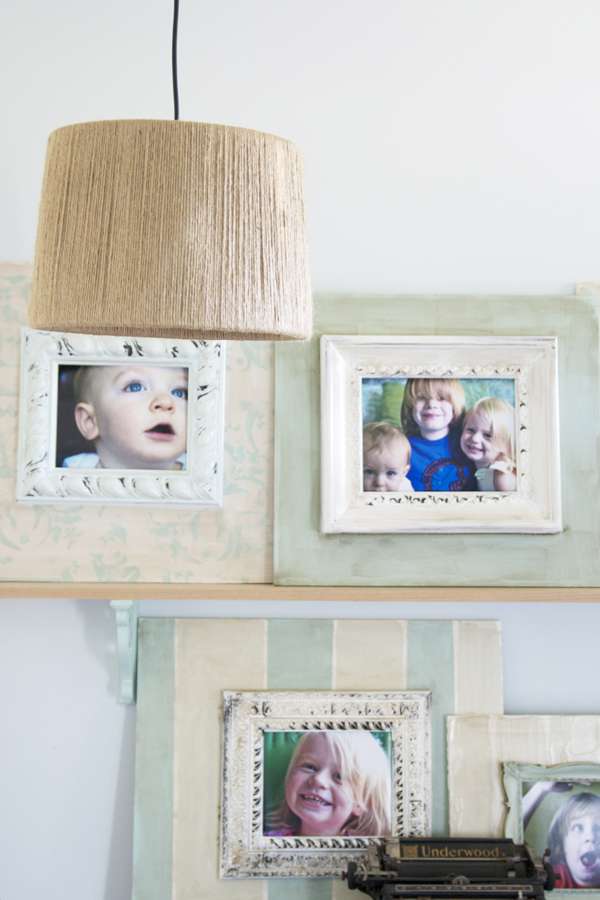
DIY jute chandelier
Instead of an old boring chandelier, you can always hang a new one - made by yourself. And it will be more in harmony with other elements of the interior.
For example, you can create your own jute chandelier. It is quite simple, so the work will not take much time. First, prepare all the required materials.
Step 3. Fixing the figures. Now we need to attach our figures to this entire structure. Determine the number of figures and their size yourself, so to speak "by eye".
Step 4. Fixing. Now we just have to fix our hedgehog in the skeleton, which we prepared in advance.
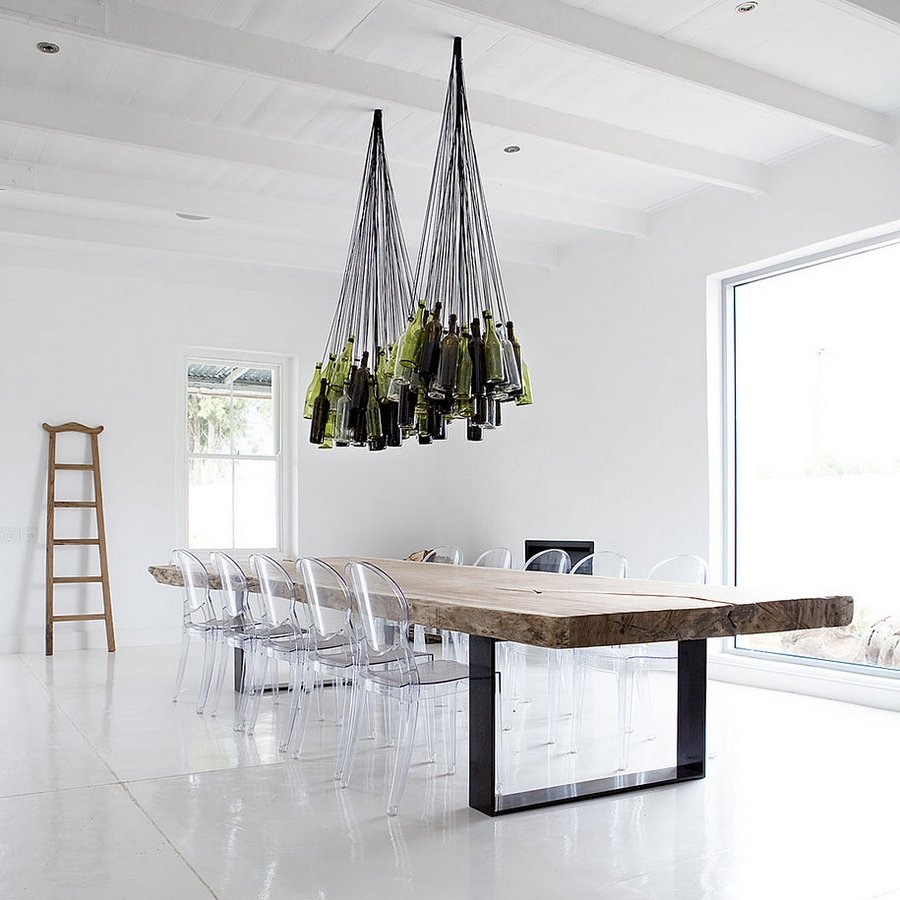
That's all! A chandelier made from ordinary bottles is ready! Such a chandelier looks very original, does not require almost any cost. You can hang such a handmade chandelier both in the kitchen and in the hallway.
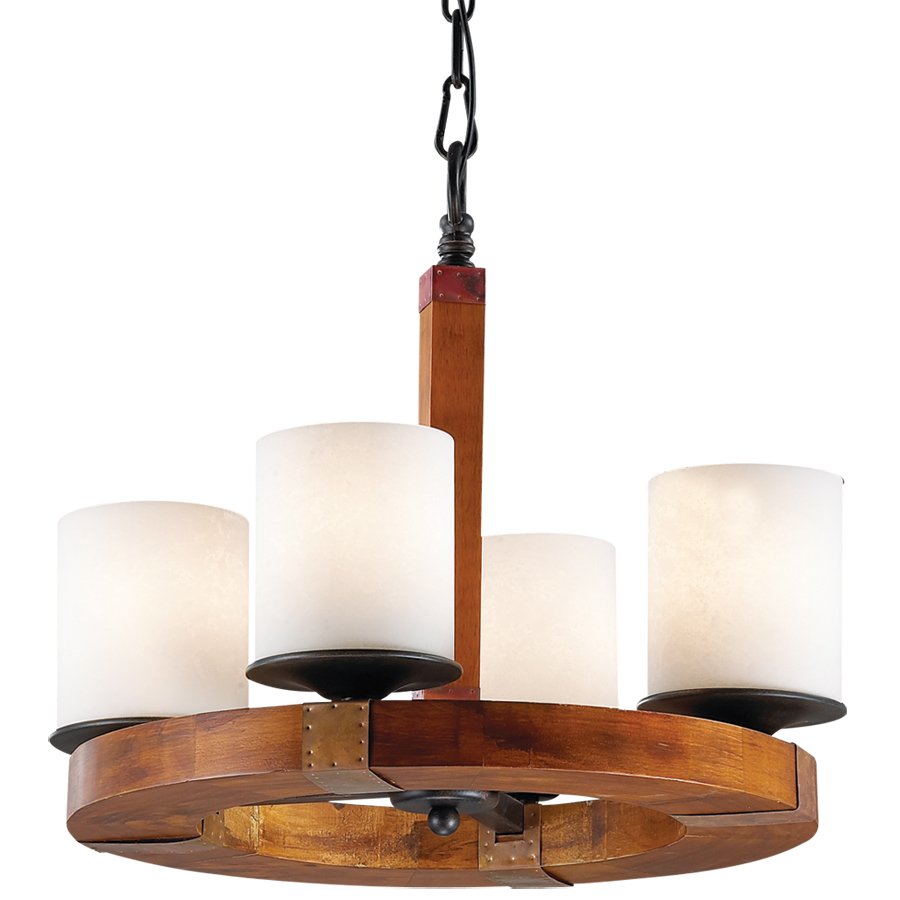
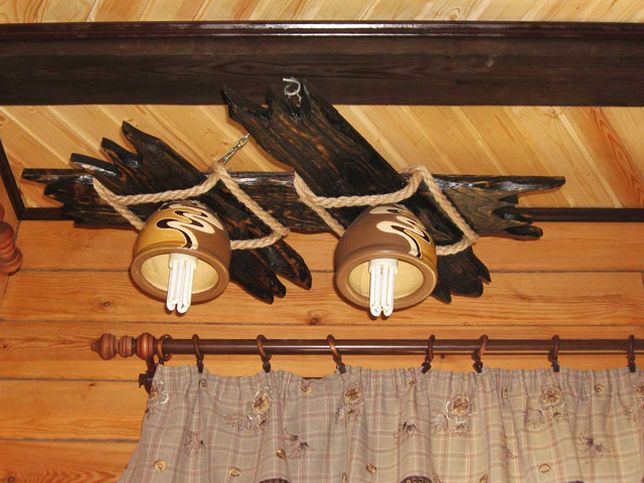
DIY wooden chandelier
Now, our dear needlewomen, let's figure out how to make a beautiful wooden chandelier with your own hands. For the manufacture we will need the following materials:
- Door trim strips. We need to purchase 12 of them, the length of which should be from 30 to 45 cm. They are sold at any hardware store, so you won’t spend a lot of effort searching for materials. And it won't take long to search.
- Find at home or buy 6 glass jars (liter). We will make ceiling lamps from them, so they should be the same.
- Tonal paint that mimics the color of real wood.
- Self-tapping screws for wood, small size.
- Canning machine.
- The paint is white or another very light color.
- Sandpaper.
Manufacturing:
Step 1. Processing the planks with sandpaper. Using sandpaper, sand each plank well so that they become perfectly smooth.
Step 2. We make grooves for the electrical wire. In each planochka on the back side, grooves should be made according to the size of the cable. It will be laid in these grooves at the end.
Step 3. We make holes for attaching the shades. We drill holes in three planochki at both ends. In them we will fix our shades.
Step 4. Painting. Now we need to paint all the planochki tone paint. The color, as already mentioned, should be under the tree. Under which tree you already decide for yourself, from the range of colors that are available in your stores.
Step 5. Fastening the planks. For fastening we will use self-tapping screws. You need to fasten the strips in pairs so that as a result you get a regular hexagon.
Step 6. In the iron lids that are used for conservation, we make holes in the center. There we fasten the cartridge into which the lighting bulbs are screwed.
Step 7. We roll up the jars in which we previously placed the cartridge with the light bulb. Roll up with the lid from Step 6.
Step 8. We paint the lid on the jar and the neck of the jar with tone paint to match the color of the tree, and the jar-plafond with white or other light paint. You can use blue paint, beige or very light yellow. That is, use the one that you like the most, fantasize. And you get an original do-it-yourself chandelier shade.
Step 9. Fixing.
The chandelier is ready, and now it remains only to fix it on the ceiling.
Each chandelier, like any other item made by craftsmen, is exclusive. Look at the presented photos of handmade wooden chandeliers, and maybe you want to add something to the design from yourself.
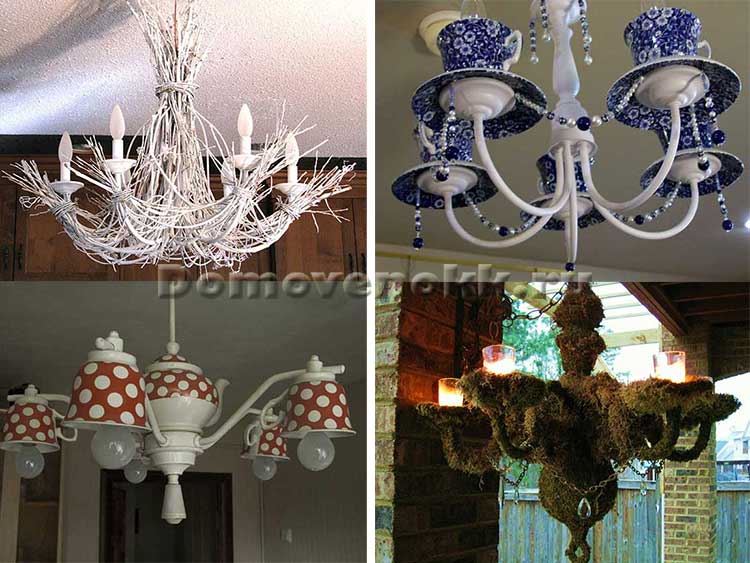
Of course, you can make chandeliers not only from wood and bottles, they are made from a wide variety of materials. Even from yarn and disposable tableware! Look at the photos of the original chandeliers below, they are also made by hand. These are LED lights. They look beautiful and very original. Also, a DIY LED chandelier consumes very little electricity, which will save a lot on utility bills. To make such a chandelier, you will need some special skills.
Very often, in a pile of unnecessary rubbish, we find old, broken chandeliers that lie for many years and do not serve their owners. But this can be fixed. Chandelier, it would seem, at first glance, can only perform its main function, to illuminate the room, but it is not, and you will see for yourself.
Renovation of an old chandelier
Take a critical look at the chandelier first. Perhaps it can still be revived, give it a second life. There are many examples of creating a "zest" of the interior from an old unnecessary chandelier.
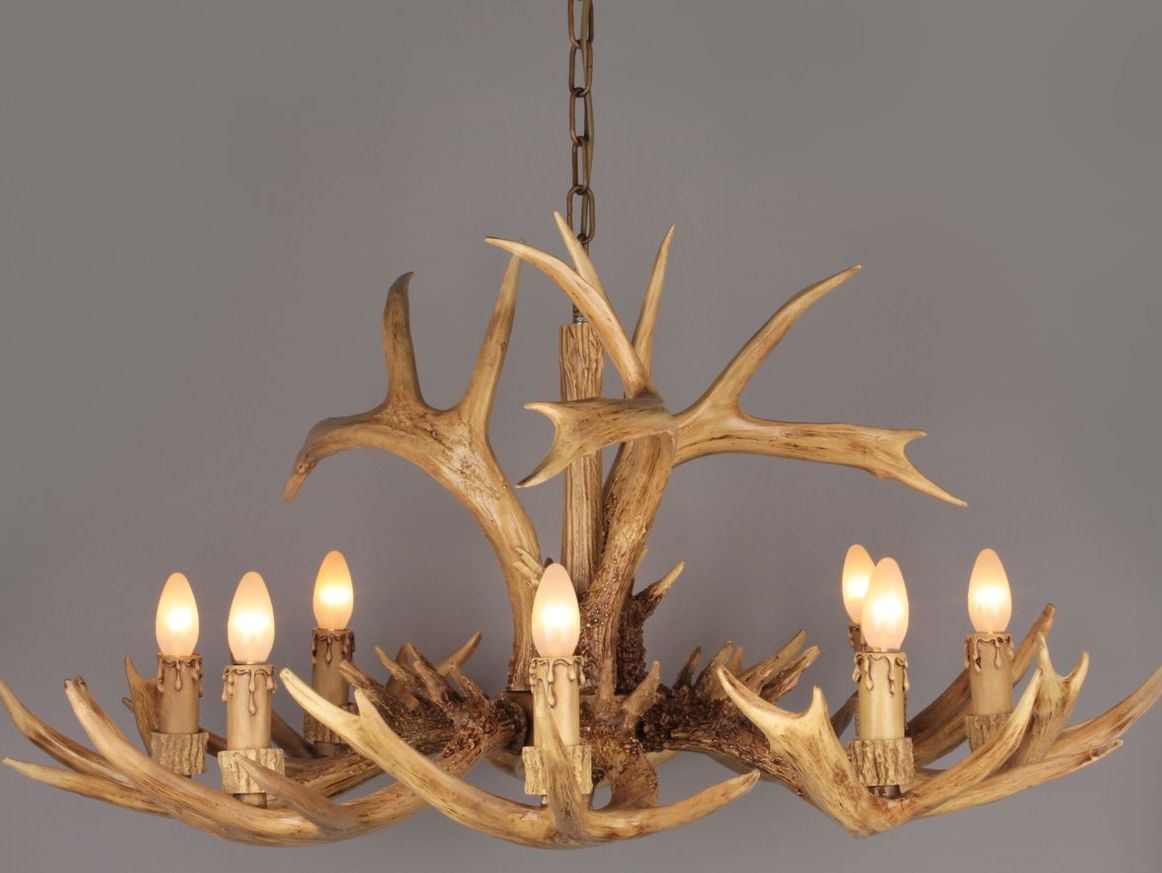
Support for flowers
In your home, you can make a pretty flower stand out of a carob chandelier that will decorate your yard. Turn the horns of the chandelier upside down and you can plant flowers there. It will be very beautiful to hang such an impromptu flower bed by planting ampelous (hanging) plants.


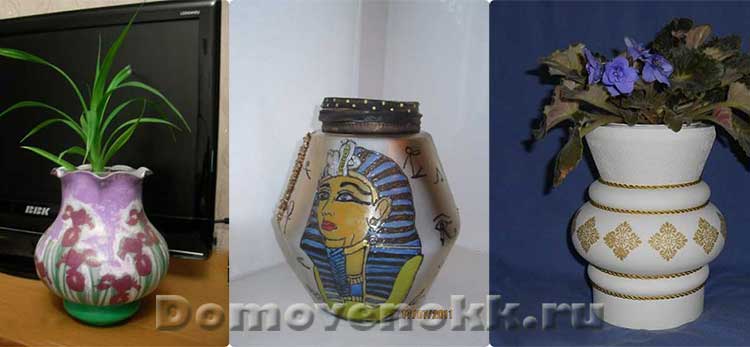
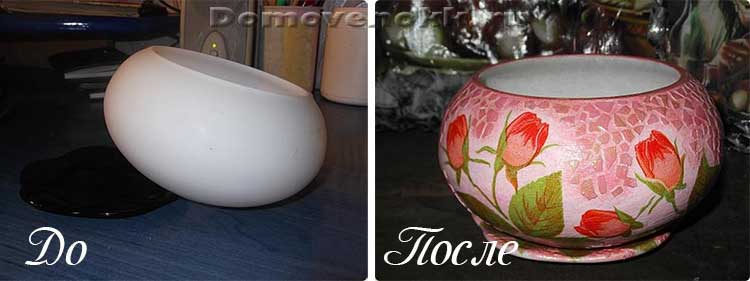
Vase from an old lampshade
You can make a vase for flowers or a pot for plants from the plafonds of the chandelier. If the ceiling has lost its former bright appearance, then this can be completely corrected. Turn on your imagination and transform the ceiling. Such a vase can even be given to someone if you put all your soul and strength into ennobling it.

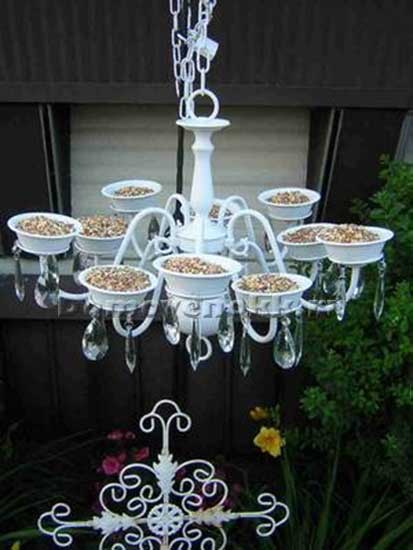
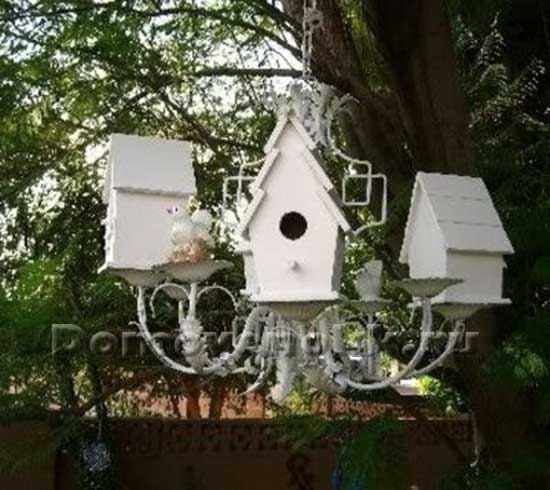
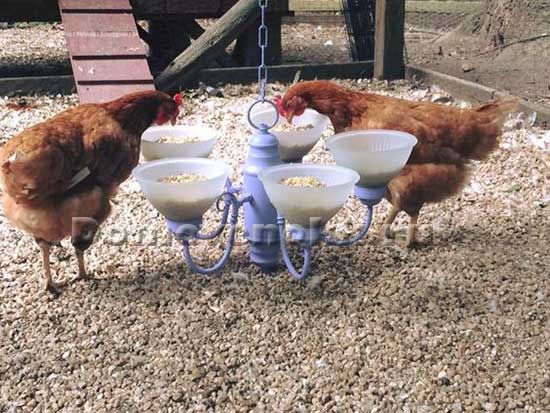
Chandelier Bird Feeder
One equally good solution for a home or summer cottage is to create a bird feeder from a chandelier. The re-creation technology is the same as with the flower bed. The main thing in the future is not to forget to put food on the birds.

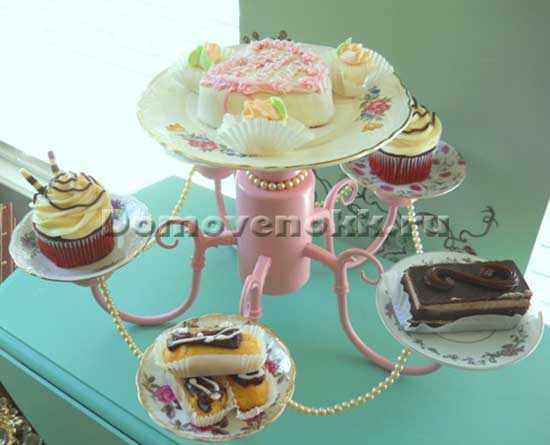
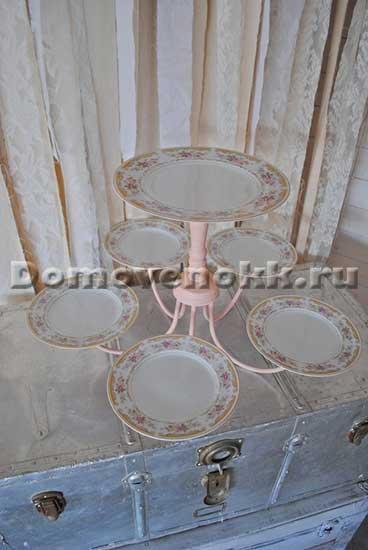
Bookcase or vase
If you come across a wide and plate-like ceiling, then you can use it as a vase for fruits or vegetables, or make a shelf for sweets. It is enough to find supports for such a vase and it can be used in everyday life.


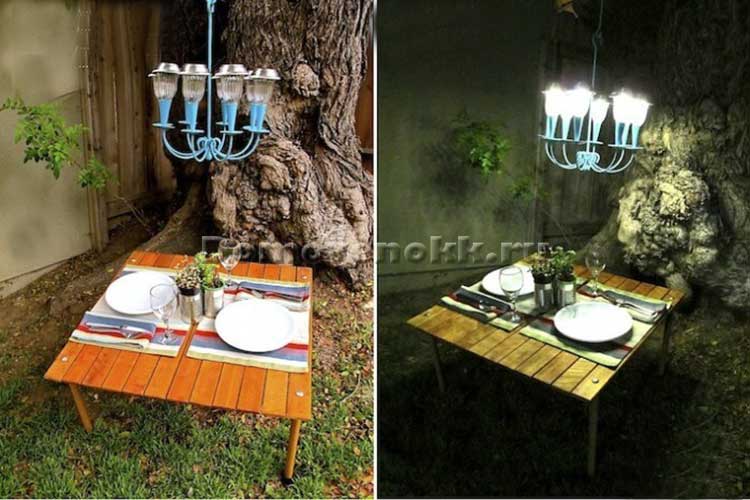
Street light
An interesting solution is to create from an old chandelier and solar-powered lamps Street light. During the day, energy will accumulate, and in the evening a beautiful lantern will illuminate the gatherings of a friendly company.
The trend to make something, which is gaining momentum, cannot bypass such an interior item as a chandelier. It is not only a source of light, but also one of the main decorations of the room. Naturally, the views of the guests will be riveted to the individual creation and the works will not go unnoticed. The abundance of improvised raw materials allows the use of a wide variety of materials. From what can a chandelier be created with your own hands?
DIY chandelier made of cardboard.
Cardboard is the most affordable material for the manufacture of various products.
Such a do-it-yourself chandelier will require cardboard different color, fabric or lace, PVA glue. And then it all depends on the imagination of the manufacturer.
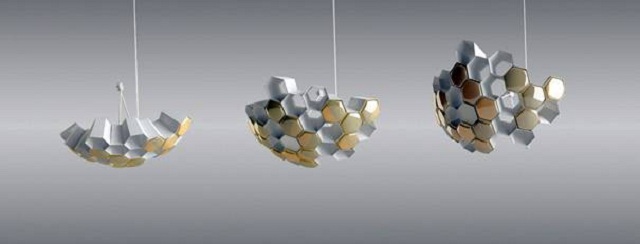
1. We cut the cardboard into circles of the same diameter and fold it into hexagons.
2. Cut out a round hole inside each hexagon.
3. Cut the fabric into circles with a diameter larger than the holes in the cardboard.
4. Using glue, we attach the fabric to the cardboard blanks so that it stretches well and closes the hole. We leave two unglued circles so that you can fix the cartridge with a light bulb, and there is an outlet for heated air.
5. We glue the finished hexagons together using the bent edges. Unclosed blanks are placed on opposite sides.
Attention: Paper burns very well! Install light bulbs of the economy option, they do not heat up much.


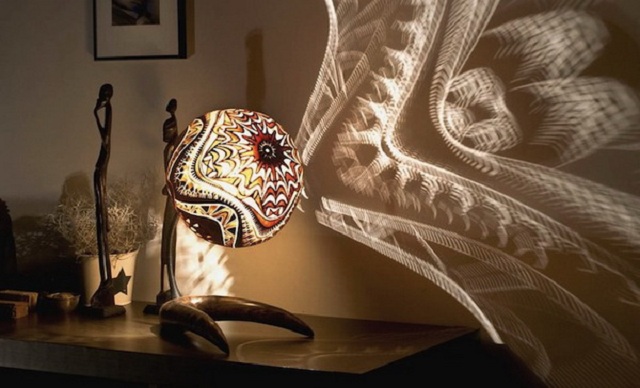
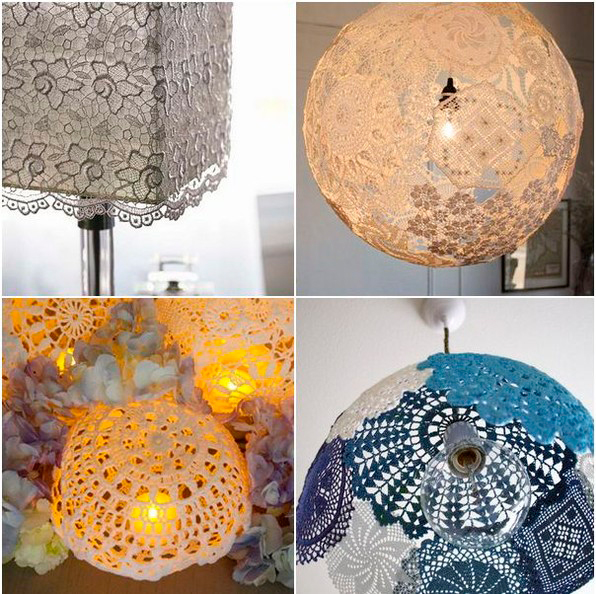
Chandelier with your own hands from a pumpkin.
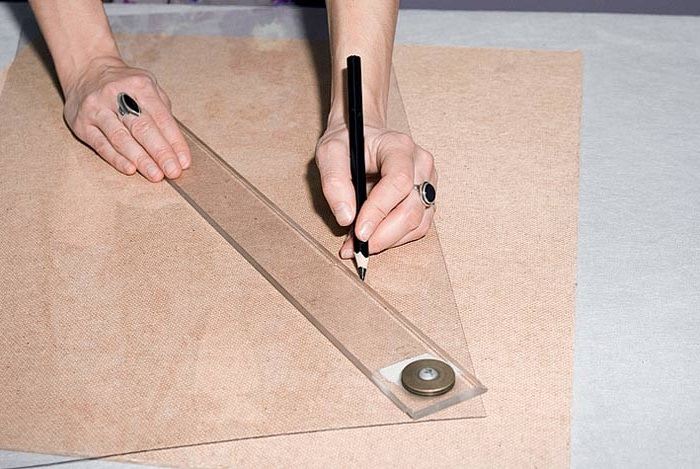
In this case, the flight of your imagination is unlimited. The pumpkin, cleaned from the inside, is in itself a ready-made lampshade, you just need to cut the desired pattern on it and insert the cartridge under the light bulb.
In order to make the pattern on the bark symmetrical and beautiful, before cutting it out, make a stencil out of paper and apply it to the workpiece with a pencil or marker. Then you can easily correct the image. A very delicate lace pattern or running fallow deer on a sunny golden pumpkin background will delight the eye on cold winter evenings. If such a lampshade is properly dried, then it will serve you for a year.

Many people prefer to make their own items home interior. And this is good, because at the same time, not only original Creative skills of a person, but also a dwelling decorated with such objects becomes unique and original, emphasizing the taste and ingenuity of its inhabitant.
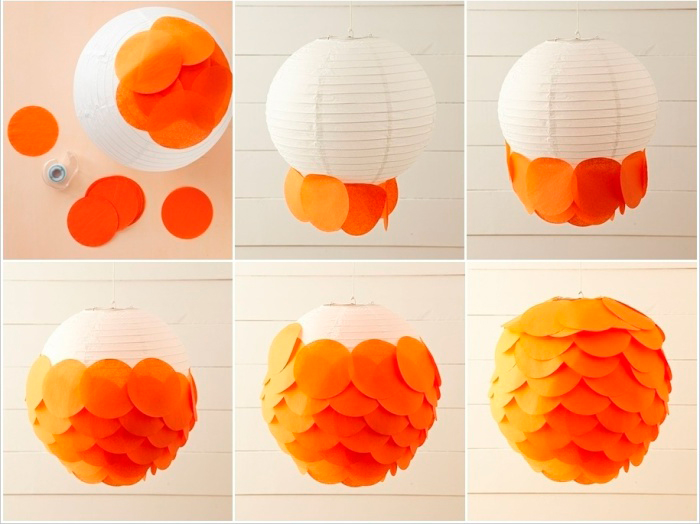
DIY chandelierfrom plastic bottles.
To make a chandelier with your own hands from plastic bottles, we need:
- The frame of an old chandelier. (Perhaps you still have an old chandelier).
- Lots of plastic bottles in different colors. (from white, milky, to dark beer bottles, including green, blue and transparent).
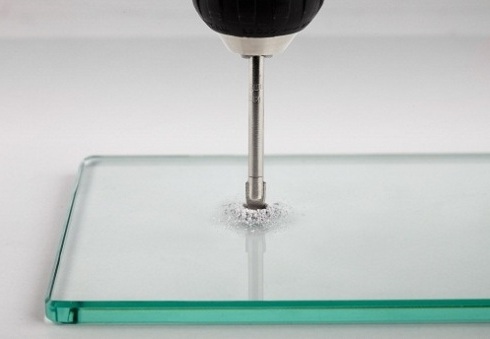
- A few steel bars that you can buy at any hardware store.
Manufacturing technology.
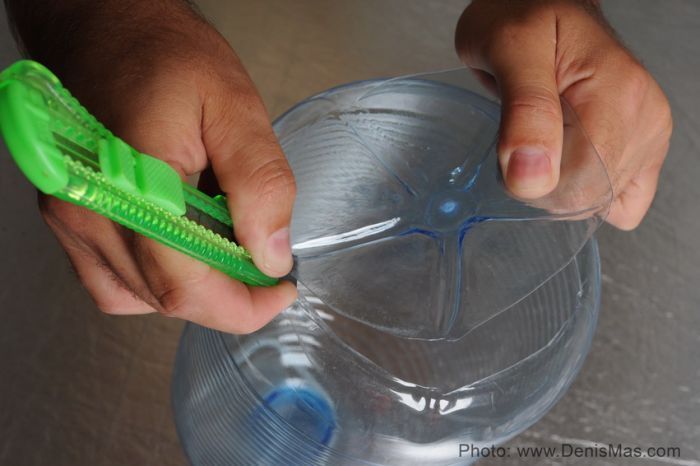
- We cut plastic bottles and cut out petals and flowers from them. You can also cut out various shapes or animals - it all depends on your imagination.
- To attach flowers and other figures to the frame of the old chandelier, we attach steel rods. We make a hedgehog from 5-7 pieces of steel rods, connecting the rods with the middle in turn with a wire. We cut the upper rod of the hedgehog with pliers, there will be a light bulb.
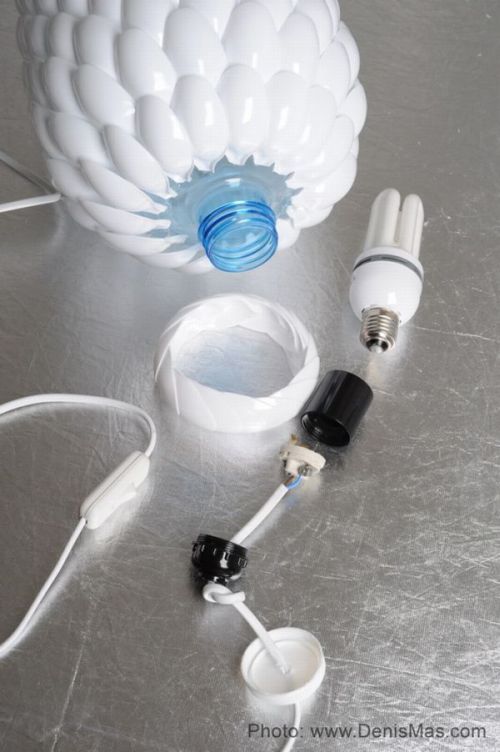
- We carefully attach the cut-out figures and flowers to the resulting design.
- We insert our hedgehog into the frame of an old chandelier.
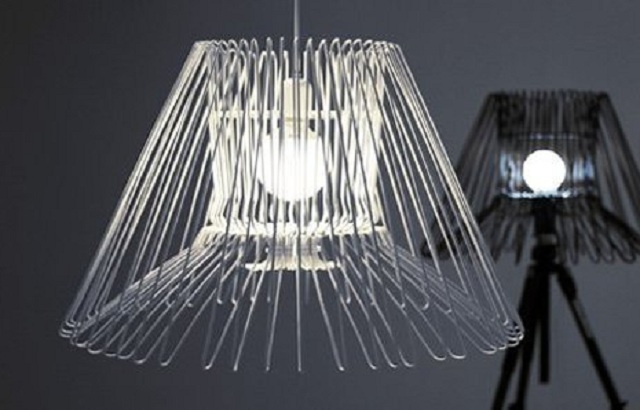
DIY chandelierfrom plastic bottles is ready to go!
DIY chandelier made from laser discs.
In the era of computer technology, almost everyone has accumulated a lot of CDs and DVDs. What use can they find? - DIY chandelier from laser discs! The design of the chandelier depends on the imagination and the number of disks that have accumulated in your house. Using wire, we connect them into various designs, not forgetting to leave a hole for the cartridge. You can make a ball, a curved cylinder, a cone, and more. With its brilliance and reflection of light, such a product will give an extraordinary charm to the room.

DIY chandelier from wood.
To make a wooden chandelier with your own hands, we need:
- Trims from the door trim, which are sold in hardware stores. 12 pieces approximately 30-45 centimeters each.
- 6 identical liter cans for plafonds.
- Tinted paint to match the color of the tree (oak or larch).
- Small wood screws.
- Rolling machine.
- White paint.
- Sandpaper.
- We process the planks with sandpaper so that they are perfectly smooth on all sides.
- On the back of each plank, we make a shallow groove for laying the electrical wire.
- On three strips on both sides we drill holes for attaching the ceiling lamps.
- We paint our planks with tone paint to match the color of oak or larch.
- Using self-tapping screws, we fasten all the planks in pairs so that we get a regular hexagon.
- In the center we make holes in the metal lids of the cans and fasten the cartridges with light bulbs.
- We roll up jars with light bulbs with a seaming machine.
- We paint the lid and neck of the jar in the color of wood, and the ceiling in white or blue.
- We fix the wooden chandelier to the ceiling.


Chandelier with your own hands from a headdress.
An old hat that has lost its shape, faded and out of fashion can also serve as a great addition to your interior. With a little creativity, you can make a beautiful chandelier with your hat crayfish. A design idea, as well as lace, ribbons, chiffon or organza, will turn an old shabby thing into a beautiful lampshade. For example, with the help of threads, attach lace in the form of a veil to the brim of the hat, tie a beautiful bow on top and the lampshade is ready. The simplest and original solution question.
DIY chandelier from yarn.
To make a chandelier from yarn with your own hands, we need:
- Plastic bowl for making a lampshade.
- Yarn. Multicolored threads.
- Fixing paste.
Chandelier assembly step by step.
- Prepare a paste to fix the yarn on a plastic bowl. To do this, mix 0.5 cups of flour with 2 cups of water, then add 2 more cups to the resulting mixture hot water, bring the solution to a boil and add another 3 tablespoons of sugar. Then mix thoroughly and let the paste cool.
- In the cooled paste, soak the yarn and woolen threads for several hours.
- Squeeze the soaked yarn lightly and wrap it tightly around a plastic bowl. Here you can show creativity and design ideas. Especially wind the yarn should be on the bottom of the bowl.
- After drying, after about a day, carefully remove the bowl from the resulting lampshade made of yarn.
- We attach a ceiling with an electric wire to the bottom of the lampshade and hang the chandelier.
Important! A do-it-yourself chandelier made from improvised materials is not designed for high lighting power, therefore it is very important for fire safety not to use incandescent bulbs with a power of more than 60 watts!
You are tired of the ordinary look of the interior of your room or country house? So, it's time for amazing changes. Of course, you can buy a bunch of new things in stores and replace old ones with them, but we suggest plunging into the creative process with your head and making something unique with your own hands. Unleash the designer in you and change the world around you, make it beautiful and unique.
Let's start with replacing the chandelier, this element of the interior will become the accent of your author's design interior. original- it is possible. If you do not take into account the cost savings, then we can say with confidence that the positive emotions that will certainly arise during the process will be remembered for a lifetime. In addition, you will become the owner of a unique and exclusive item. Stock up on patience, time and the necessary materials.
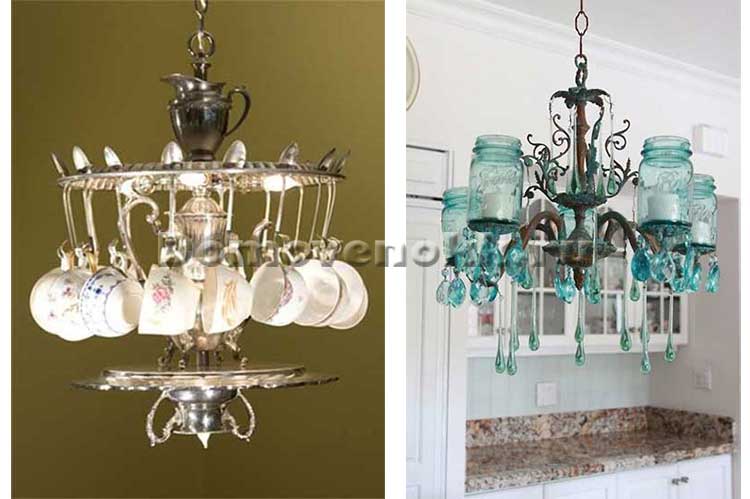
Materials for the manufacture of the ceiling can be different. The most forgotten and abandoned items will be used, everything will fit. Old kerosene lamps, an openwork cage for a canary, cups with saucers, burlap, grandmother's lace, decorative feathers, beads and much more.
When inventing a new chandelier, it is necessary to decide in advance in what style the room will be decorated. The romantic style of the room is suitable for a young girl, country style or Provence will create an unforgettable atmosphere in country house, - you choose. It is also necessary to determine what intensity of lighting you would like to achieve in the end. Then start picking necessary materials to make a chandelier.
DIY chandelier: photo tutorial on lampshade decor.
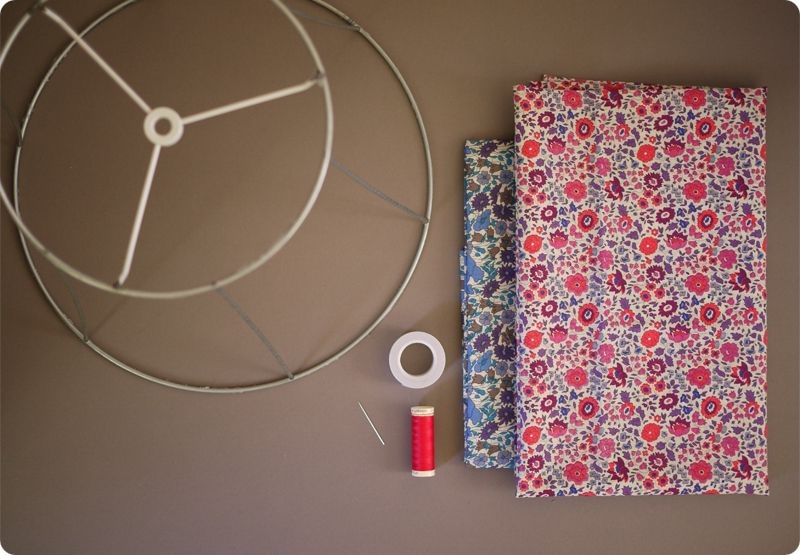
You will need:
- cartridge of the required diameter;
- electrical cord;
- frame of the future chandelier;
- decor elements;
- kapron threads;
- hot glue gun;
- bulb.
An old lampshade frame found in the attic, with the help of your imagination, will turn into an elegant and stylish thing. Many famous interior designers started their careers this way, making amazing things and putting them up for sale. Who knows, maybe your success is just around the corner?
And so, measure the lampshade and make a pattern. When choosing a fabric, pay attention to its density. It can be organza, chiffon or a denser burlap fabric, linen. Sew the details and, pulling the resulting cover onto the frame, fasten the fabric with threads. Now decorate the lampshade with lace, beads and artificial flowers. Attach the cartridge to the finished lampshade and connect the wire, it remains to screw in the light bulb and the chandelier with your own hands (as in the photo) is ready.
Your home has become a source of pride and admiration. Now no one can stop you from creating new masterpieces!
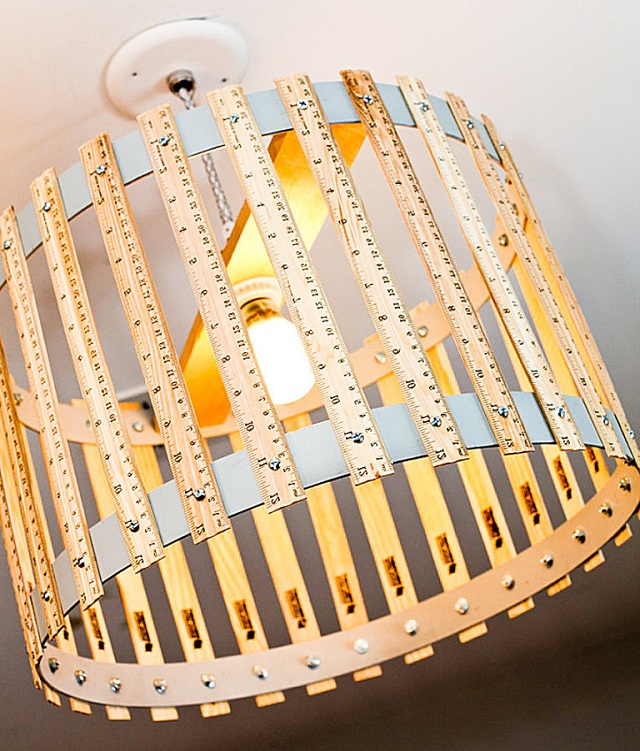
DIY chandelier from rulers.
Children's rooms are the most painful issue in terms of design. Children grow up very quickly, and chandeliers in the form of airplanes or other toys quickly lose their relevance. That is why we turn on the imagination and proceed to the creative process!
Making a chandelier with your own hands from rulers is easy! You need to decide on the shape and choose plastic or wood. The advantage of plastic is the good flexibility of the material, but at the same time it melts well, emitting an unpleasant odor, so low-incandescent bulbs are placed in such chandeliers, best of all LED ones. Using plastic rulers, you can make round and semicircular lampshades.
But it is best to take wooden rulers of the same length, two small hoops and a wooden plank. Using self-tapping screws, we fasten the rulers at an equal distance to the hoops. We skip the bar inside one of the circles to install a cartridge with a light bulb on it. The rulers between the hoops can be fixed in parallel or in the form of a lattice. Such a do-it-yourself chandelier will especially appeal to schoolchildren and will suit any interior.
New Year's chandelier with your own hands (photo attached).
If the peak of your creative activity fell on the eve of the New Year holidays, you can surprise your friends and loved ones with a real work of art. A do-it-yourself Christmas chandelier (photo attached) made of bright Christmas balls can replace the Christmas tree and become the central decoration of the house.
You will need:
- ordinary plywood or plexiglass;
- coarse linen rope;
- blue, silver, green and gold balloons;
- stapler;
- glass elements of an old chandelier.
Cut out a 50:50 cm square from plywood or plexiglass. Drill holes randomly every 5 centimeters.
Using a wire staple, thread the linen thread into one hole and out of the next hole. Cut two ends to a length of 2 m. Fill all holes in this way. Fasten the square to the ceiling instead of a chandelier, and tie the balls at different distances from the floor, cutting off the excess length. Do this in the central part of the composition. Hang small pieces of glass along the edges on shorter threads, giving the entire composition a pyramidal shape.

Stylish chandelier with your own hands, ready!
To make the image of your room unique, you can do many things with your own hands. Chandeliers are one of those items.
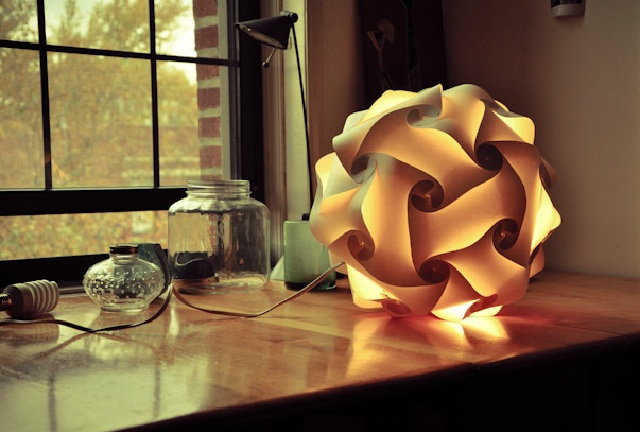
The most popular way to make a chandelier with your own hands is winding threads. We take an ordinary balloon, inflate it. You will also need a lot of PVA glue and more than 100 meters of thread. It is advisable to use cotton threads, so the glue will not run and lie evenly. It is more convenient to pour glue into some kind of container, and apply glue to the threads with a brush. We wrap the ball with these glued threads, making sure that there are no large gaps. We are waiting for the glue to dry. It is better to wait more than a day than to start again, but with other materials. When the glue has dried, untie the knot of the balloon and inflate it again. This is done so that the shape of the ball is not lost and our do-it-yourself chandelier does not become oval. Now you need to burst the ball with a needle, and carefully remove it from the cocoon of thread with something sharp. Cut a round hole at the top of ours and place a lamp in the ball, preferably with a matte finish. Fix the light bulb and the story of the chandelier. You can compare the result obtained by looking at examples of photo chandeliers or a video lesson.
To make the chandelier with your own hands even more original and tender, use thin lace instead of threads. Starch the lace and paste over the ball in the same way. This lamp will fit perfectly into the kitchen, made in country style.
To make a sconce with your own hands, use the same method with pasting threads or lace. You can also use thin strips of fabric or tulle. Only instead of a round ball, take a juice box. Preferably from half a liter - so the sconce will look more attractive. Before creating, look at the photo chandeliers to understand which sconce suits you.
DIY chandelier from hangers.
Don't throw away old things. Everything has a use. You may even have a chandelier with your own hands from clothes hangers. This is a very convenient material for creativity, and hangers, as a rule, are very durable. Just fasten them together with wire and give them any shape, decorating with fabric, bows, paper or other improvised material. You can install not one, but several LED light bulbs or led strip. A chandelier of this type characterizes the owner of the room as an extraordinary person who loves experiments.
![]()
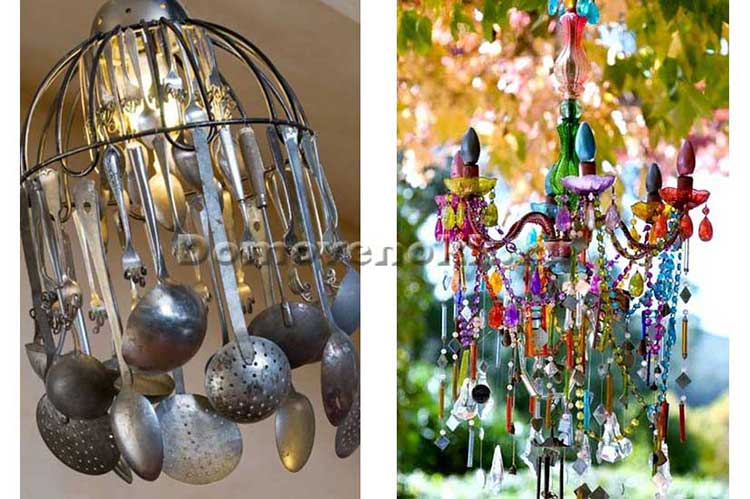
There are more extravagant examples of creating chandeliers with your own hands.
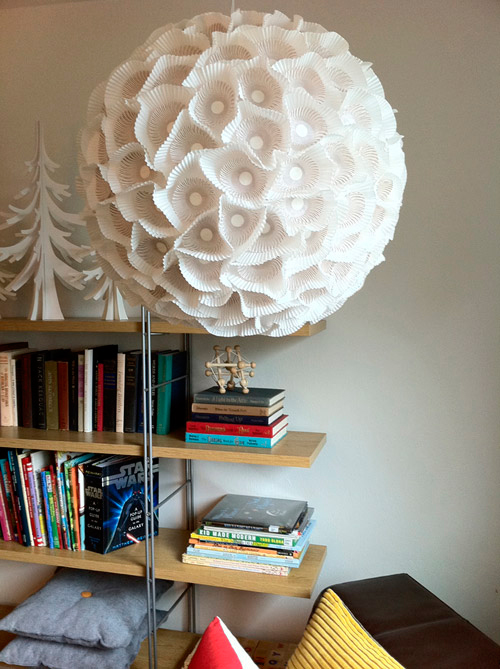
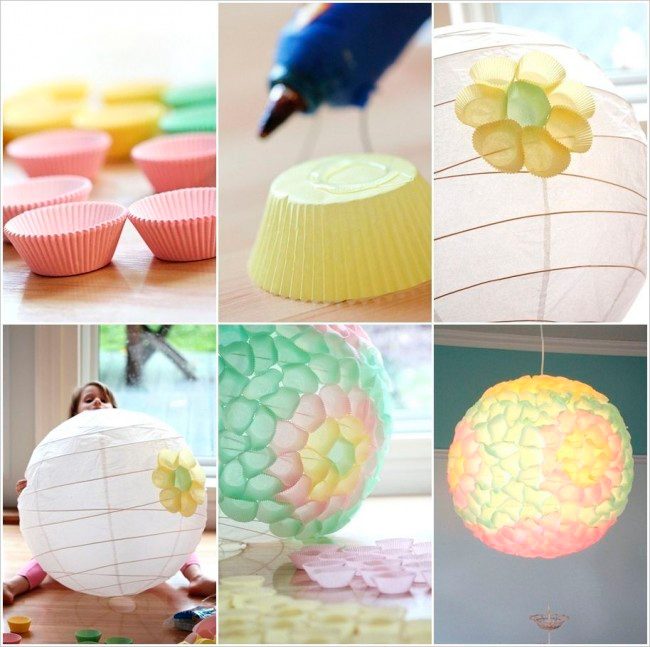
Well, here is another idea on how to make a chandelier with your own hands from improvised materials.
For this chandelier model, we need a large plastic bottle and a lot of disposable spoons.
Look at the photo of the chandeliers with your own hands and decide what you want to get. An excellent do-it-yourself chandelier will turn out with the help of an old lampshade. Need a metal ceiling base with a ceiling. Seal the space around the light bulb with foil (be sure to save energy!). Remove the fabric from the old lampshade and attach suitable paper to it. Glue the bottom of the lamp in contact with the lamp with baking paper, which will give our chandelier a soft yellow light with your own hands. Ready. It seems that the chandelier is hanging by itself, without touching the ceiling.
If you have several embroidery hoops, use them to create beautiful lamps. As a base, take a hoop or wire to create the desired shape of the lamp. Cover the frame with fabric or look at the photo chandeliers to properly paint the base. Attach organza or sheer chiffon to the frame. For decoration, you can also put a solid Christmas tree garland inside. Instead of fabric, you can use pendants: string beads on a strong fishing line and attach the fishing line to the base. It turns out original chandelier with your own hands. It looks interesting if you hang several of these lamps nearby.
Looks weird and homemade chandelier made like this: carefully glue the barbecue sticks together into a square shape, as you will see in the photo of the chandeliers. If desired, attach pasta in the idea of bows along the edges of the chandelier. As a decoration, put a ribbon of bright fabric between the sticks. In the same way, you can create a sconce.
The lamp looks intricately made of disposable cups fastened together with a stapler. How to do it correctly, photo chandeliers show. And with the help of a fishing line, attach the chandelier to the ceiling.
Every woman wants to bring originality and comfort to her home. One of the most important elements of decor - a chandelier, can transform any interior, and created with your own hands, will give it an atmosphere of home warmth and comfort. In this article we will tell you how to create a chandelier at home, original ideas with photos and videos to help beginners.
As materials for the manufacture of a chandelier, almost any material at hand is suitable:
- paper, gift wrapping and cardboard;
- textiles and knitwear;
- ropes, ribbons and threads;
- wood and glass;
- wire, feathers and beads.

As a frame, you can use an old chandelier or buy suitable rings and stands in stores that sell materials and tools for manual creativity.
Advice! It is very important to choose the right color scheme for materials for the future chandelier. Lampshades made of light and transparent materials are suitable for a dark room, while denser materials can be used for a light one. Using materials in yellow, orange and red shades will give the room warmth, while blue and green materials will make the room feel colder.
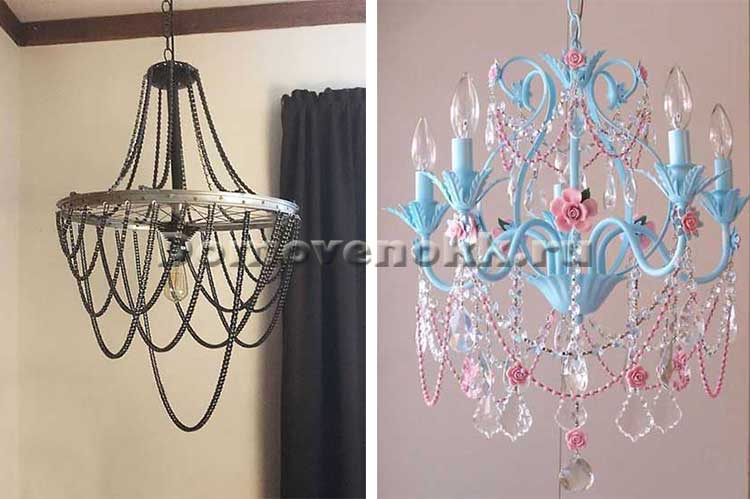
Option 1 - Shabby chic chandelier
An original chandelier is easy to make from an ordinary metal paper basket.
Materials used:
- metal basket for papers;
- spray paint in delicate or pastel shades: pink, peach, beige, cream, lilac, mint, jade;
- a strip of linen textile in a contrasting or matching color;
- glue gun;
- scissors;
- bulb socket.
Performance:
- Drill a hole in the bottom of the basket for the electrical wire.
- Use spray paint to paint the basket inside and out.
- Then pass the electrical wire with the cartridge at the end into the hole.
- Lay a strip of fabric 8 cm wide in folds, and then secure with a glue gun around the top of the lampshade from the basket.
- Decorate the textile border with a bow and fabric roses.
Advice! If desired, the border can be decorated with beads, decorative glass pebbles, shells.
Option 2 - DIY art deco chandelier
For a living room or bedroom, you can make a simple and spectacular chandelier from silk fringe in the form of a cascade.
Materials used:
- 2 wooden hoops of different diameters
- white silk braid with long thick fringe
- white acrylic paint
- fishing line
- glue gun
- scissors
- socket with light bulb
Performance:
- Paint the hoops.
- Cut 3 identical pieces of fishing line about 50 cm long each, then use them to attach the smaller hoop to the larger one in 3 places, so that the distance between them is 5 cm less than the length of the fringe. The remaining ends of the fishing line will then be used to attach the chandelier to the electric cord.
- Using a glue gun, glue the fringed silk braid first around the perimeter of the smaller hoop, and then around the perimeter of the larger one. Do not apply hot glue directly from the gun to the line attachment points, as this may melt the line. It is better to first apply a little glue to the paper, and then, after cooling, carefully glue the attachment points of the fishing line.
- Fasten the chandelier to the power cord with a cartridge using the free ends of the fishing line.
Advice! The upper edge of the chandelier can be decorated with pearl or transparent beads using a glue gun. Instead of white fringe, you can use silver. If the fringe is not thick enough, it can be laid along the hoops in 2 layers. A cascading chandelier will look very interesting if the fringe is attached to a wooden base in the shape of a square.
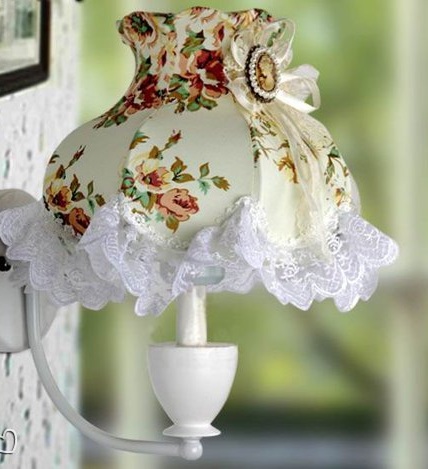
Option 3 - DIY chandelier in country style
Using the frame of an old lampshade, you can make a beautiful chandelier by simply covering it with lace or guipure.

Materials used:
- metal frame from a lampshade of arbitrary shape;
- a strip of lace, guipure;
- threads to match the fabric, a needle;
- cord;
- scissors;
- bulb socket.
Performance:
- Measure the circumference of the lampshade at its widest point.
- Cut off a rectangle with a length of 4-5 cm more than the circumference of the lampshade and a width of 8-10 cm more than the height of the lampshade.
- Connect the part into a ring, stitching along the short ends.
- Pull the part onto the frame.
- Hem, bending, the bottom edge.
- Gather the free upper edge of the new lampshade, neatly distributing the folds and securing them with a cord.
- Attach the lampshade to the power cord with a cartridge.
Advice! If necessary, the frame can be refreshed by painting from an aerosol can in a suitable shade. Instead of a lace fabric, you can use openwork knitwear or tight knitwear in light colors with stripes or with a pattern of braids, bumps.
Option 4 - DIY Tiffany style chandelier
American designer Louis Tiffany used stained glass technology to make his modernist lamps. With the help of simple materials and tools, you can independently make an exclusive Tiffany-style chandelier.

Tiffany-style lamp from a plastic bottle
Materials used:
- 5 liter plastic bottle;
- sealant;
- silver or gold paint;
- paint on glass 5-7 matching shades;
- marker;
- scissors;
- bulb socket.
Performance:
- Cut a plastic bottle in half. To create a chandelier lampshade, use the top of the bottle along with the neck.
- Using a marker, mark the surface of the plastic lampshade into 6 equal segments, drawing vertical lines from the neck to the bottom edge.
- Each segment is symmetrically painted in Art Nouveau style: you can depict flowers, leaves, grapes, dragonflies, drops, taking any image of the Tiffany lamp as a basis.
- Cut the bottom edge of the bottle along the contour of the pattern applied to the surface.
- Draw the entire surface of the lampshade, including the lower edge, along the contour of the pattern with sealant, making sure that the lines are neat and not thick. Give him time to dry.
- Gently, using a thin brush or ear stick, cover the surface of the contours applied with sealant with silver or gold paint.
- Fill in the voids of the picture with paint on glass, arbitrarily combining color shades.
- Carefully cut off the neck of the bottle.
- Insert power cord with cartridge.
To make chandeliers with your own hands, turning on your imagination, you can use any materials, creating unique lamps in different styles. For safety reasons, use energy-saving light bulbs for their operation.
DIY thread chandelier - video
DIY chandeliers - photo


![]()
We advise you to read
 Therapeutic effect What is vitamin e used for?
 - instructions for use Dexalgin how to take") Dexalgin (ampoules with dexketoprofen) - instructions for use Dexalgin how to take
Dexalgin (ampoules with dexketoprofen) - instructions for use Dexalgin how to take Diclak solution - instructions for use Diclofenac injections instructions for use for children
 Dream Interpretation: why dream of Fire, to see Fire in a dream, which means Why dream of fire in a mirror

