Many people remember the reliable Singer sewing machine. At one time, the German miracle of technology was the pride of any home craftswoman.
Having ceased to perform the main functions, the design will only interfere and take up space. Of course, you can immediately throw it away, or you can show a little ingenuity and make an elegant coffee table from a Singer sewing machine with your own hands.
Required Tools
- Metal brush. We choose the option with a rigid, large bristle. The brush is useful for the initial cleaning of the surface from accumulated fat and machine oil.
- Cleaning agent. It will be needed to process and dissolve contaminants. Any solvent can be used. It is best to use a spray gun, as it allows you to evenly distribute the liquid over a large area.
- Bulgarian without a nozzle. The tool is powerful enough to remove the old layer of paint.
- Matte paint for a cast-iron bed from a sewing machine. It is most convenient to use an aerosol can, but ordinary canned paint will work.
- Decorative impregnation for wood. Applied to the countertop for better preservation and additional protection.
- Screwdriver. It is intended for fast tightening of self-tapping screws. You can get by with a screwdriver, but an electric tool will noticeably speed up the process.
- Self-tapping screws 4.2 x 19 mm. You can choose a gold-plated version and use as a decoration.
- Wide brush. A soft-bristled paint brush will help evenly distribute the impregnation over the surface of the countertop.
Necessary materials
- To make a coffee table from a Zinger typewriter, you only need a cast-iron bed and a table cover.
- The size of the cover is chosen arbitrarily, in our instructions it will be 1000 by 600 millimeters and 22 millimeters thick.
Assembly
- Separate the top panel from the legs of the sewing machine table. Usually it is mounted on four bolts, to detach it is enough just to unscrew them.
- After that, we begin the primary processing. Apply cleaner to the beds. Thoroughly soak the folds and corners, they often accumulate dust and engine oil. The main task of this procedure is to degrease the surface and get rid of persistent contaminants. Carefully go over with a brush with metal bristles and, if necessary, apply another layer of solvent.
- Having finished with the preliminary cleaning, we will deal with the old paint. It is necessary to get rid of it with the help of a grinder with a special nozzle. Let's go through all the curls and corners of the legs, ideally old paint shouldn't stay at all.
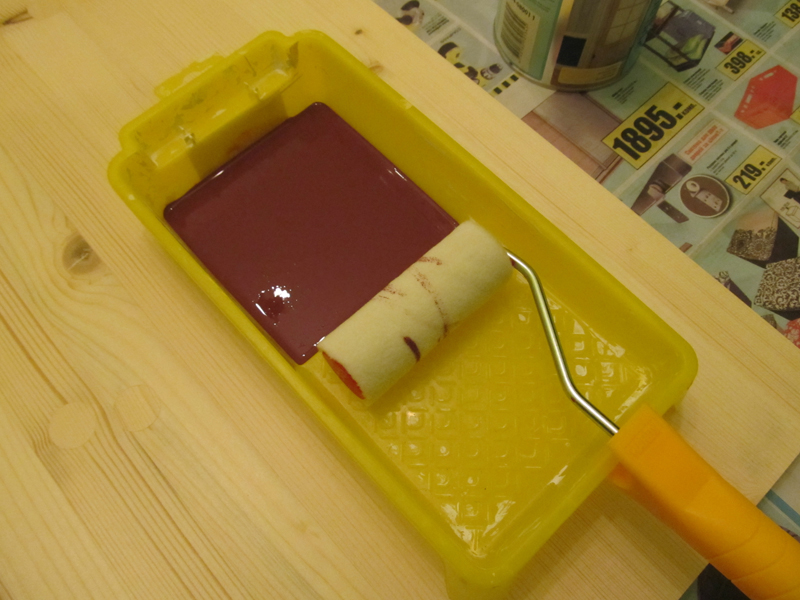
- Degrease the cleaned metal and apply a new coat of paint. Spread the layer evenly over the entire surface, it is most convenient to use an aerosol can for this. In some cases, it may be necessary to re-apply, make sure that the paint lies well and move on to the countertop.
- After manufacturing, we cover the countertop with decorative impregnation. Usually a wide brush is used for this. Impregnation protects wood from rotting and external damage. Saturate the surface well, applying two to four coats.
- After drying the wood, we proceed to fixing it on the beds.
We put the lid on the floor and put the cast-iron legs on top. We find the mounting holes, they are located in the corners of the beds. Using a screwdriver and self-tapping screws, we connect the cover to the beds. This completes the main build process.

Labor and cost
Most of the time is occupied by the processing of the beds. You may need to work hard for several hours. Everything will depend on their initial state.
It took me about two hours to clean the surface of oil, old paint, re-degrease and apply a new layer. If the cast iron is heavily rusted, then much more time may be needed.
The assembly of the countertop and its fixing will take about an hour. The longest time will have to wait until the decorative impregnation dries, it usually takes up to twelve hours.
A bottle of solvent will cost about 100 rubles per 500 ml. Paint - 600 rubles and more, depending on the manufacturer. Tabletop from 300 rubles. The total cost will not exceed 1500 rubles.
Conclusion
This is how, thanks to simple instructions, you can assemble an elegant coffee table from an old Singer typewriter with your own hands. It will not cost you much, but it will please the eye and faithfully perform its work for many years.
Always pay attention to old, seemingly unnecessary things. With the right approach and proper skill, they can be turned into something amazing.
Do you know how many options for spectacular vintage furniture can be made from the base of an old sewing machine? Answer: many! But we chose the most interesting of them, because the table is an item that is needed in any home. On the other hand, a table made from an old sewing machine is the easiest vintage piece of furniture you can make yourself.
So. we will need a very old sewing machine with a pedal: Singer, Pfaff, Husqvarna and even Soviet-era models. They are united by the main thing that we need - a luxurious cast-iron base (legs), genuine vintage. The condition does not matter, even a rusty one will do (if it is exactly like that, buy metal paint “directly on rust” and bring the base into a neat look).
Everything else is extremely simple. Remove the wooden part or just the typewriter, and attach what will become the countertop on top. And they can be different - depending on your preferences for materials and the size of the table.
We looked at a lot of options for tables from the base-legs from an old sewing machine and found out what can be done: a console table, serving or dining table, a table for a home office or garden. Best Examples collected in this gallery for inspiration - 45 table ideas from an old sewing machine.
We wish you successful finds and the realization of your Dream of vintage home interior furniture!
Here's what an old sewing machine might look like. Do you have one? Maybe one of your friends or relatives? When you see what wonderful vintage tables you can make from it, urgently go in search. And when you become its happy owner, do not limit yourself to the factory countertop - make your own, original. We have collected a lot of ideas on this topic.
|
|
|


__________________________
console tables from an old sewing machine:
From the base of the sewing machine, you can make an original console table. Since this is the easiest, it is with such a table that we begin. As you know, a console table is a very compact version of the table that will fit in almost any corner that will be transformed thanks to such elegant vintage furniture. And on top you can place the necessary little things or just pleasing to the eye.
Lay a sheet of glass on top for a great addition to a classic living room. A top made of raw wood or planks will help create a rustic country style table. Paint the legs white and you have a charming vintage console. A black table with wrought iron legs will complete the interior in Moroccan style.
However, it is not necessary to put it in the living room. Complement an unusual base with wooden sides or glass in a shabby frame - you get a cute flower table that is appropriate both in the greenhouse and in the hallway. In addition, you can make a luxurious showcase for your collection from the base of a sewing machine (the easiest option is to strengthen it on top ... an aquarium turned upside down).
__________________________
garden tables from an old sewing machine:
A table from a sewing machine can also be placed on the veranda as a flower stand. Turn on your imagination and paint the countertop in an unexpected color.
__________________________
home office table from the base of the sewing machine:
What about unusual desk from a sewing machine? If you prefer conciseness, you can get by with a simple board as a countertop. It, like the legs, can be painted in your favorite color. But if the soul requires frills, attach the top from the old bureau to the wrought iron base. You will have a thing worthy of the title of a family heirloom.
__________________________
serving tables and kitchen islands from the base of the sewing machine:
Your home certainly deserves the best and most exclusive furniture. Including - in the kitchen or in the dining room. How about a serving table from the same old sewing machine? Make wooden sides or place a roomy wooden tray on top, attach the wheels - and enjoy your new handy kitchen gadget. However, such a table does not have to be mobile - it will come in handy both as a kitchen island, and for storing dishes, and as a mini-bar in the dining room.
__________________________
dining tables from old sewing machines:
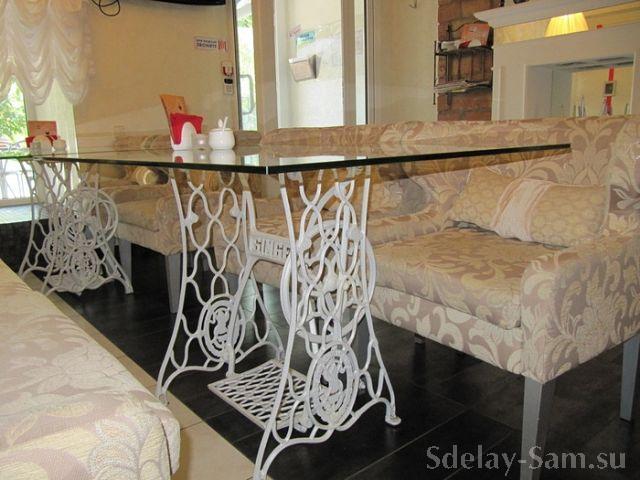
The sturdy cast iron base of the sewing machine is the perfect base for a dining table. She is stable and effective. The compact countertop is slightly larger than the one that the typewriter had - an ideal option for a table for two in a small kitchen. The dark wood top makes this a classic table. If you plan to pair it with modern furniture, paint the countertop white or black. However, the countertop does not have to be wooden - it can be made of glass or, which is especially luxurious, of marble.
We had legs from a SINGER sewing machine while we adapted them as a bed for a hand-held circular saw, but in the future we want to make a decorative table, and as an option, use glass as a tabletop. We have glass - it is stalinite from some kind of truck (booth window).
For those who are interested, you can read about the circular saw. And we will go further and consider what options for tables you can make with your own hands and how they fit into the interior
This is what the sewing machine looks like. We had just such a thing, only where the machine itself went, I don’t remember - maybe it’s somewhere

Here is a table with a glass top. Legs painted in White color, under the color of the interior.
In the photo below, the legs are not from the SINGER typewriter, but the principle is the same. They are painted bronze. Same with glass top

Option with a wooden countertop in a modern interior

We have something like this glass with rounded corners

And here both the table and the chair are made of legs from Singer. In another photo - a table in gold.


Extended version of the table with a massive wooden top

Unusual use in the bathroom


Wooden countertop in a "wooden" interior

And this is some design solution with a thick top with two pairs of legs from a typewriter

Table for garden or gazebo. Agree, it is always nice to sit on wooden furniture, at a table made by yourself, and even in the fresh air, enjoying a conversation and a cup of green tea, or something stronger.

And here is a combination of a log house made of logs and a mini table with one leg)

And in conclusion - computer tol. If you also put a generator on the foot, then you can generate electricity and train muscles - this is for those who sit at the computer for a long time and move little)))

This is just a small part of what you can
The metal patterned legs of the machine can ideally be processed with a sandblaster, sandpaper or special solutions (if there is rust), then paint in the desired color or varnish
This “love story” started a long time ago, a couple of years ago. Once I had a job, thanks to which I visited almost all the restaurants in the center of Kyiv. In one very cozy establishment, I noticed that all the tables were made from old Singer sewing machines. I really remember this idea. And she lay in my head until the next meeting with a similar table, which took place in the city of Drogobich (Lviv region). Walking around the city, I went to the store of things self made. It was very nice there. A lot of different very stylish and unusual things, and again ... a table from a sewing machine ... Then this idea was already firmly planted in my head, and besides, I infected my husband Kostya with it.
The search began for the machine, which, fortunately, did not last long. My great-aunt offered us to pick up her old sewing machine, which has been lying in her country house for a long time. A lot of time passed before we transported this “treasure” from Vinnitsa to Kyiv, then another six months, until we were ready to implement this idea. And we made the table itself in just 5 days and just fell in love with it!
How did we do it?
Step 1
They dismantled the table, threw out a completely outdated countertop and other parts from the typewriter. True, they left a box (we put it in it). All the details were washed in the shower, cleaned from a hundred years of plaque with a metal brush.


Step 2
Leg painting. Kostya took everything metal parts to the garage and painted them, hanging them on a wire.

Painted with wear-resistant paint 4 in 1. It turned out a very beautiful matte finish.

Step 3
Bought pine furniture board. Dimensions: 100 x 60 x 1.8 cm.

For painting, we chose the “Pinotex Interior” transparent paint and tinted it in a purple-burgundy color. This color is just right for the color palette that we have defined for the room. In addition, it is dark enough not to distract or irritate the eyes while working.

We decided to cover the tree with a roller, because it applies paint more evenly than a brush and does not leave streaks and furrows.
The tabletop has been painted three times. Between layers kept for 2-3 hours, although this paint dries almost instantly. The peculiarity of "Pinotex Interior" is that it does not leave a greasy layer, but is completely absorbed into the wood, since it is water-based. That is, the effect is obtained, as from a stain, but this paint, in addition to tinting, also protects the wood.

Here is such a velvety effect after a three-layer coating. But we decided to also cover the table top with acrylic varnish for reliability, since this sewing machine table will be complete computer desk, for which we will sometimes drink tea or coffee :) We were not sure that Pinotex would react favorably to spilled coffee. And the polish will hold up.

Step 4
Lacquering. Why did we choose acrylic lacquer? Firstly, because there is a child in the house, and even if you cover the countertop with oil varnish in the garage, you will have to wait a while until the unpleasant toxic smell disappears. Acrylic varnish is absolutely non-toxic. Secondly, it dries quickly and on the same day you can fix the table top. Thirdly, this varnish can be applied with a very thin, imperceptible layer, which was to our advantage, because we still wanted to preserve the velvety.

During painting, the varnish has white shade, but then this effect disappears and the layer becomes completely transparent.

Step 5
Table marking for fixtures. We did it with masking tape so as not to stain the paint layer with a pencil (or something worse :)). Everything was measured, the location of the legs was determined.


Installed the tabletop in the right place.

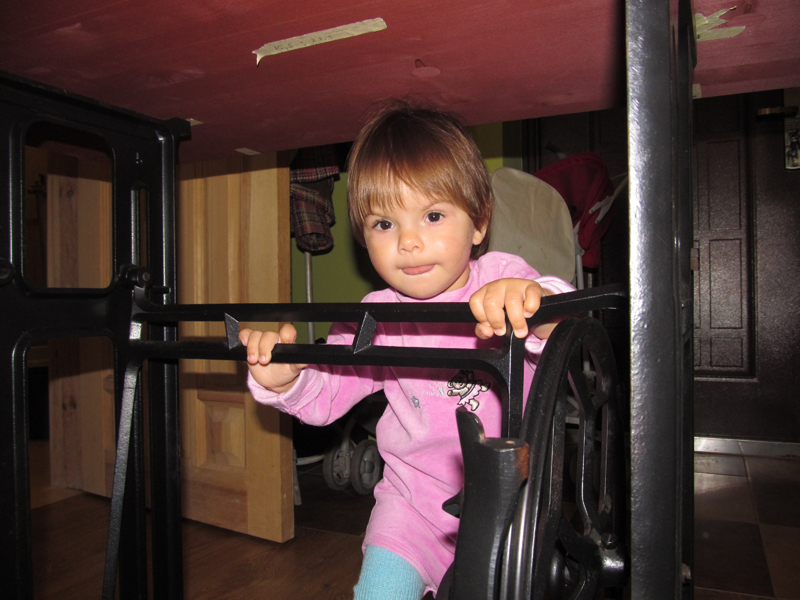
Xenia actively helped :)
We put marks in the holes on the legs through which the old tabletop was attached. They will be clearly visible on the tape. According to the marks, we drill holes for furniture nuts.


After the holes are ready, you need to hammer furniture nuts into them.

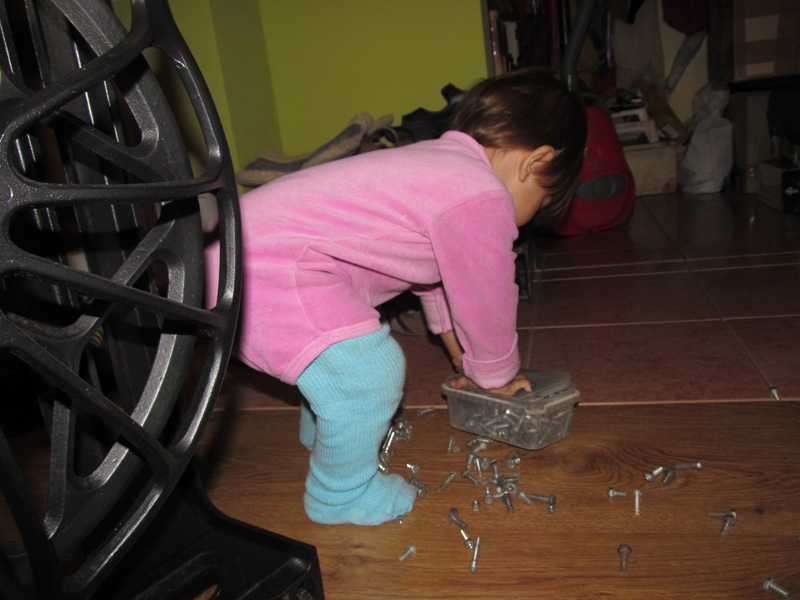
You can also play with nuts: scatter them throughout the apartment, and then collect them together with the whole family. This lesson is suitable for taking a little break from the hard work on creating a table from a sewing machine :)
We fix the table top on the legs and the table is ready! This is what Costino looks like now workplace. True, now we have to fight for the opportunity to sit at the computer desk, because we only have one graphics tablet, and I really want to draw on it :)))

To this love story Ficus also hung around and, in my opinion, very successful.

Now the modest Soviet chair is waiting for alterations. He will become a concise addition to the male workplace. But that's another story…
We advise you to read
 Psychological characteristics of children in adolescence
 Transferring a child to another school - the procedure and necessary documents Whether to transfer a child to another school
, diagnosis, treatment Treatment of urogenital chlamydia") Chlamydia urogenital - description, causes, symptoms (signs), diagnosis, treatment Treatment of urogenital chlamydia
Chlamydia urogenital - description, causes, symptoms (signs), diagnosis, treatment Treatment of urogenital chlamydia The benefits and significance of hydroamino acid threonine for the human body L threonine what

