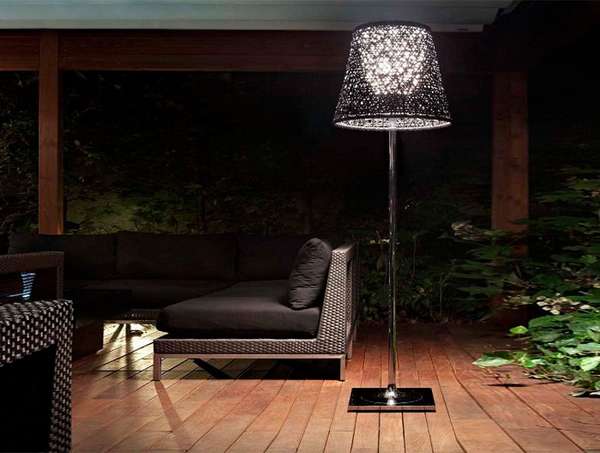
If you have a floor lamp or a lamp that you would like to update, or you want to purchase an original thing that no one else has, then why not initially make it yourself at minimal cost? It's no secret that often original designer items cost a decent amount and it is very difficult to choose exactly what is needed and fit into an existing interior as organically as possible. We bring to your attention an instruction on how you can update a floor lamp / lamp with a lampshade with fabric, and therefore give it a unique look.
You will need:
- lamp with lampshade/floor lamp,
- the fabric you like, which will be sheathed by our floor lamp (take fabric with a margin),
- aerosol glue (spray) for fabric,
- flame retardant spray for fabric,
- newspaper (for "pattern")
- wool thread,
- marker (felt pen, pen),
- rope,
- crayon / remnant of dry soap.
Process:
1. Make a pattern for a floor lamp.
If you have a cylindrical floor lamp, measure the girth and height of the lamp and draw a pattern for it in the form of a rectangle. But if it is trapezoidal, you will have to tinker a little.
To do this: take a woolen thread and tie it vertically tightly around the floor lamp, make sure that the thread sits firmly and strictly vertically perpendicular to the surface (i.e. not shifted). Spread sheets of newspaper connected to each other on a hard, stable surface (a table, for example), pick up a lamp and start gradually moving a floor lamp over the newspaper (as shown in the figure). At the same time, mark the “trajectory” of the movement of the floor lamp at the same time. Start the movement from a place that is tied with a woolen thread, as soon as you make a whole circle, you can finish.
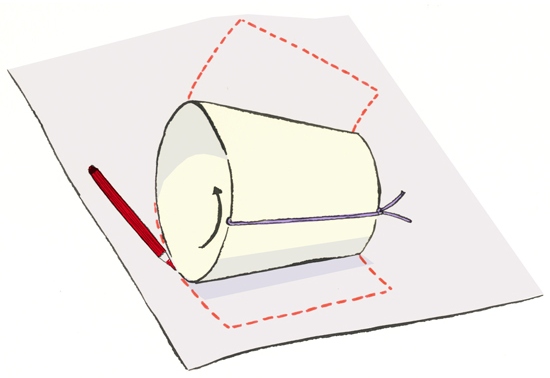
If you have a well-filled hand, then, of course, you can get the exact shape of a floor lamp in another way, and not only by eye. For example, this can be done with a meter and a newspaper, only this time directly apply it to a standing floor lamp. Or you can replace a newspaper with a felt-tip pen with a piece of unnecessary dark fabric and a piece of chalk or a dry bar of soap. In general, how you make a pattern is up to you, the main thing is that it fits the floor lamp.
2. Add 1 cm to each side of the pattern (they are needed for future seams). Again, with a rounded pattern, you will have to tinker a bit, adding 1 cm evenly. Cut out the resulting pattern.
3. Attach the pattern to the back of the fabric, circle its outline with chalk, cut out the fabric.
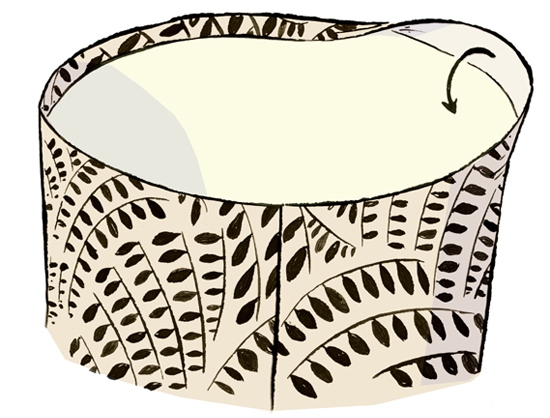
4. Now it's time to grab the fabric spray adhesive and carefully, following the instructions on the can, distribute it along the edges of the floor lamp and spray the edges of the fabric with it - as you see fit. Stick the fabric on the floor lamp, do the same procedure with the indents of the fabric and bend them as shown in the figure. Give the glue time to dry.
5. If you are completely satisfied with the result and the fabric on the floor lamp sits firmly, then you can treat the entire floor lamp with a flame retardant fabric spray.
Now you know how easy it is to update a floor lamp with your own hands at minimal cost!
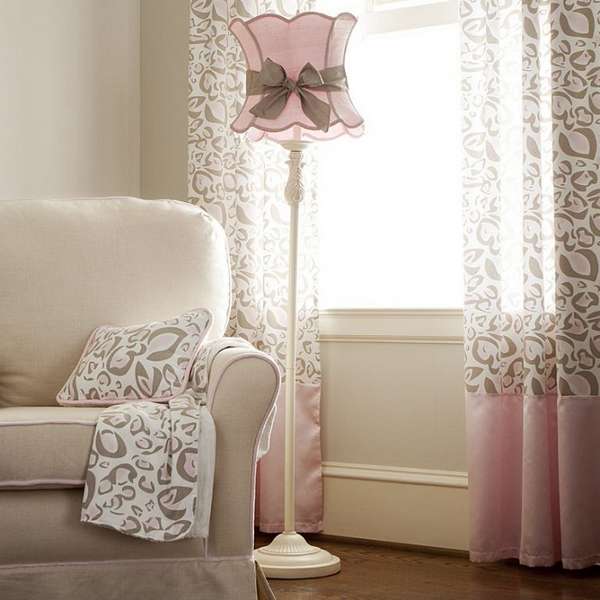
Want to add some personality to a room? Make the lampshade the center of attention with a beautiful fabric. may be a favorite sofa cushions or complement the base of the lamp. Fully customizable and original, this project is sure to give your room a new look! The concept is quite simple and easy to do with your own hands. See what can come of it.
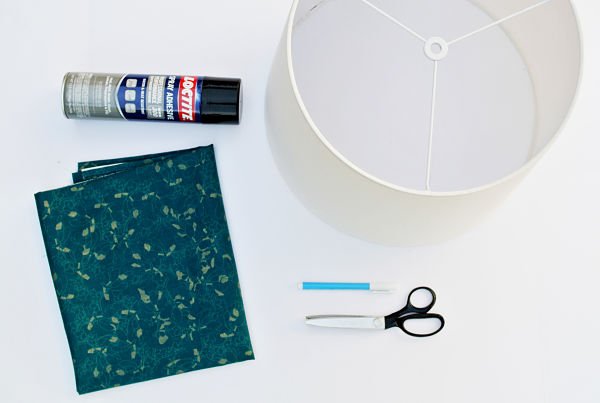
How to update a lampshade. Necessary materials:
ready-made lampshade as a base, fabric according to the size of the lampshade, glue, scissors with zigzag edges.
Lay the fabric wrong side up on a flat surface to get rid of excess wrinkles. Twist the lampshade over the fabric. If its diameters are different, then you get a curved figure. Remember that there should be enough fabric to cover the lampshade and hem allowances.
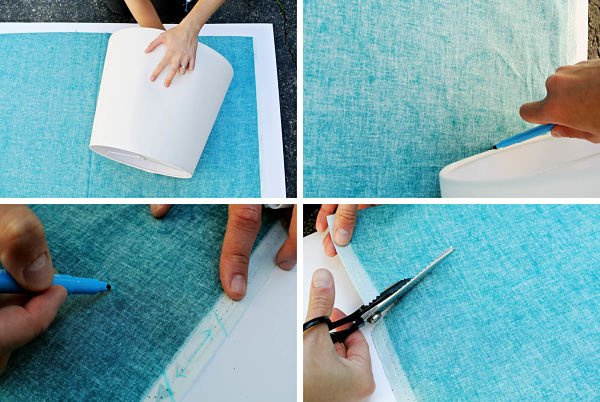 Then circle the outline of the lampshade and add allowances. Do this carefully, remembering the saying "Measure seven times, cut once." The lines will probably be curved and parallel, so measure the distances in several places, which should be the same along the entire length.
Cut out the fabric with zigzag scissors. This will allow you not to process the edges of the fabric additionally.

After the piece of fabric is ready, coat the lampshade with glue. Now you can gently attach the fabric and carefully smooth it with your hands. From below, bend the edge inward, having previously smeared it with glue.

Since allowances were made along all edges, there will be additional matter that is superimposed on the fabric from the other end from the start of wrapping. These excess fabric must be glued on top. To do this carefully without staining the fabric on the lampshade, use a piece of cardboard or paper.
Fold the edges at the top of the lampshade around the wire, cutting the allowance slightly with zigzag scissors. Glue to the inside of the lampshade. After that, all edges should be folded. Let the glue dry well.
How to restore a floor lamp?
Do-it-yourself floor lamp restoration.
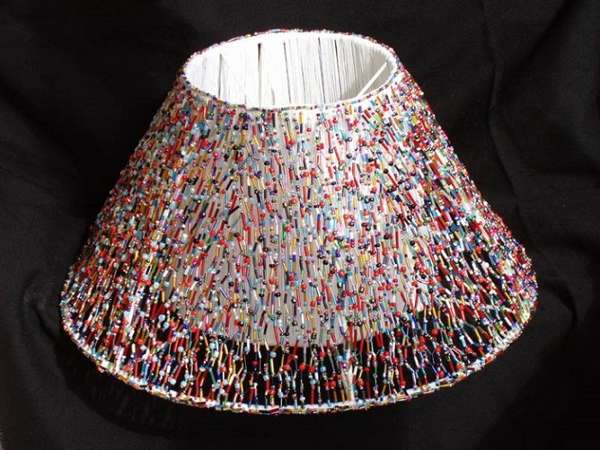
If you have an old floor lamp at home, you can update its lampshade with your own hands, decorate it with fabric, beads or braid, make a beautiful original thing that will be in a single copy.
Materials and tools:
- the cloth;
- fringe;
- cotton braid;
- artificial flowers;
- linen gum;
- scissors, threads, needles;
- ruler, cm;
- sewing machine.
Work instructions
How to restore an old floor lamp? To do this, you need to update all its main parts. Before starting work, remove the lampshade from the lamp and remove the old close-fitting from it. It is better if you do this over a sheet of paper. After that, the frame must be washed and dried. Next, you need to measure it and make a pattern for making a new cover.

To create a tosher with your own hands you will need: buttons, threads, fabric,.
If the lampshade has a cylindrical shape, then it is necessary to measure the height of the stand located under it, as well as the circumference of the frame ring. Make a pattern in the form of a rectangle. The height of the rectangle will be the corresponding rack height. The length will be equal to the circumference of the ring.
If the sides of the frame are made in the form of trapezoids or rectangles, then you need to measure their lengths, make a drawing for any one part. For the entire cover, you will need to cut out as many parts as there are sides to the design.
Then choose the right fabric. To do right choice, turn on the lamp, look at it through the fabric. Evaluate whether a lampshade made of such a fabric will successfully fit into the interior of your room. See how your chosen fabric transmits the light from the lamp. Structures made of thin materials, through which the frame and the lamp are visible, should preferably be made with a lining.
After that, it is necessary to cut out the details of the covering from the selected material according to a pre-prepared pattern. Allowances must be added to the upper and lower sides of the parts, which are needed in order to bend the material and make a drawstring for a cord or elastic band. If the pattern was made for only one part, you need to add seam allowances on the sides of each.
All edges of the parts must be finished with an overcast seam and sewn along the sides. Then the upper and lower allowances must be folded inward, make a drawstring, in which a small hole must be left. A cord or elastic band will pass through it.
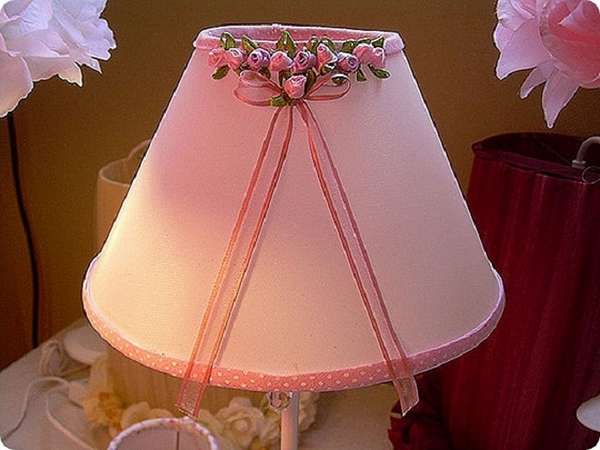
After that, wrap the racks, as well as the upper and lower rings, with cotton tape. Pull the material over the frame, insert the cord into the backstage. The resulting finished exhibit can additionally be trimmed with beaded or textile fringe by sewing it to the product along the lower ring. Then the surface of the resulting lampshade can be finished with artificial flowers. You need to select fringe, flowers, finishes in accordance with the interior of your room. Attach the restored lampshade to the floor lamp stand. By updating appearance antique floor lamp, you can improve the lighting, create an excellent design of the recreation area in your home.
Making a floor lamp with your own hands is not at all difficult if you put a little imagination and creativity. This task will certainly require some time, special tools and materials, but the end result is sure to please its owner. A lamp made by yourself will have personality traits and features, since no one will have this. This creative process allows you to create floor lamps of any desired size and style, which is most suitable for the room. Often found on sale suitable option it’s hard, and it won’t be cheap, but in order to make a floor lamp with your own hands, you can use any materials at hand. Some difficulty may lie in wiring it for lighting, but even the fairer sex can do it. So, we will consider step by step all the processes of making a lamp at home, as well as different types lampshade decoration.


Do-it-yourself floor lamp: preparatory process
Before starting work, you need to draw up a sketch of the proposed lamp, decide on the desired height, the shape of the lampshade and its design, and make the appropriate measurements. A standard set of tools that you may need include: a drill, pliers, a knife, scissors, a screwdriver, special glue, a pencil and a tape measure.
We say “basic”, because, depending on a particular model, additional accessories may be needed. The individual elements from which the floor lamp will be assembled with your own hands are: a wooden or aluminum tube for the frame, fasteners, an electrical system that includes a cord with a plug, a switch, a cartridge and a light bulb, wooden planks for decorating a stand, a body (mesh, an openwork plastic bucket, etc.), material for decorating a lampshade and decorative elements.
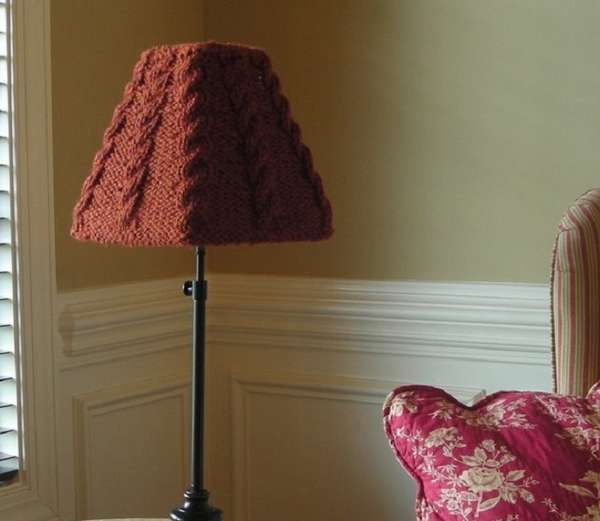
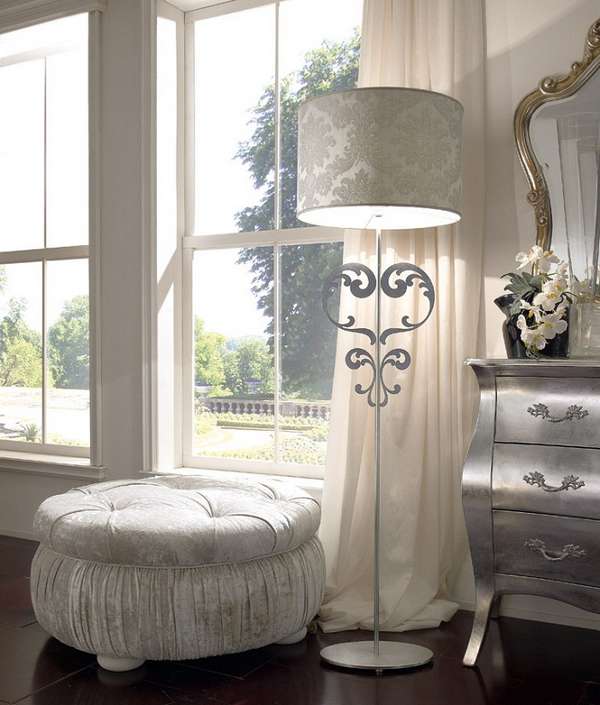
A beautiful stylish lampshade can be built using a wide variety of materials, such as colored wire, fabric, paper, unnecessary plastic bottles, wallpaper, etc. A do-it-yourself floor lamp (the photo in the article demonstrates this) can be made of a completely original design if decorative clay is used in the manufacture of the lampshade, which is a rather plastic material, dries quickly and lends itself perfectly to decoration.
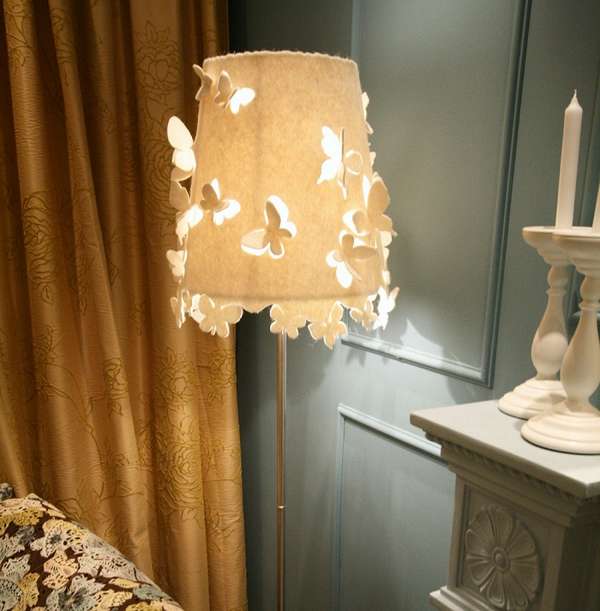
Beads, beads, shells, rhinestones, appliqués made of fabric or paper are often used for decor, while the decoration is carried out taking into account the stylistic direction of the room in which the floor lamp will be located. The simplest approach when creating a new lighting piece of furniture is the reconstruction of the old one.
How to update a lampshade for a floor lamp with your own hands
No matter how beautiful this or that piece of furniture is, and, in our case, a floor lamp, over time it may lose its aesthetic qualities, or cease to correspond to a new repair carried out using a different style. In this case, it is not necessary to resort to buying a new model - it will be enough to re-register the lampshade for the floor lamp with your own hands, and there are many types of implementation for this.


The simplest of them is to paste over the ceiling with wallpaper. All that is needed for this is, in fact, wallpaper and special glue for them, which can be purchased at any hardware store. It is worth choosing wallpaper by illuminating them with a light bulb in order to immediately understand what kind of light the floor lamp will give when turned on. Having previously measured the circumference of the ceiling, cut off a suitable piece of wallpaper. The cover must be removed from the leg of the floor lamp and wiped with a degreasing compound. After such preparation, wallpaper glue is applied to the ceiling, then wallpaper is applied and fixed on the surface of the ceiling. It is not worth pressing them strongly, as unwanted tubercles may form, which are difficult to eliminate, and the aesthetic appearance of the lampshade will be lost. When the design dries well, it is returned back to the leg. The updated do-it-yourself floor lamp is ready.


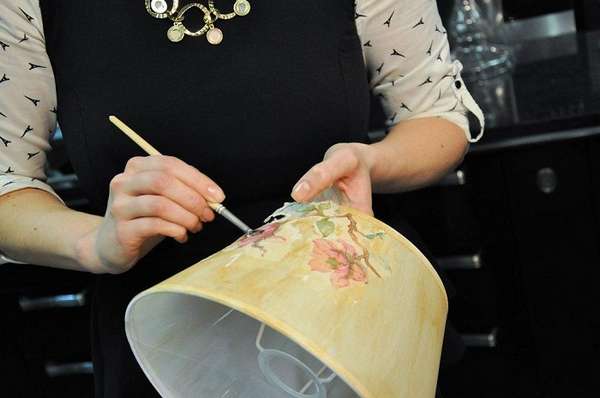
An excellent way to design a lampshade, as well as its partial restoration, is to use the decoupage technique. For such work, it is recommended to take napkins with a solid pattern that have shades that match the interior of the room (for example, you can prepare napkins with the image of fruits for the kitchen, cartoon characters for the nursery, etc.).
The shade of the lampshade, initially, is primed with white matte paint. This is necessary to ensure better adhesion to the napkin. After drying (approximately about 1 hour), we begin, in fact, the process of pasting itself.
It is worth noting that, in the case when the napkins are multi-layered, it is necessary to carefully separate only the layers with a pattern. Glue (PVA or wallpaper) is gradually applied to the prepared surface of the lampshade and napkins are glued. You need to act as carefully as possible, since it is quite difficult to fix an incorrectly fixed napkin without damaging it. When the ceiling is completely processed and a drawing is created, it is left to dry, and then it is treated with glue again and left to dry for a day.
At the final stage, you can cover the lampshade for the floor lamp, decorated with your own hands, with acrylic varnish to give the finish strength and moisture resistance. Such a floor lamp cover can be decorated with beads by gluing them with a glue gun.

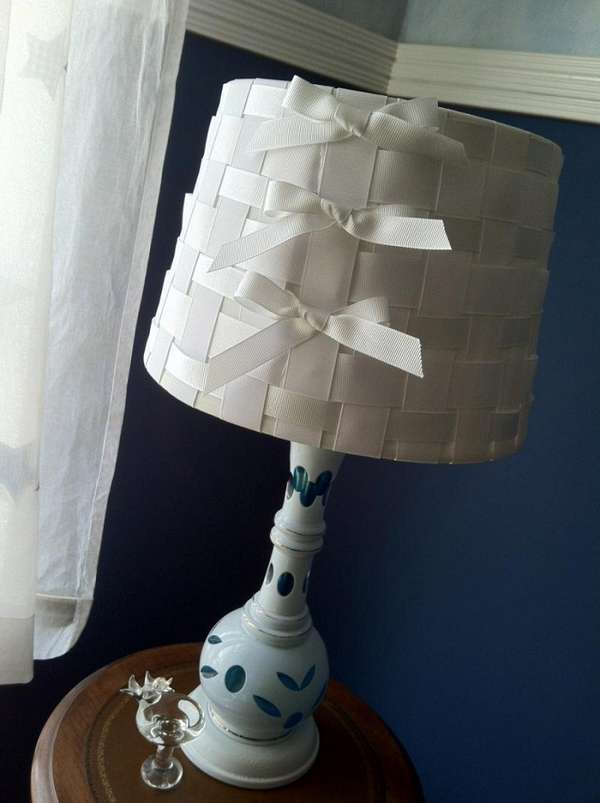
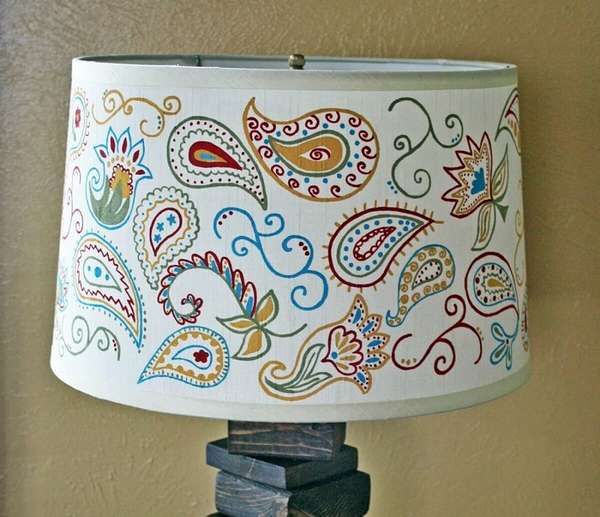
There are actually quite a few lampshade design techniques. Some craftsmen braid it with satin ribbons in a checkerboard pattern and decorate it with bows, use appliqués and embroideries. One of the extraordinary and original solutions how to update a floor lamp with your own hands, and, in particular, a boring white lampshade - paste it over with used photographic film (in this case, the ceiling must have a cylindrical shape). Refracting through the frames, the light will cast bizarre patterns into the interior.

Do-it-yourself floor lamp
Do-it-yourself production of this floor lamp, involves three main stages: the construction of a leg with a base and electrical wiring, the design of a frame with a lampshade, and, in fact, the assembly of the entire structure together.
Having undertaken to design a floor lamp with your own hands, the first thing you need is a stand. You can make it from gypsum, the amount of dry mix of which is about 3 - 5 kg, depending on the size of the lampshade. As a leg you will need an aluminum pipe. Some savvy craftsmen use a fragment of an old tubular metal cornice as it.
For the frame, you will have to purchase a grid, the width of which will be equal to the height of the desired lampshade. The mesh is bent in a circle until the desired diameter is obtained, the excess part is cut off, and the edges are fixed by bending the wire. For structural strength, aluminum tape can be run along the entire circumference. Thus, the basis for the lampshade turned out.
Now it's all about fantasy. You can process the frame of a floor lamp with your own hands from a metal mesh in a variety of ways. For example, tie it with fluffy threads using the macrame technique, and tie flowers on top.
In the middle of the last century, things made by knitting macrame were very popular, and, as they say, everything new is a well-forgotten old. If a floor lamp is being made for a modern high-tech room, the best solution would be to braid its frame with black wire, while leaving gaps, and then paint it with black spray paint.

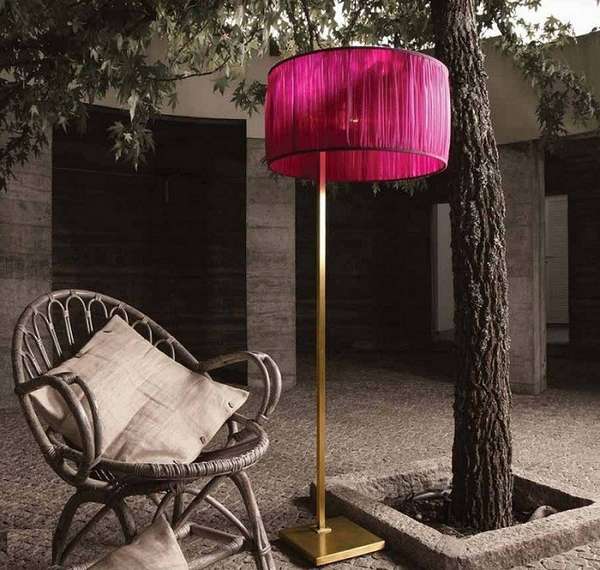
Do-it-yourself floor lamp made of fabric
You can also make a floor lamp with your own hands from fabric. In this case, the frame will be a thick wire structure. Any material can be used as a fabric, but opaque is better (so that the frame is not visible), such as cotton, taffeta, dark silk, etc. Blue, yellow, orange, green or red will be the most suitable colors - they will give warm light. If you choose a fabric with a floral print and decorate the lampshade with elegant ruffles and bows, you can get a wonderful floor lamp for a room in country or Provence style.

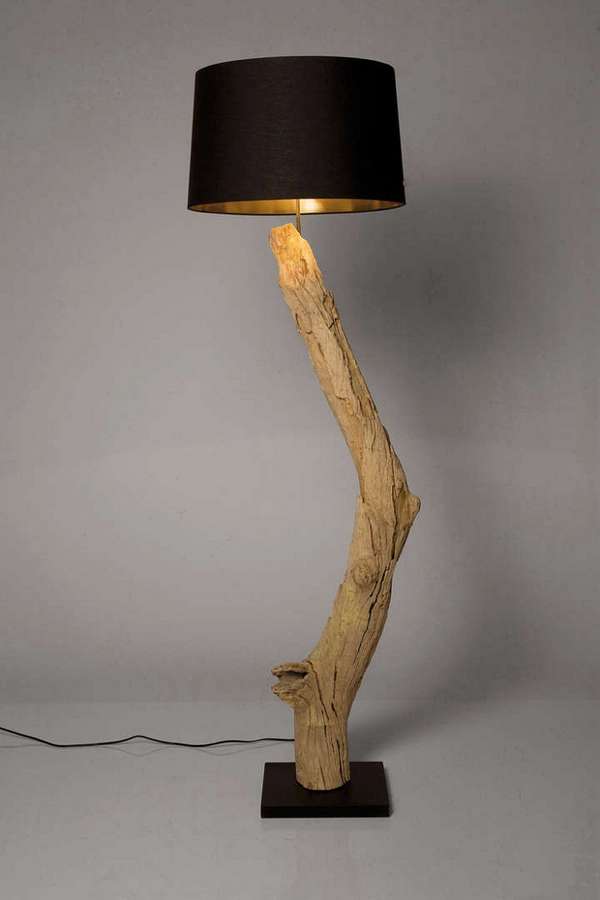
Do-it-yourself wooden floor lamp
If the interior of the room is decorated in Scandinavian or eco-style, which is quite popular these days, you can make a wooden floor lamp with your own hands, or rather, from tree branches, which can be found in any park or forest. A massive, tripod-shaped branch will serve as a good base for a floor lamp, and the upper part will serve as a place for a lampshade attached to a rope. Or, on the contrary, the trunk can be mounted in a plaster stand, and several lampshades can be fixed on diverging branches. The trunk can be decorated with multi-colored threads and lace. It should be noted that wood is a flammable material, therefore, for safety reasons, such floor lamps are equipped with LED or energy-saving light bulbs.

We advise you to read
 Psychological characteristics of children in adolescence
 Transferring a child to another school - the procedure and necessary documents Whether to transfer a child to another school
, diagnosis, treatment Treatment of urogenital chlamydia") Chlamydia urogenital - description, causes, symptoms (signs), diagnosis, treatment Treatment of urogenital chlamydia
Chlamydia urogenital - description, causes, symptoms (signs), diagnosis, treatment Treatment of urogenital chlamydia The benefits and significance of hydroamino acid threonine for the human body L threonine what

