I accompanied the merchant to Tortuga, or rather to his lighthouse, and he gave me the plans of his competitor, another merchant, whose hold was full of mahogany. He said that in two weeks he would have to appear on Cayman Island to replenish supplies of drinking water. I thanked for the information and did not harbor a grudge against my former companion, instead I moved to the port of Tortuga and exchanged my Lugger for a Sloop, which was a little better than mine and could accommodate 15 more people, not to mention a larger hold, additional guns more high caliber. I did not load my ship, because my sailors were not very good gunners, and I myself, not too accurate, so I took 6-pound guns (3-pound on the Lugger), loaded the ship with gunpowder and shells, provisions took enough for the trip to the Caymans and more to spare for the days of waiting for the ship. I did not load the ship too much and relied on speed and maneuverability, because the battle was ahead of me against the Flute, whose hold was supposed to be bursting with mahogany, therefore, there would be a battle against a clumsy heavyweight.
Cherishing dreams of a mountain of gold and glory, I sent my ship towards the Cayman. Along the way, there were pirates and Spanish patrols, but they would never catch up with my swallow. Arriving on the island, three days earlier than expected, I decided to inspect it for profit, and other hunters like me. As soon as he landed on the shore, the sailors immediately ran up. They showed that they had not eaten for several days and were very glad to see my ship. They asked me to serve, but I recruited sailors in the tavern of Tortuga and I did not have a place for them. Well, I did not leave them there on the island with empty hands and a stomach. He ordered his sailors to provide them with a boat, medicines and provisions. That would be enough for them to get to the crowded shores of Cuba, and he himself went into the interior of the island. After several hours of searching, I found the entrance to the cave. There was an empty chest in it, and there was a disgusting atmosphere in the cave itself - it smelled of a curse, so my bodyguard and I hurried out of it as quickly as possible. Having examined the whole island, I returned back to the ship. Those sailors have already gone cold, apparently they decided to try their luck and try to swim to the mainland or to Cuba. Good luck to them on this.
I ordered the ship to be disguised and began to wait for that merchant. Three days later he appeared on his flute under the French flag. About this, his "friend" forgot to mention, so I ordered to change my French flag to the Jolly Roger and went to meet the flute. My sloop cut through the waves like a hot knife through butter, and in half an hour you could already see the surprised face of the merchant through my cheap binoculars. On the deck of the flute, the sailors began to run, interfering with each other. Salaga, I thought.
The battle went on for several hours. My sloop seemed to be dancing near the big and clumsy elephant and stinging in its most vulnerable parts. I did not have much gunpowder, because I did not want to overload my ship, so the first thing I did was fire on the crew of the ship. Let them be newbies, but there were three of them, and maybe even four more than us. It's not worth the risk. So the buckshot stocks were running out, and the flute's crew had noticeably decreased, and his sails had also suffered, now he was even more clumsy. I didn't let this unfortunate captain turn his ship sideways towards me, constantly adjusted my side to its stern and fired from all five 6-foot guns. Well, the gunpowder ended in the hold.
My sailors are only 30 out of 59, what a pity that not all of them will be able to see the gold that I will receive for the goods that the flute is in the hold, if it really is there. But there was nowhere to retreat, and it was stupid - we took up arms and boarded. There were three enemy sailors for each of our sailors, and this is taking into account the fact that we fired at them with buckshot for so long that it would be enough to cast a large bell.
How many deaths. Of all the sailors, only four squeezed out, and then, three of them were badly wounded. It was impossible to allow the death of the rest to be in vain and armed, my Indian friend and I went down into the hold, where ten more French sailors were waiting for us. Their number is against our skill. I did right choice that saved this Indian from the gallows. The victory was ours, and I had to meet with their captain. The merchant turned out to be not accommodating, but I wanted to offer him to surrender and sail on, with his surviving sailors or those taken prisoner. He thought that he could defeat me and doomed his people to slavery - well, it would be on his conscience.
And the merchant did not deceive. The hold of the flute was completely filled with mahogany. We reloaded the goods into the hold of our ship for several hours, and then headed back to Tortuga. The way back turned out to be quite calm, and the wind was ardent and glorious. The risk paid off and I earned fifty thousand pesos, of which ten thousand went to repair my swallow, recruit a new team and resupply. Ahhhh, what a glorious day it was!
Steel arms:
Spoiler
Poker
Old, rusty poker. It can hardly be called a weapon, but it is quite heavy and has a strong handle.
Brass knuckles
Sharp spikes and a comfortable grip allow this brass knuckles to serve as a good tool in the hands of a master.
dusac
Just a rusty piece of iron; even the brace that once protected the hand fell off from old age ...
Brett
Musketeer sword. Such weapons were used by musketeers in the military service of various states.
Malkus
A steel saber with a heavy blade that can cut through any mail.
Kutlas
Saber with a short, wide blade. An ideal weapon for boarding fights. And, nevertheless, this is the weapon of a simple pirate, and not an officer, and, moreover, not a captain.
Dagger
An ordinary dagger that is only good for close combat with an unarmed opponent.
Schiavona
An elegant and deadly sword of Venetian mercenaries from Dalmatia.
Saber
Ordinary soldier's saber. The weapon is simple, but cuts well.
Maltese sword
Sword of the Knights of Malta. This sword is good for both attack and defense.
Italian rapier
Graceful rapier of the Italian masters. A beautiful and at the same time dangerous weapon in skillful hands.
Katzbalger
Short sword of the German mercenaries. It was used mainly for outrages and debauchery, therefore it is not very suitable for protection.
Scottish broadsword
A type of broadsword common in Scotland. Perfectly suited for both defense and attack.
sea cleaver
A weapon common among military sailors. The thing is quite ordinary, but made to last.
estok
With this sword, you can easily break through any block; and even the strongest armor is unable to protect against his powerful piercing blow.
French rapier
The lightness of the blade of this rapier allows you to inflict lightning-fast injections on the enemy. A very effective weapon for dueling fights, as well as for a fight with several enemies.
Italian sword
This sword is over a hundred years old, but it hasn't affected it in any way. Needless to say, the Italian gunsmiths knew their stuff.
spanish sword
Swords of this type were often preferred by the Spaniards. The blade of this sword bears the mark of one of Toledo's finest craftsmen.
Flamberg
Germanic sword, equally adapted for both stabbing and slashing.
Crackemart
A weapon popular with English and French sailors. For a saber, perhaps a little heavy.
german rapier
A simple but effective rapier forged in Germany.
Athill
The insanely sharp blade of this beautiful weapon is capable of cutting through almost any obstacle in its path.
Falchion
Heavy knight sword. There are few people who can withstand his powerful blow.
English rapier
Rapiers like this one were made in England for aristocrats and nobles. Often used as a dueling or award weapon.
Spanish rapier
Rapier of Toledo craftsmen with a light but rather strong blade. The weapon of choice for Spanish duelists.
Hurricane
A very balanced blade that allows a hurricane to pass through enemy lines.
Spanish saber
This blade comes from the glorious forges of Toledo, which not only breaks through almost any defense, but also protects its owner well.
Cerberus
A rather rare blade in the Archipelago, and it is not known where its name came from. However, this short blade has always been preferred by reckless brave men and adventurers, for it is excellent not only in attack, but also in defense...
Rapier Morgan
The famous pirate's rapier, isn't it the key to his success? Razor-sharp blade, excellent balance - all this allows you to survive in any mess
Tanat
Sword of the servants of the Order of Dagon. According to legend, the prototype of this sword was forged from a meteorite that fell from heaven.
Cavalry saber
A very, very good example of the weapons of the French cavalry.
Dutch infantry saber
An excellent example of a weapon. Not everyone will be able to resist his lightning-fast chopping blows.
Howegen
Very good heavy single-edged sword. This is a real rarity: there are only a few of these in the entire archipelago.
french sword
One of the best works of French masters. Great collectible weapon.
Kortelas
Genoese sword. Once such swords were armed with professional fencers in Italy.
Sword
Heavy and powerful weapons are not the best solution for a quick attack, much less defense. However, this is more than made up for by the damage it does.
Axe
Boarding axe. A powerful weapon when attacking, but almost useless for defense.
Ax
An effective weapon for destroying rigging, as well as for hand-to-hand and boarding fights. The sharp protrusion on the butt is able to easily penetrate any armor.
Hatchet
Boarding hatchet. Effective only with a sudden attack.
macuahuitl
An obsidian Aztec sword with an unpronounceable name. Good heavy weapons are always valuable, even if they are made of wood and stone.
Combat claws
A series of deadly razor-sharp blades will leave an indelible mark on the cooling body of its victim...
Pistols:
Spoiler
Pistol
Small cheap pistol. Dangerous only at a very short distance.
long barrel pistol
Regular long barrel pistol. Decent range and stopping power, but it takes a long time to reload and isn't very accurate.
Mortar
Real hand gun. Great stopping power, but range and accuracy leave much to be desired.
Quadruple pistol
Four pistols in one. It takes a long time to recharge, but it's worth it. Using this pistol requires the Marksman skill.
Brether pistol
This pistol is a true work of art. Excellent range and accuracy of fire, fast reloading, high lethal force - a weighty argument in any dispute.
double barrel pistol
Great pistol with two barrels. For those times when one bullet isn't enough. Using this pistol requires the Marksman skill.
Blunderbuss
Powerful, lethal, rather heavy and rare killing tool in these waters.
Double-barreled blunderbuss
An excellent example of the quality of English firearms. An excellent blunderbuss gun for the master shooter.
Shotgun
Weapon of another time. Why and how it ended up here remains a mystery. Using a shotgun requires the Sharpshooter skill.
Breastplates and clothes:
Spoiler
Common Cuirass
This cuirass was worn by ordinary soldiers. It does not provide good protection, but it is still able to reduce the impact force by 10 percent.
French cuirass
This cuirass is not perfect, but worthy of consideration when encountering pirates. Reduces saber strike damage by 20%.
Spanish cuirass
Breastplate made the best craftsmen Castile. Able to take a good cut from a cutlass, reducing damage by 25%. Only officers could afford to wear it.
Dutch cuirass
Cuirass of Dutch officers. Reduces saber strike damage by 22%.
Dear Cuirass
Breastplate of gilded metal. A sign of wealth and prosperity. Perfectly restrains any blow, reducing the impact force by 35 percent.
castoffs
Such clothes suit only a professional tramp. Long unwashed, it exudes a disgusting smell that can scare away any person in their right mind. (+20 stealth when worn)
Merchant clothes
Well-cut, made of fashionable material, such clothes suit a wealthy gentleman and only he can afford. (+20 trade when worn)
Nobleman's clothes
Meet by clothes, see off by mind. Making a great first impression is the mission of this exquisite garment. (+20 authority when worn)
Spyglasses:
Spoiler
cheap spyglass
A simple spyglass with scratched lenses. This junk has no place in the pocket of a self-respecting captain.
Through it, you can only see the type, name and speed of the ship.
Ordinary spyglass
Ordinary spyglass. The lenses are quite decent, although it can be better.
Through it, you can only see the type, name, speed of the ship and the degree of damage to the sails.
Good spyglass
Expensive spyglass with excellent lenses. Allows you to see the smirk on the face of the enemy boatswain for a mile.
Through it you can see: the type, name, speed of the ship, the number of guns and the degree of damage.
Excellent spyglass
Spyglass made by a craftsman, with lenses made of the purest rock crystal. It can only be better than the exclusive version.
Through it, you can see: the type, name and speed of the ship, the degree of its damage, the number of crew, guns, and what they are loaded with.
Exclusive spyglass
This optical instrument is more like a telescope than a spyglass. Lenses of the purest rock crystal, with a perfect fit, and the use of a tripod to avoid hand twitching, allow you to see absolutely everything, even the type of guns on the ship or in the fort.
totems
Spoiler
Totem Shochiketsal
Shochiketsal, goddess of flowers and love. (+20 luck)
Totem of Mictlantecuhtli
Mictlantecuhtli, god of the underworld. (+20 stealth)
Totem of Quetzalcoatl
Quetzalcoatl, god of the morning star, lord of the elements. (+20 defense)
Mixcoatl Totem
Michcoatl, god of the hunt. (+20 Accuracy)
Totem Tezcatlipoca
Tezcatlipoca, patron saint of priests, punishing criminals. (+20 pistols)
Totem of Chalchiuitlicue
Chalchihuitlicue, goddess of the sea and lakes. (+20 prestige)
Totem of Huitzilopochtli
Huitzilopochtli, god of the blue clear sky. (+20 medium weapons)
Tlaloc Totem
Tlaloc, god of rain and thunder, lord of all edible plants. (+20 light weapons)
Totem Mayahuel
Mayahuel, goddess of fertility, who gave people an alcoholic drink. (+20 heavy weapons)
Totem of Tonacatecuhtli
Tonacatecuhtli, the creator god who gives food to people. (+20 trade)
Totem Camashtli
Camashtli, god of the stars, hunting, war and fate. Fire maker.
Totem of Sinteotl
Sinteotl, the young god of corn. (+20 Navigation)
Totem Tlasolteotl
Tlazolteotl, the goddess, the devourer of dirt, cleanses from illicit passions.
Totem Tonatiu
Tonatiu, god of the sky and the sun.
Xipe-Toteku Totem
Xipe-Toteku, god of crops, patron of goldsmiths. (+20 to repair)
The most complete and most interesting questions in the comments.
The most adequate difficulty for this part of the Corsairs is a sailor. Preserved almost all game factors (full calculation of the wind, etc.) and at the same time fights do not become something unrealistically epic and difficult), or cabin boy, if you prefer a more arcade game.
Save as little as possible during sea battle. This may cause the flight.
You should not do all saves in one slot, and even more so use only quick save (F6). There is a small chance that the save file will be corrupted when overwritten, and you may also run into a situation that is too difficult to go through or some other annoyance.
If you're going to take the Growing Life and Growing Energy perks at all, then try to pick them up as early as possible. This will allow you to get some "extra" hit points and energy as you rank up.
After talking to your treasurer in the company cabins, you can use him to purchase goods in shops. To do this, in the dialogue with the merchant, select "my treasurer will buy goods", but remember that he will sell everything that is superfluous, including that which is at a value of zero.
At the beginning of the game, if you do not want to incur additional costs without any bonuses, disable the "Loot Section". Although this function looks more realistic.
For any blade, the value of the "Balance" attribute falls within the range from 0.0 (center of gravity at the hilt) to 2.0 (center of gravity at the tip), respectively, a value of 1.0 is the middle, or the most balanced blade (at the same time, there is no optimal value for the indicator, the player will have to decide on his own preferences). The larger the number, the greater the power of the weapon. but its speed is less and, apparently, the fatigue from its use is stronger, although I am not sure about this.
Weight greatly affects the energy consumption when using this weapon.
Weapons of the "Broadswords and Axes" class additionally take away a certain part of the enemy's energy with each hit.
You can use the "Three Schools" amulets at the same time, but you cannot use offensive and defensive amulets at the same time.
"Schools of magic" are determined by the color of the stone in the upper left corner, and their orientation is determined by the border around the stone:
Claws Attack.
Sun-Protective.
Ouroboros-Sustainers.
Well, judging by the manual, there are also unique symbols:
Black morion in a bone socket means danger from an inactivated object;
A white pearl in a bone socket means that the item has useful non-magical properties, but you will have to pay something for its use (such an item carries both bonuses and penalties, for example, Rum or Wine);
Yellow amber in a Kolovrat frame means that the item contains information that can be recorded either in the Documents (see the "Ship Log") or in the Cartographic Atlas (see the relevant section);
A golden star rune on a dark background means that the item is a tool with which you can create new items and which does not disappear after the first use, i.e. is not a component.
The M key is your best friend in the Caribbean archipelago. At least if you have at least one card.
HEADING ANGLE: a constant value for the ship, the best heading of the ship relative to the wind, expressed in degrees. The first value is the angle between the direction of the wind (from the base of its indicator arrow on the mini-map) and the direction of the vessel's movement (its course), upon reaching which it can develop the maximum speed possible for it (taking into account all factors). The smaller the angle, the steeper the ship goes to the wind. The second value is the angle between the direction the wind is blowing (from the end of the indicator) and the course of the ship (the smaller its value, the closer the ship moves to the wind). Both values show the general direction and are given in pairs for your comfort (use the value that is more convenient for you).
A very important thing at the Sailor difficulty level and above.
The optimal caliber of guns is 24.
If the corpses lie on top of each other, and you want to search everything, then after you take everything valuable from the corpse, press the "do not search" button.
Some more from the manual:
ships with oblique sailing weapons move faster in hauled courses,
ships with direct sailing weapons move faster backstay courses.
However, in addition to the direction, the wind has a force, which should not be forgotten either. The stronger the wind, the more it affects the dynamics of the vessel (depending on its parameters). The following statements are true for the game:
wind, with a force of 8 knots, does not affect the speed of ships;
the third class of playing ships makes equally good use of winds of any strength;
with an increase in class (2, 1), the ship starts to go faster at a wind speed greater than 8 knots, and vice versa;
with a decrease in class (4, 5, 6), the ship starts to go faster when the wind speed is less than 8 knots, and vice versa.
With a difference in the number of guns onboard batteries, the ship receives a list on a more loaded side, the greater, the greater their weight and number. The roll affects aiming and shooting (the guns of the “littered” side hit lower, and vice versa), as does the sea (rocking).
To place a mine, open the window with the description of the product "Gunpowder" and click the "Launch Mine" button. The installation of one mine consumes 200 conventional units of gunpowder (or 10 volume-weight units - game centners). Be careful: your crew will carry out the received order, even having spent all the gunpowder remaining in the hold!
When buying ships, the shipbuilder evaluates only the ship itself, all cargo in its hold or guns installed on it pass to the new owner for free. If you intend to buy a ship to replace an existing one and intend to use its guns in the future, first remove them from the batteries - in this case, they, along with the rest of the cargo, will be moved to the hold of the new ship. If you plan to get the maximum profit from the transaction, sell goods, weapons and the ship separately!
The City of Abandoned Ships game can be played as three characters: Peter Blood, Ian Stace and Diego Espinoza, each with their own unique storyline.
Passage of corsairs city of lost ships
Storyline for Peter Blood
You appear at Oglethorpe's estate, England. In the yard on January 1, 1665. Servant Jeremy Pitt informs you that Lord Gilda is wounded. Enter the house, talk to the servant Andrew James and proceed to the bedroom, in the west wing on the second floor. Approach the bed with the dying lord. A servant will appear and report that he has brought everything necessary for treatment.
You are in your office. Talk to Andrew James. The second servant, Jeremy Pitt, will appear and report that the royal dragoons are jumping here. He will advise you to take a sword from the balcony and run away to hide. exit the office, take the key from the table on the left and go up to the second floor. Open the chest on the balcony and take Brett's sword, pistol and ammo. Captain Gobart will soon appear and a dragoon will attack you. If you kill him, two more will attack you. You can't kill all of them. As soon as they defeat you, you will be captured and, according to the plot, will be imprisoned.
You will appear at hard labor. April 1, 1665. Jeremy Pitt will tell you that Colonel Bishop wants to see you. Exit the room. Talk to Colonel Bishop. Go home, you might find something useful. But do not take a weapon - the guards will take it away from you at a meeting. Leave the plantation and run along the path to the right. Find yourself on the streets of the city of Bridgetown. Head to the governor's residence. Talk to the governor sitting at the table, go through the door next to him and go up to the second floor to his wife's bedroom. Talk to Mrs. Steed. Talk to the governor. Tell him that you went looking for Mr. Dan and you need money to buy medicine. Take 1000 piastres. Go outside and turn right. There you will find Mr. Dan's house. Dan himself is not in it, but there is your competitor - Dr. Wacker. He asks you to come the next day to the tavern for an important conversation. Leave the house and you will meet Mr. Dan. Tell him you've come for a cure from the governor's wife. He will give it to you absolutely free of charge. Return to the residence and give the medicine to Mrs. Steed.
You will appear in the tavern the next day. Mr Wacker is gone. Ask the tavern owner where you can find Dr. Wacker. Head to the tavern room. There you will find Dr. Wacker, who promises to give you a loan of twenty thousand piastres to help organize your escape. Return to the plantations and find Jeremy Pitt. Tell him that he is the only navigator and the fate of the escape depends on him. After he agrees, you will need to find three slaves: Hagthorp, Ogle and Nicholas Dyke.
Nicholas Dyke will tell you that Colonel Bishop wants to sell it. Talk to Colonel Bishop. You will find him at his plantation residence. Head to the tavern and have a drink with one of the drunkards. He will tell you that an important merchant, a friend of Colonel Bishop, has recently arrived in the city. It's probably Vernon. Find his home. Exit the tavern to the right, go past the usurer's house, you need to - the next one. Wait for Vernon to go up the stairs and search the chest that is directly below her. Take everything that is in it and go outside. Talk to Nicholas Dyke and inform him that the deal will not go through and he can safely prepare to escape.
Corsairs city walkthrough
Find also a slave in a spotted bandanna - Levays Moyer. He will complain of a headache and ask you to bring him some medicine. Return to the city to Mr. Dan's house. He doesn't exist right now. Go to the second floor and take the medicine in the box next to the scales. Go back and give the medicine to Levays. In return, he will give you a light dagger that the guards will not be able to detect.
Now find the one-eyed slave Ned Ogle in one of the houses. Return to the city, find the usurer's house and pay him the debt of 5000 piastres.
Talk to Pitt and report that you have found a weapon and a team.
You will find yourself the next day in your hut. Go to the tavern and talk to Dr. Wacker. Instead of the promised 25,000 piastres, he gave you only 18,000. The rest must be obtained somewhere. Go to the moneylender, he has a business for you. After talking with him, return to the tavern and talk to his owner. Give him 500 piastres otherwise he will refuse to speak. Head to the shipyard. Talk to the impostor. Tell him that he is your old debtor.
He will get scared and give 55000 piastres instead of 30,000, although this will negatively affect your reputation. Now you can either nobly return the money to the moneylender, or leave it for your own needs. Now that you have the required amount on hand, return to the tavern and talk to the carpenter at one of the tables. Exit the tavern. A soldier will come up to you and order you to go to the plantation. Return to the plantation. On the way, Nathaniel Hagthorp will meet you and inform you that Pitt was captured by the guards. After the conversation, you will find yourself at the gates of the city at night.
We continue the passage of the city of lost ships. Run to the plantation. You will need to quietly sneak past the guards to the edge of the plantation and take weapons from the chest. Please note that each guard has his own patrol zone. The visibility zone in the dark is small, so the main thing is not to pass directly on their path. Get to the longest white building. In the near corner of the plantation you will see a bunch of logs and boards. Among them is a chest with weapons. Unfortunately, you will have to be content with only a saber and a few healing potions. Fighting the guards is almost useless. near the colonel's house you will see a captured Pitt and two guards near him. You will see the guards somewhere around the corner and deal with them. Then talk to Pitt. He will say that Natal escaped on your sloop.
Now leave the plantation past the guards, trying not to engage them in battle. Enter the city. kill all the Spanish guards, drawing them out one at a time, and a lady will come up to you to thank you for saving her. She will tell you that the Spaniards have captured the city. Head to the shipyard. Swim around the shipyard on the side of the sea and find your comrades. Swim to the ship. Climb onto it and kill the guards. Then go to the cabin and fight one on one with the captain. The ship is yours. Exit the cabin and talk to Pitt. Talk to the team. Only Ogle will agree to serve you faithfully, the rest will be asked to be landed at the first port. This is where the uniqueness of Blood's storyline ends.
To start a national storyline in the game, you need to get a letter of marque (if you want to play a pirate line, you need to talk to Morgan in Port Royale). To do this, you need to complete about 10 small assignments from the governor of the city belonging to the line you need. The possible options for these tasks are described below.
1) Destroy a gang of thugs in the jungle. Run through the jungle, find a couple of thugs, destroy them, soon you will come across the head of the gang. After defeating him, you can return to the governor for a reward.
2) Search for an enemy infiltrator in the city. Look for it in the houses. As soon as you enter the desired house, a conversation with him will immediately take place, after which the battle will begin. After killing the scout, you can return to the governor for a reward.
3) Destroy the smugglers.
4) Get into the enemy fort (city) and take the documents from the messenger. The task is not easy. You will have to make your way under the cover of darkness, from the nearest beach through the jungle. Soldiers in the dark see only in front of them and not very far. Therefore, you have a chance to get through unnoticed.
Walkthrough of the game Corsairs city of lost ships
Dutch national storyline.
The Governor-General of Holland, from whom you will take tasks, is located in the city of Willemstad.
1) The first task is to deliver the head of the Jansenists Chumakeiro to Curacao, at the moment he is on the island of San Martin. Having sailed to the island, go to the tavern keeper and ask about Chumakeyro, he says that he took a house for himself, which is located near the residence of the governor. As soon as you enter the house, two people will attack you. After killing them, enter the room on the second floor where Chumakeyro stands. Now sail to Curaçao, where in the residence of Peter Stezzant, Chumaqueiro will give you 30,000 piastres.
2) The second task is to purchase a shipment of coffee, black, red and sandalwood from Fort Orange for Curacao. You will be given papers for the purchase of goods at a special price and the amount of money. The entire cargo will take 6800 centners, be prepared for this. Goods must be delivered to Stavesant within 2 months. Sail to Jamaica, dock at Cape Negril and go to Fort Orange. First, go to the governor and give papers to get preferential prices, then go to the store. After purchasing the goods, come back. For completing the task, you will receive 75,000 piastres.
3) The third task is to obtain information about the plans of the British in relation to Holland in connection with the trade war. Go to Hispaniola and talk to the head of the city of La Vega. The head is Edward Mansfield, but in fact, his surname is Mansvelt, he is Dutch by nationality. He is also Modyford's confidant in the robberies of the Spaniards. But Mansfield cannot tell Vaschet of the plans of the British, but recently an English envoy from Modyford came to him with a proposal to attack Curaçao, naturally Mansfield refused. Edik will also say that Vaschet's plans for the British are best learned from the great and terrible Henry Morgan. Go to Jamaica and there you will find out that Morgan is in Antigua. Go there and talk to him. He will say that if you help him, then he will help you too. We must find out if his companion Pierre Picard is honest. He is located in Tortuga, then ask the moneylender, the owner of the shipyard, the owner of the store, in the tavern and in the brothel. It turns out that he spent a lot of money. Now go to Morgan, he says that Vaschet knows nothing about plans, but one of his officers, who was imprisoned, knows about Modiford's plans, head to the Prison, kill the guards. You will learn that the British want to attack Fort Orange. Swim to the governor general and he will pay 50,000 piastres.
4) Passage of the Corsairs the city of lost ships. The fourth task is to intercept the British and save Fort Orange from ruin. Sail to Jamaica as quickly as possible. A small squadron consisting of 3 English ships will cruise around the island. Sink them and land in the bay. Kill all the English in the bay and in the next location. Mission completed. You can go to Stevesant, he will pay 100,000 piastres.
5) The fifth task is to escort three flutes to the La Vega pirate settlement and back. Swim to La Vega, disembark. It turns out that the Spaniards attacked the settlement and killed Mansild. Buy provisions and go to sea. The more ships survive, the greater the reward. If all the ships survive, it will be 60,000 piastres.
6) The sixth task is to find Morgan and inform him that the Dutch are out for revenge. Swim to Jamaica, sneak into the city and go to Morgan's residence. Henry will say that the attack was organized by the Spanish Governor of Santiago, Jose Sancho Jimenez, and we need to conduct reconnaissance to find out if Don Jose will be in the city in the near future. Sail to Santiago and dock at the lighthouse. Make your way into the city and go to the tavern. Ask the owner about the governor, under the pretext that you want to enter the service. Several Spanish officers will enter. Kill them and run to the ship. The task is completed, you have learned that a holiday is coming soon in the city and the governor must attend it. Return to Jamaica to Morgan. Quest completed. Sail to Curacao to the governor and get 200,000 piastres.
7) The seventh task is to deliver a dispatch to the Governor of Tortuga Bertrand d "Ogeron. Sail to Tortuga in order to deliver the dispatch to d'Ogeron, then he will ask you to walk for two hours while he writes a letter to Stezzant. After two hours, you will receive a letter. At the port A messenger will meet you and say that a messenger from the governor of Holland is waiting for you in the tavern. Go to the tavern and go up to the room, then you will be stunned and the letter will be taken away. left the port in the near future.It turns out that the brig La Rochelle has left the port, which is going to San Juan.Head there and board the ship off the coast of San Juan.The captain will say that Antonio, who took the letter from you, left the ship and moved to the galleon Isabella, which is going to Santa Catalina.Catch up with the galleon, board it and Antonio will surrender.Take the letter and head to Stezzant, he will issue 150,000 piastres.
8) Corsairs city of lost ships passage. The eighth task is a business trip at the disposal of Aaron Mendez Chumakeyro. His house is located in the city, not far from the residence. Aaron will give the task to find an ancient book that some English privateer tried to sell in a pirate settlement in Bermuda. Go to Bermuda and go to Jackman's residence. After talking with him, swim to Martinique, to the local brothel. Ask all the girls there, one will give you new information, for a fee, the filibuster who wanted to sell the book, in an incomprehensible language, was called Laurent de Graf, he usually lives in Tortuga. Swim to Tortuga. In the local tavern, you will find out that now de Graf has been on a raid to Cartagena for two weeks now. Swim there. Near Cartagena, Laurent, fighting against the superior forces of the Spaniards. Sink the enemy squadron without letting it sink the Frenchman's ship. Send a boat to Laurent de Graaf's ship. Ask him about the item you are looking for, he will offer to buy a buried treasure map from him for 235,000 gold. Pay the required amount. The treasure is hidden on Turks Island. Swim to the Turks, go into the cave and find the chest. You will find a holy book there, as well as a blunderbuss gun, a couple of good pistols, an expensive cuirass, 200 gold bars, rings, brooches, and a couple of idols, including a very useful idol - the rat god. Sail to Curacao to Chumaqueiro and give him the bible. As a reward, you will receive 1,000,000 piastres. Then go to the residence to report on the success of the mission.
9) The ninth task is to capture four battleships of the first class, namely manovars. They are usually found in large trade caravans, military squadrons and gold caravans. For each ship you will be given 50,000 piastres.
10) The tenth task - the defense of Curacao from the attack of the Spanish squadron, consisting of 8 ships, including manowars. Go to the port and go out to sea, there the fort is already fighting the invaders, help him defeat the Spaniards. After the last Spaniard goes under water, the mission to protect Curacao will be completed. Return to the residence for a reward of 200,000 piastres.
11) The eleventh task is to repel the attack of the Spaniards on San Martin. Put out to sea and sail to Marigot as quickly as possible. When you get to San Martin, join the battle against 8 enemy ships. After sinking their fleet, return to Willemstad and receive a reward of 200,000 piastres again. Governor-General, says it's time to take retaliatory action against Spain.
12) passing the city of lost ships. The twelfth task is the capture of Maracaibo. The fort there is not so powerful and it will not be difficult to smash it. After capturing a colony for Holland, you will receive 300,000 piastres and the opportunity to capture English and Spanish colonies for yourself or Holland.
Walkthrough of the game Corsairs city of lost ships
French national storyline
1) The first task is to escort the French privateer Per Legrand, who captured a military galleon with rich booty on a lugger and now wants to return to France. Go to the tavern and talk to Pierre, he will become our passenger. Now head to the island of Martinique, the bay of Le Marne. Five thugs who need Legrand's gold will be waiting for you on the shore. Engage in battle with them, trying to save Pierre. After defeating them, you will receive the promised reward of 20,000 piastres. Swim to Tortuga and report on the mission.
2) The second task is to deliver a letter to the Governor-General of the Dutch Republic, Peter Stezzant. After arriving in Curacao, go to the residence of the governor. You will be imprisoned, mistaken for one of the pirates who killed the envoy D'Ogeron. After some time, the jailer will pass in the prison. Talk to him. It turns out that his relative is one of the officers in this colony. Persuade him to ask his relative to search our ship, where there is a French corsair patent. The jailer will want to take some things from the ship in exchange for help. Peter Stezzant will come and apologize. Now we need to find out Vaschet of this story with the pirates in more detail. Go to the tavern. There you will overhear a conversation between two people in a tavern. Then you have to follow them. And so, having reached the bay, it turns out that these are not pirates at all, but sailors from the Spanish galleon, who, under a pirate flag, robbed ships in the local waters. Next will be a fight with the Spaniards. Now go to the port. A Spanish galleon is waiting for you there. Take him on board, then the captain of the ship at death will tell you everything. Go to Stezzant and tell about the fact that the filibusters are not to blame for anything, you will receive 20,000 piastres. Go to Tortuga, tell everything to the governor and get the title of Commander of the French Fleet.
3) The third task is to find a way to bring Donna Anna to Tortuga. For this mission, you will be given a Spanish trade license and a ring by which the wife of the commandant of the fort will know that we are the envoy of D'Ogeron. There are three ways to get into Havana. The first. Having raised a flag friendly to Spain, enter the port and moor. Second. Land at the lighthouse and then go to the city. Third. If the license has expired, then go to the city at night, landing at the Lighthouse. Next, go to the tavern and ask the maid to take the ring to Donna Anna. After 3-4 days, the maid will say that she took the ring and Donna Anna will wait for you at night, opening the door. Enter the house and kill the soldiers waiting for you. Go into the bedroom and talk to Donna Anna. Now run to the ship and sail to Tortuga. And there you will receive 25,000 piastres.
4) The fourth task is to escort a first-class battleship to the island of Dominica. Rumor has it that the Spaniards are already hunting for this ship, in 3-4 galleons, under the command of Juano Galeno. Near Dominica, the ship should connect with the squadron of the island of Guadeloupe. Go to the Port Authority and take command of the Soleil Royal. Now your course lies on Dominica. Near Dominica, 4 galleons will be waiting for you, but there will be no French squadron. After the sinking of the squadron of Juano Galeno, you need to go to Guadeloupe and find out why the promised squadron did not meet you. The governor of the city of Basse-Terre will justify himself by saying that he received a letter about the nomination of your squadron only yesterday and did not have time to prepare anything. He will take the royal manowar and thank you for the mission you completed. Return to the Governor General. As a reward, you will receive 28,000 piastres. Also talk to d "Ogeron again and get a promotion.
5) The fifth task is to protect Donna Anna. It turns out that the relatives of the murdered commandant of Fort Havana want revenge. Go to Havana to find out the details of Vaschet's revenge from Donna Anna's friend, Iness de Las Sierras. Land near the lighthouse and run to the city, there as quickly as possible run to the house of Ines, ignoring the guards. It turns out that relatives go somewhere in the jungle. You will find them at the lighthouse, followed by a fight with relatives. Then sail to Tortuga, where you will receive 5,000 piastres from D'Ogeron, at the same time go to Donna Anna, and receive gratitude from her.
6) The sixth task is to deliver a letter to Francois Olone. Under no circumstances should the letter fall into the wrong hands, and if you get into trouble, before you die, you must first destroy the package. Put out to sea and head for Guadeloupe. On the approach to Guadeloupe, you will be attacked by a Spanish warship. Having dealt with the ship, moor in the port and go to the house of the French filibuster, which is located almost opposite the governor's residence. François will not receive you at first in the best way, but as soon as he finds out the purpose of your visit, his attitude will change. Then you can choose one of the options:
1) Refuse to attack Cumana and receive the promised reward of 10,000 piastres.
2) Agree to participate in the proposed adventure to participate in the attack on Kumana, but there is one condition, there should be only 1 ship in your squadron.
The squadron will include yours and 3 other ships, a frigate and two corvettes. Keep heading for Cumana and hurry up. Having defeated the fort, land and after a fight in the city, go to the residence and demand money from the local governor. Then you can either share everything honestly and get a legal share equal to 50,000 piastres, or keep the money for yourself, but then you will have to fight Olone and his comrades. Now head for Tortuga and talk to the governor.
7) The seventh task is to release Rock the Brazilian from prison. He is kept in Santiago. Land at the lighthouse, then go to the church, ask the priest for Vaschet of the Inquisition, then exit the church. There is a door under the stairs. Enter there, then ask the prisoners where Rock the Brazilian is located and kill the guard guards, then together with Rock, who cannot hold weapons, leave the city. Sail further to Tortuga, where the Governor General will give you 30,000 piastres, and Rock will hint that he has something hidden in Martinique, namely an expensive cuirass that can withstand 35% of the blows.
8) The eighth task is to go to the disposal of the Marquis Bonrepos. Monsieur Bertrand d "Ogeron asks you to report to Guadeloupe, to the naval commandant of France, the Marquis of Bonrepos. Sail to Guadeloupe and moor at Basse-Terre. Go to the residence and talk with the Marquis. He will fill you in on the details of politics and give you his own task. It consists in the persuasion of well-known pirates (in Jamaica, Jackman in Bermuda and Morris in Trinidad and Tobago) not to participate in the war against the Dutch.They will not give you funds for this operation.Sail to Bermuda, to Jackman, he was not even going to get involved in this matter.More sail to John Morris, to Trinidad and Tobago, tell him about the upcoming events.He does not like to attack the Dutch, but for this, he will require you to complete a small task for him - to deliver Captain Gay's logbook to him.Sail to Jamaica and go to the local tavern , ask the owner where to find Captain Gay. He rents a room. Enter the room and kill Captain Gay. Search the body and take the ship's log and personal belongings. Enter the residence to Henry Morgan, but he's not there. The servant will say that he is at his house in Antigua and warn that Morgan's house is always closed. Now make your way back to Maurice, give him the ship's log and in return get what was required of him, his agreement not to attack the Dutch. It's time to go to Antigua, visit the famous English pirate Henry Morgan. The door to the house is locked, go around his dwelling, behind the house there is a hatch to Morgan's basement. Go to his house and talk about non-aggression against the Spaniards. Henry does not want to attack the Dutch and will demand 250,000 piastres. Give him the money. The task is completed, it's time to go to the Marquis of Bonrepos. Instead of a yellow award, you are given a baronial title. Return to Tortuga, where you will receive congratulations from Bertrand d "Ogeron, and the next title.
9) The ninth task is to repel the attack of the Spaniards on Port-au-Prince. For this task, you will be given the Soleil Royal, however, it must stay afloat. Next comes the battle with the Spanish ships. Go to Tortuga, where you will receive 5,000 piastres.
10) The tenth task is the capture of Santo Domingo and its transfer to the possession of France. Sail to Hispaniola, defeat the fort and land troops. After the fight inside the city, go to the residence and embrace the Spanish colony with the French. Return to Tortuga and receive a reward of 40,000 piastres.
11) The eleventh task is the capture of Santa Catalina. The city is located on the Main and controls the New World pearl industry. After defeating the fort and landing troops, having dealt with the soldiers in the city, go to the residence and declare Santa Catalina a French colony. Return to the Governor-General Bertrand d "Ogeron. As a reward, you are given everything that you plundered in Santa Catalina. Now you should go back to Guadeloupe to the Marquis of Bonrepos.
12) The twelfth task is a meeting with the Marquis of Bonrepos. Head to Guadeloupe, where you will find out that peace has been concluded with Spain, the Soleil Royal is being withdrawn from your squadron, the Louvre knows about you and that's it. Do not forget to visit D'Ogeron, he will make you an admiral, and now you can seize colonies for yourself or for France.
Spanish national storyline.
1) The first task is to free three Spanish citizens who were taken prisoner by Henry Morgan, a famous English pirate. For the release of prisoners, he demands an amount of 500,000 coins. You are required to infiltrate the Port Royal prison and free the Spaniards. The term is one month. Swim to Jamaica and moor in Portland Bay, then through the jungle, make your way to the enemy fort, if you have an English trade license and the flag of a friendly nation to England, calmly go through the guards to the prison. If not, you will have to break through with a fight, or just run a little. In prison, kill all the soldiers and free the captives. The way back will be easy if you run out of the prison and run to the bay. Return to Havana. Oregon-and-Gascon will thank you for the successfully completed task and give you 50,000 piastres.
2) The second task is work for the Holy Inquisition. The meaning of the task is this: a high-ranking Jesuit António de Suosa arrived in the archipelago. You are being sent to him. Go to Santiago, the residence of the Inquisition is located under the church building. Find Suoza and get data from him on the second task. It is as follows: you need to collect an indulgence, which is 50,000 piastres from three merchants: Joao Ilhaio, Josef Nunen and Jacob Lopez de Fonseca, but if they refuse, then you need to kill them. You can find them in Curacao. They organize a sect there called the Janensints. In the port, a priest will come up to you and say that it is highly undesirable to kill them. Go to Curacao. First, go to the tavern and ask the owner about the three Jansenists. Get information from him that Joao Ilhayo and Jacob Lopez run the store, and Josef Noonen is a moneylender. Go to the store first and talk to Joao. He will say that he does not have that kind of money. When asked where his partner, Jacob Lopez, is, he will answer that he does not know. He will offer a deal. If you find Lopez, their families will collect 100,000 piastres and be able to buy indulgences. Agree. Sail to Panama, go to the store, and ask about Lopez. It turns out that he was supposed to come in a month ago, but never came. Now walk through the houses of Panama and run into bandits in one. Kill them and go up to the second floor, where you will find the missing person. He will ask you to render him a service, which is to search for the stolen Gospel of Judas Iscariot. The thief was last seen at a shipyard in Bermuda, from where he never returned. This request is not required. But if you have taken up the execution, sail to Bermuda, go to the shipyard. Talk to Alexus, he will open the door for you. Next, go to the dungeon, kill a few skeletons. In one of the chests you will find a treasure and a Gospel. Now return to Curacao to Joao Ilhayo. He will give the promised amount of 100,000 piastres, tell him about the gospel for Jacob. He will issue a reward of 1,000,000 piastres. Go now to the usurer, he will refuse to talk to you. Go to the tavern. Ask the waitress about the pawnbroker's son. It turns out that he sailed off to piracy near Jamaica, to Fort Orange. Swim there, board his ship, take your son prisoner, and give your son for a ransom in the form of an indulgence, now the task is completely completed. Swim to Suosa and get a reward that depends on the timing of the task. Then report to the Governor General.
3) The third task is to capture Rock the Brazilian and hand him over to the Inquisition. Rock lives in Tortuga. swim there, sneak into the city and go to the tavern for information. It turns out that he is not on Tortuga now, he is pirating near Maracaibo. Keep heading for Maracaibo. Board his ship, Rock the Brazilian will surrender. Take him to the hands of the Holy Inquisition, to Monsignor de Suosa. António will send you to the Governor General. Oregon-and-Gascon will tell you to come to him in a few days. Return to the residence in a few days and get the task to find the treasures of Brazilian rock, which are located in Cuba, Hispaniola and near Belize, in Maine. The exact location of the treasures is unknown. The first will be a treasure located in Cuba. Swim to the bay of Ana Maria, moor, then turn left and then straight ahead, go into the cave and open the chest, which contains 150,000 piastres and several idols. Then sail to Hispaniola, to Samana Bay, go straight and find a well that serves as the entrance to the cave, find in it a chest with a treasure that will amount to 150,000 piastres, diamonds, gold bars, gold rings, gold brooches. Now head for Maine, towards Belize. Dock at the port, exit the city gates, turn left and then right, go into the cave and search the chest, which will contain 150,000 piastres. Return to Don Francisco and give him the money, 500,000 piastres (you will have to fork out more than was in the chests) and get 100,000 piastres.
4) The fourth task is to investigate the murder of the commandant of Havana, Jose Ramirez de Leyva. Go to the commandant's house, then on the second floor in the room you will find an unfinished letter, then go to the tavern, where you will find out from the waitress that she gave the letter to the commandant's wife from some kind of ladron. Now go to Oregon-and-Gascon, get a trade license. Then swim to Tortuga, talk to the owner of the tavern. After talking, he will talk about D'Ogeron's passion, a Spaniard by nationality Donna Anna, brought by one of the trusted officers of the Governor-General, Henri d'Estre. Next, go to Henri's house. The servant will say that the owner is talking near the house, then Henri will run run after him into the dungeon in the bay, where he will stop you and ask why you are chasing him, then kill the ladron.Now to the governor general for a reward of 120,000 piastres.
5) The fifth task is a business trip to Santiago. Go to Santiago and go to the residence, on behalf of the local governor. The task will be to completely destroy the pirate settlement of La Vega on Hispaniola. Swim to Hispaniola, moor in La Vega Bay, go to the next location, the assault will begin, kill all the pirates and enter the city, where the massacre will continue. After destroying everyone in the settlement, go to the residence, there you will have to fight with the leader of the filibusters of La Vega, Edward Mansfield. Kill him and exit the residence. The task is completed, you can return to Jose Jimenez. Don Jimenez will present an award of 100,000 piastres. Return to the Governor-General, and receive gratitude from him.
6) The sixth task is to intercept the general-governor of Holland in Tortuga. You will be issued a trade license. Go to Tortuga, go to the port authority there, the boss will agree to send a messenger when the Dutch messenger ship arrives, then rent a room in the tavern for a week, wait a couple of days, then you will be informed that the Dutchman has arrived. Next, lure the orderly into the tavern room, where you take the dispatch from him. Receive a reward of 50,000 piastres.
7) The seventh task is to help Manuel Rivero Pardal. We urgently need to go to Antigua, to help the Spanish corsair Manuel Rivero Pardal, who is in search of British merchant ships in the waters of the island. French filibusters went to intercept him, under the command of Moses Vauquelin. Sail as quickly as possible to Antigua and join the battle between the unequal forces of the Spanish corsair and the French pirate squadron. After sinking the last ship, go for a reward of 25,000 piastres.
8) The eighth task is to protect Cumana from the attack of the combined French-English squadron of pirates. Swim to Cumana, sink the enemy squadron and get 100,000 piastres in Havana.
9) The ninth task is the task of the governor of Porto Bello to escort the ships. Sail to Porto Bello where Governor Cabral will brief you in detail. You need to deliver 4 galleons loaded with gold to the uninhabited island of Cayman, where you need to transfer the squadron to the powerful Spanish fleet sent to Europe. Take command of a squadron of 4 galleons loaded with 10,000 quintals of gold. Near Cayman, instead of Spanish ships, pirate ships will be waiting for you. The galleons entrusted to you must stay afloat in order to receive the maximum reward. Having sunk the last pirate, head to Havana, where tell the governor-general about the strange events that happened to you. He cannot understand at all why the meeting place was Cayman if it was necessary to escort ships to Belize. He will promise to look into this situation and reward you for saving all the galleons in the amount of 220,000 piastres.
10) The tenth task is to protect Maracaibo from the invasion. Don Francisco will say that the problems in the previous task were the result of inconsistent actions, this will not happen again. And you need to go to Maracaibo to repel enemy attacks. Head for Maracaibo, go to the local governor and then go out into the street, where you will meet a Spanish officer carrying bad news: an English pirate squadron attacked the city. Go to the governor again, he will order to start repelling the attack. Go out to sea and start a battle against 8 ships, among which there will be several manowars. There will be a fort on your side. Having sunk all the ships, dock and go to the residence, where you will receive a reward from the saved city, in the amount of 70,000 piastres. Return to Cuba, where you will receive gratitude from the Governor General.
11) The eleventh task is the ruin of the Dutch colonies. Returning after a while, Don Francisco will ask if you are ready to attack the fortified cities. The task will be to plunder 2 Dutch colonies in the archipelago, on the islands of Curacao and San Martin. Sail first to Curacao, defeat the fort, and capture the city. Then attack San Martin. Having captured the city, you can return to Havana. The reward will be all the booty looted by you. Oregon-and-Gascon will ask to see him in about a month.
12) The twelfth task - the capture of Port-au-Prince. In a month you will be assigned to capture the French Port-au-Prince. All trophies are your property, the time of the task is not limited. After destroying the fort and killing the French soldiers in the fort and the city, go to the residence and declare the colony a Spanish possession. Return to Governor General Francisco Oregon y Gascon. All tasks are completed and you can act in the interests of Spain.
Game corsairs city of lost ships walkthrough
Pirate storyline
Sail to Bermuda. There, contact Jackman with a job offer. Jackman will say that at the moment he has no assignments, but Captain Goodley, who is currently in Puerto Principe, in Cuba, needs help, and will offer to meet with him and discuss the details.
Go to Cuba in Puerto Principe and find Captain Goodley in the tavern. When talking with him, it turns out that you need to take one type named John Bolton, who is waiting in the port of Puerto Principe, to Port Royal in Jamaica to Henry Morgan. Agree, saying that serving with him is an honor for you. Go to the port of Puerto Principe and meet John Bolton there, take him on board and head to Jamaica.
In Port Royal, Jamaica, escort John Bolton to Morgan's house (Morgan's house with columns is on the left side of the city if you go from the port). On the way to the house you are stopped by English soldiers. The commander of the soldiers says that you and John Bolton have been charged with piracy. You are put in jail until the circumstances are clarified. However, you are released by Morgan himself, who says that he has paid a ransom for you and is waiting in his residence, after which he leaves.
At the residence, Morgan instructs Edward Low, who lives somewhere in Martinique, to hand over the black mark. Head to Martinique at Le Francois. Upon arrival, ask the tavern owner about Edward Lowe. It turns out that the owner of the tavern knows Lowe and he lives not far from the tavern. Exit the tavern and go right to the boarded house where Lowe lives. Enter the house and when talking to Edward, give him the black mark. Lowe will say that all the problems with Morgan have already been resolved and will ask to return the black mark back to Henry Morgan. Go back to Jamaica to Morgan.
After listening to the story, Morgan becomes furious and says that Lowe deceived you. To remedy the situation, Morgan instructs you to track down and deal with Low personally without any black marks. Therefore, quickly return to Le Francois and go to Edward Low's house. However, he had already left the house in an unknown direction. Go to the owner of the tavern and ask him about Lowe. The owner will confirm that Edward recently left the settlement, left things for his safety, and where he himself could go, the owner of the tavern does not know. Go to the store and ask about Lowe. The merchant says that Edward came, was interested in a place where it would be possible to purchase a ship, but it is his business to trade goods, not the ships that are sold at the shipyard. There is no shipyard in Le Francois, the nearest shipyard is in Fort-de-France. Either go there on foot across the island, or land on a ship at the port of Fort-de-France.
We continue the passage of the corsairs of the city of lost ships. First, go to the shipyard and ask the owner if Lowe has come. It turns out that Lowe really came in and wanted to buy a ship (brig), but he didn’t have money for such a ship and Edward went to the moneylender. Since then, the owner of the shipyard Low has not been seen again.
Head to the moneylender. He will say that Edward Low really came in and tried to borrow money, but the moneylender immediately sees crooks and deceivers, and therefore Low did not give a loan. Where Edward Low went next - he does not know.
From the moneylender, head to the port authority. Ask a question about Edward Lowe to the head of department. He asks why you are interested in Edward Lowe. Answer that Low is your close friend and you should inform him about the serious illness of his mother, but it’s just that you can’t catch up with Edward. The Port Authority Chief pecks at this ploy and says that Lowe boarded a passing ship that went to Bermuda.
In the settlement in Bermuda, head to the tavern, where its owner says that Lowe was here and was interested in the local shipyard. Go to the shipyard to the master Alexus. To the question of the master about who you are to Low, answer that you want to catch up with him in order to settle scores with him. The master begins to complain that the swindler Low forged Jackman's signature, and he (Alexus) gave Low a ship - the Sea Wolf brig with unique characteristics, which was built by Jackman's order. Go to Jackman. He is in a state of quiet fury from what happened and asks for only one thing when we kill Lowe to convey hello to him from Jackman. But where Lowe went on the stolen brig is unknown.
Ask people in the taverns in the archipelago about the rumors until someone tells you that attacks on mail ships have become more frequent in the Cumana area, which is located on Maine. Head towards Kumana. If the ship is more powerful than class 6, then it must be parked at the Kumane Port Authority and any class 6 ship can be bought at the shipyard. After that, on this ship, go to sea and sail to the Trinidad and Tobago region. There you will meet Lowe on the brig. Board the brig, talk to Low, who says that Morgan's power will soon change. Kill him. Go to Morgan with a report on the work done.
Corsairs city of lost ships walkthrough
Morgan proposes to conduct an operation, the result of which will overshadow all of Sharp's cases. Namely, Morgan proposed to rob the pearl divers, who on tartans would collect pearls for a month on Turks Island in North Bay. Morgan offered to deliver at least 1,000 small and 500 large pearls. Profit - in half.
Get to the North Bay of the Turks. There, pearl divers are already fishing on tartans under pirate flags. At the sight of you, they flee in all directions. You need to catch up with them and line up side by side with each tartan, then the pearls will be automatically reloaded into your inventory. Collect the required amount and return to Port Royal to Morgan, where you will hand over half of the booty.
At the exit from Morgan's residence, Captain Goodley meets you and offers you a job as a bounty hunter for a good reward. The target is John Avory, who was last seen in Willemstad (Kurorosau Island). Head there and go to the moneylender. The pawnbroker confirms that John Avory was here recently, but is no longer in town. He heard that John was going to Port of Spain, in Trinidad and Tobago. Go there. There contact the moneylender. The Port-of-Spain pawnbroker says that Avory did work for him in the city, but after the job he left the city and went to the Spaniards on Maine in the city of Maracaibo. Maracaibo's pawnbroker confirms that John was in the city, but according to rumors he overheard in the brothel, Avory went to the French in the city of Port-au-Prince, in Hispaniola. In Port-au-Prince, first go to the tavern. The owner of the tavern says that John was here a couple of days ago and killed the card sharper. You need to visit the moneylender. The pawnbroker will tell you that Avory has done some work for him. But where John went next - one can only guess. Although the moneylender has a suggestion that John could go to Willemstad, because. a moneylender was recently robbed there. The moneylender of Willemstad is still experiencing what happened, but this is not surprising, because an unknown person stole 50,000 piastres from him. He hired John Avory to find the burglar. The moneylender will also promise to pay you 5,000 piastres for being the first to bring gold to the moneylender. John Avory himself went to Bermuda. The owner of a tavern in Bermuda confirms that John Avory is now on the island, or rather in the house of Orry Bruce, apparently this is a loan shark robber. The house is next to the tavern, go there. In the house you will meet John Avory and Orry Bruce, who are sorting things out. Tell them that you have an order for both of them, then kill them and take valuable things from the corpses, and also take 50,000 piastres from Orry Bruce. You can return for a reward to the moneylender and report to Captain Goodley about the completed order.
We continue the passage of the game corsairs city of lost ships. Give the moneylender of Willemstad money, he pays you 5,000 piastres in return. You will find Captain Goodley in the Port Royal tavern and receive a reward from him, also tell him that you will now go to report to Morgan about your successes, to which Goodley only smirks. Go to Morgan's residence.
After hearing the story, Morgan says that John Avory was his confidant and you finished him off. You explain that this was the order of Captain Goodley. Morgan immediately calls the captain to sort out the situation. Goodley, who came, says that he did not give you any orders. To understand what happened, Morgan appoints a duel between you and Captain Goodley. Kill Goodley. Morgan says you've proved your innocence in this case.
Henry Morgan will ask you to go to Jackman in Bermuda and tell about Goodley's death.
When Jackman sees you, he is very surprised and says that you allegedly captured and handed over to the Spaniards his captain Sid Bonnet. Will have to figure this out. Jackman directs you to the Bay of Cozumel, on Maine, where John Leeds anchored on the frigate Antwerp, with whom you need to talk. Head to the Bay of Cozumel.
There you are met by John Leeds on his frigate. Launch the boats into the water and climb onto his ship. After a conversation with Leeds, it turns out that the crew and the captain of the corvette sunk by Leeds landed in Cozumel Bay. By the way, the captain of the corvette is very similar to you and, accordingly, all the sins of this captain are blamed on you. Therefore, you need to deal with your double. Land in the bay, where destroy part of the crew of the sunken corvette, but the captain is not among them. Go to the next location from the bay and meet a captain there who really looks like you. The double says that he will tell everything if he and the team are released from the encirclement and allowed to leave quietly. Kill him and the rest of his team.
After that, return to the ship and keep your way to Bermuda to Jackman. Jackman, after listening to the story, sends you to Morgan with a report on what happened. Report the situation to Morgan.
Morgan will send you to catch up with the pirate Steve Linnaeus, whom he sent to La Vega, in Hispaniola, to find out a series of oddities that have been happening recently in the Coastal Brotherhood. Go to La Vega.
Upon arrival, turn to the innkeeper for help. He says he hasn't seen Steve Linnaeus in a while, but his buddy just went to sea. You need to capture him. Go out to sea and catch up with your friend Linnaeus, who really did not have time to go far, and climb aboard. When talking with Steve's friend, a strange story is revealed. According to him, Steve recently left with two strangers in an unknown direction and disappeared. And his schooner "Swallow" seems to be sold at the shipyard of Santo Domingo. Linnaeus, according to a friend, would never have sold his ship of his own free will. Therefore, a friend of Linnaeus weighed anchor and went to sea, so that the history of Linnaeus would not be repeated with him. In any case, you need to check the shipyard of Santo Domingo.
The owner of the shipyard of Santo Domingo said that the deal for the sale of the "Swallow" was the most successful, because it was given to him for nothing. Under some pressure, the owner also says that he bought the "Swallow" from a type who did not introduce himself, but the servant of the shipyard owner saw how he went to sea on the frigate "Leon". According to the owner of the shipyard, the frigate should still ply in the waters of Hispaniola. Go out to sea global map, there you will see a ship with purple sails - this is the Leon frigate, take it on board.
The captain of the "Leon" offers you to go over to the side of HIS admiral. This is Richard Soukins. He also says that their brotherhood needs people like you, and Henry Morgan himself was promoted to admiral of the Coastal Brotherhood and no one elected him. In addition, the captain of the Leon reports that Steve Linnaeus is already at the bottom of the sea. Refuse the captain's offer and kill him. Head to Morgan.
We continue the corsairs of the city of lost ships passage. After the report, Morgan directs you to Puerto Principe, where, according to rumors, Richard Soukins is planning some kind of operation against the Spaniards, which must be thwarted. This will damage Sawkins' reputation among the pirates.
In Puerto Principe, go to the tavern and ask the owner of the tavern about the operation. He will answer that something is really planned now, but Sawkins keeps all the details in the strictest confidence even from his close associates and sits at home almost without a break. You need to get into the house of Richard Soukins and steal documents. Go to the Soukins' house, grab the papers from the table and run out of the settlement. Because everyone becomes an enemy. The Soukins papers set out a plan for the upcoming operation against the Spaniards. Soukins learned that the Spaniards had started the transportation of the largest consignment of precious stones from Panama. To carry out this operation, the Spaniards abandoned the overland delivery of jewelry from Panama to Porto Bello and navigation in the Caribbean. Only one ship of the line should round Cape Horn, rise to the fortieth parallel, then turn right and reach Lisbon in a straight line.
Soukins gathers a squadron and is going to meet the Spaniard in two weeks at San Martin. We need to get ahead of them and intercept this ship below San Martin, sink it or board it. Go out to sea and sail to San Martin.
In two weeks, a ship with purple sails appears at San Martin - this is your goal. Board the ship. In the chest, in the captain's cabin, you will find a large number of gems. That's it, mission accomplished, you can report to Morgan.
Morgan will ask about the details of the operation, but evading the answer, say that there was nothing particularly interesting on the ship.
Morgan will offer us to make a trip to Panama. Morgan's plan is to take Porto Bello and reach Panama by land. The Spaniards will definitely not wait for this. Morgan offers to take a more powerful ship (if the squadron consists of more than one ship, then the rest must be placed in the port authority) and gives 20 days to prepare. During these days, hire people, buy provisions, medicines, weapons, cannonballs, bombs, gunpowder and return back to Morgan by the agreed date.
It turns out that by this time Morgan had already assembled a squadron of 5 powerful ships of the 1st class. He gives you the task to speak and immediately take Porto Bello. Move towards Porto Bello, attack the fort and capture the city. Go to the governor's house and talk to the governor. The governor is already aware of the plan to march on Panama and was ready for your attack on his city and therefore was very surprised that you took the city so quickly. Besides, he said that you will die in the jungle on the way to Panama. Tell this news to the approaching Morgan. He believes that Richard Soukins managed to secretly warn the Spaniards about the plan to march on Panama. Morgan is not going to refuse the campaign and offers to split up. You will command the second squad, which will include Sawkins. You are instructed to land in the Gulf of Darien within two days and proceed to Panama. On the way to Panama, you need to quietly shoot Sawkins, because. Morgan does not want to see him at the city walls.
Go out to sea and get to the Darien Bay. Drop off there. Soukins will come up to you and say that he is ready for the upcoming operation.
On the way to Panama, your squad will be attacked three times by the Spaniards and the local population.
Corsairs city of lost ships walkthrough
The last battle will be at the walls of Panama. Morgan comes up and gives the task to find the governor of Panama, because. the Spanish forces were exhausted by ambushes in the jungle, then no one was left in the city.
Go to the house of the governor of Panama, find him in the next room and interrogate him. According to him, Escorial's gold is in a closed chest in the same room, but the key is with the commandant of Panama, who participated in the defense of the city and most likely died. We need to find the key. When you leave the governor's house, you will meet Morgan. He gives the order to find the key, and he goes to interrogate the governor.
Go to Panama Fort. There in the prison on the commandant's desk lies the key you need, take it and return to the governor's house. Open the chest - there is Escorial's gold (50,000,000 piastres). At this moment, Morgan comes up and takes the gold with the words that now he will collect the gold from all the sailors, and in the evening he will divide it, according to the laws of the Coastal Brotherhood. He also says that the governor could not stand the torture and died, however, he managed to tell about another chest, which is located on the outside of the fort. Morgan sends you there to check the given words. Go to the fort. In front of the fort there is a narrow path that goes around it from the outside. Follow it, at the end of the path there is indeed a chest, but there is nothing valuable in it. Return to the city.
At the entrance to the city, a sailor meets you and says that Morgan collected gold from everyone, loaded it onto a galleon in the port, and secretly left Panama in an unknown direction. The sailors refuse to go back with you and continue to rob the city, so you will return to the ship alone.
On the way to the Darien Gulf, you will be attacked by the Spaniards, but it is not necessary to fight with them, you can run around them.
Board the ship and head to Port Royal, Morgan's residence. Morgan's secretary says that Morgan himself is in London and will not arrive until a year later. Return a year later to Morgan and demand your share of the booty. However, Morgan says that the Coastal Brotherhood has come to an end, he himself is now a planter, and he bought his forgiveness and forgiveness of other surviving pirates from the English crown for Escorial's gold. End of the pirate storyline.
Walkthrough Corsairs City of Lost Ships
main quest
To start the main quest of the game - the quest of the game City of the Lost Ships, you must first complete the so-called quest about killing beggars. It is taken in the main city of the country of which the hero is a citizen. (for example, for Jan Spains, this is Willemstad).
Oliver Trust will stop you on the street and offer you to kill all the beggars in the archipelago for a reward of 1,000,000 piastres. You can either agree or refuse the offer, this will have little effect on the further denouement. Now you should look for beggars (a man in rags, usually sits on the ground, can move around the city) in cities, and talk to them, find out why they are being hunted. You need to interview at least three beggars. One of them will send you to a tramp who lives on one of the islands of the archipelago. If he is not in the city, spend the night in a tavern, he will be found soon. The tramp suggests that the governor-general of Curaçao, Peter Stevesant, was involved in this case. Head to Curacao, to the colony of Willemstad.
Enter the residence and go into the room (the door opposite the entrance), go to the chest near the round table. The chest is locked and you don't have the key. Leave the residence and go to the tavern. Ask the owner about the key keeper, the tavern keeper will tell you to contact the key maker, Hill Corner, who is sitting at a table near the bar. The master of keys, will agree to make a copy of the key from the chest in the residence for a decent amount of money, agree to his offer, and wait 2 nights in the tavern. After that, go to the house to the key keeper. Enter the house. An officer and 2 soldiers will come, kill them and go up to the second floor and take the key from the table. Now go to the residence to the chest. When the soldier turns away, open the chest and take away all its contents, the letter (Stavesant's correspondence with the Dutch West India Trading Company) and the treasure. Return to the beggar.
It turns out that Teaser Dan really visited the Island of Justice. You, again, need to go back to Willemstad, to Stevezant and talk to him. Dock in the sweat of Willemstad, go to the tavern and ask the tavern keeper about Teaser, where Den disappeared, the tavern owner does not know, also, he will advise you not to get involved in the affairs of the Governor General and the Dutch West Indies Company. Now go to the residence and start a dialogue with Staveson. But as soon as you mention Teaser's name, the governor will become sharply alert. Say that you are writing a book, but you won’t be able to really learn anything. We need to find a representative of the Dutch West India Company in the archipelago.
Get to the nearest pirate colony. When you get to the nearest diplomat, ask him about the representative, but the diplomat refuses to give the location of the representative of the Dutch Trading Company. Give the agent the name Oliver Trust, and he says the customer can be found in San Martin. Swim to this island.
We continue the passage of the game Corsairs city of lost ships. Having moored in one of the bays of San Martin, make your way to Marigot and go to Oliver's house, which is located just opposite the local moneylender. After a short dialogue, kill Thrust, search the corpse and take the letter from the table. From the letter you will learn the location of that very mythical island of Justice, which turns out to be by no means mythical. Return to the ship and swim to the familiar beggar.
The tramp will give you the key of Diffindur, which will come in handy in the future.
Before heading to the City of Lost Ships, leave your ship at the Port Authority and change to a tartan. Give the money to the moneylender. Seat the officers on boats and also leave them at the head of the port. Since you will lose everything when you enter the City.
Swim to the upper left corner of the map. You will go out to sea. After the “swim” command, a video will play, and then the hero finds himself in the City. The sea is raging, wild storm. A local resident named George Stokes comes up to you and says that he saw the death of your ship. You are the only one who survived. He will guide you a little. The city consists of many wrecked ships connected in an incomprehensible way. You are on the galleon "Velasco", which is inhabited by one of the established criminal clans - narwhals. On the barque "San Gabriel" there is a second clan - Caspers. Neither one nor the other spares anyone who dares to disturb them. Stokes will also say that you need to visit the head of this God-forgotten place, Admiral Chad Capper, on the San Augustine warship before the end of the storm. As it turned out, this is the same missing privateer who went out three years ago for the prize and disappeared without a trace. And now he's an admiral and head of the City.
Turn around and jump into the water. You need the Fernando Diffindur flute, which contains the very chest that opens with the Diffindur key. The ship has a rift roughly in the middle. Having found the ship, swim around it and go into the breach. Chest on the right. Put all your things there and calmly go to the admiral.
You will be officially declared a "Citizen of the City". The City has almost everything that is inherent in an ordinary port: a tavern, a shop, a church, a moneylender. The pawnbroker has a different story. Everyone will tell you that he is a terrible, terrible man, a warlock. The debtor will be obliged to return to him an amount five times greater than this. It turns out that Brahms gave his soul to Miclantlecuhtli, the Aztec god of the dead. If the debt is not repaid, after a while, when moving to any location, you will be transported to the sacrificial temple, to Tenochtitlan. God will come to you and demand your money back. If you don't have them, you won't get out of there. This will happen even after you get out of the City.
Now go to the caravel "Fleron", to the owner of the tavern Hill Brunner and ask him about Teaser Dan (the same missing beggar). Everyone thinks he drowned. Hill asks you to keep quiet about the fact that Teaser managed to get to the mainland, because the admiral should not know about it in any case. The law of the City says that no one can build rafts and boats to sail away. Hill will ask you to visit him later, he must think over the information received.
After a while, return to Hill. He will make an appointment for you after twelve o'clock at night in his wine cellar (this is one of the cabins on the same ship, you need to go on deck and go to the stern of the ship). After the conversation, you will need to visit the Fernando Diffindur flutes, where Teaser often swam. Hill needs proof that you're right.
Corsairs city of lost ships walkthrough
Now your task is to find Andre Labor, a carpenter, in the city. According to Brunner, it was he who helped Dan build a swimming facility. Labor appoints you a meeting in the cabin of the Protector corvette. The carpenter betrays you. He brings a policeman with him. Kill them. Tell Hill about what happened. He offers to cover up the traces of the crime and substitute one of the clans, namely the "narwhals". To do this, you need to lie in wait for one of the "narwhals" in the bow of their base (the galleon "Velasco"), take the clan amulet from him and take it to the admiral, and thus avert suspicion of murder from you. After doing this, you will be instructed to destroy all the "narwhals". Officers will be available to help. After killing everyone, go to the barrels opposite the entrance. Between them lies an ordinary key for chests. Report to the admiral on the successful completion of the mission. Now go back to Hill Brunner and tell him what happened. He will ask you to come to him later. Spend the night in the tavern for a few days, then go to the Hill. He says that today at midnight in the tavern there will be a meeting of Kapper with a certain person. You must eavesdrop on the conversation by hiding behind a pillar in the wine cellar (stand sideways and don't move or you'll be detected). The information turned out to be really important. It turned out that Kapper and the leader of the Kasperov clan (and it was he) were in the same bunch. It turns out that it’s not you, the admiral, but he circled you around his finger. With your hands I destroyed the "narwhals". In addition, they mentioned a certain Mechanic. Report everything to Brunner. He will express his thoughts on this matter and try to remember who has already lived here before him. This is necessary in order to find out who this Mechanic is.
You won't learn anything more from Hill. After a while, he is killed. Tavern waitress Armo Dyulin will tell you that she found Brunner's corpse in the wine cellar, and noted that before his death, he asked her questions about the man who lived here before him.
Go to the admiral. He will tell you not to get involved in this matter. Try to find the oldest inhabitants of the City. One of them is Cecile Galard, who lives in the Eva galleon. Going to her, you will see three "Caspers" trying to kill the unfortunate woman. Kill them and you will receive information about the Mechanic as a thank you (if you fail to save the elderly lady, Aurelie Bertin will tell everything). His name is Henrik Wedeker, and it was he who came up with the method of securing the ships of the City. It looks like the admiral has isolated him on the barque San Gabriel, the base of the Casper clan. You need to get to him. You will have to destroy the entire clan alone.
City of Lost Ships Walkthrough
Talk to Henrik. It turns out that the city rests on only three skeletons of ships and can be destroyed by any storm. Fortunately, he has a ship to sail away from here. But: firstly, he will sell it to you, and only for a million and a half, and secondly, the ship still needs to be freed from the wreckage. But this can only be done with the gear that Henrik dropped into the water. Your task is to go down into the water in a special suit (you can do this only from 10.00 to 19.00) and get the gear. The supply of air in the suit is only six minutes, and terrible voracious creatures have wound up under the City.
The suit hangs on the wall inside the Phoenix platform. He puts on (and takes off) automatically, you just need to approach him.
Get down under the water. The location of the gear is randomly generated. You will have to fight with huge crabs. You can only fight with a saber. You won't be able to run either, and the time is only six minutes.
After finding the gear, go back to the Mechanic. The corvette must be provided with all the necessary goods for sailing. These are cannonballs, buckshot, knippels, bombs, canvas, medicines, boards, provisions, gunpowder and weapons. Go to the tavern waitress Armo Dulin. So, shells for guns can be obtained from housewives. They are Lea Tooors, Aurelie Bertin, Alice Taylor and Eliza Calvo. Elise will need a lute, 10 bunches of grapes and 3 bottles of wine, Leah - 10 bags of salt. Provisions, boards and canvas can be bought from the owner of the store. Padre Angel will give you medicine. For gunpowder and weapons, you need to contact policeman John Workman. He will help with the condition: take him with you.
It remains to recruit a team of at least 15 people. After completing the set, go to the Mechanic, the storm has already begun. But Capper arrested him. We need to rescue the scientist.
Go to the residence. There is no mechanic here. He's in jail on the Tartarus. Run there as fast as you can. Unfortunately, it will not be possible to free Vedeker - he is in a cage, and there is no time to look for the key. The mechanic will send you to the second mast of the Fernando Diffindur flute, to the very place where Teaser Dan hid his chest.
Having reached the indicated place, go out to the open sea through the "open" icon. Quest completed.
That's all the passage of the Corsair to each his own!
Corsairs To each his own Weapon to the hero
You need to correctly calculate and choose weapons for your character. So: weapons are divided into types, broadswords / axes, sabers / hatchets, rapiers / swords. The weapon has attack/balance stats, 84.5/1.1, and a weight of 4.4. The character has an energy parameter. If the weapon is heavy, then you spend more energy on a blow, depending on the type of weapon, your level, the blows can be different in damage, the maximum damage is brought with piercing weapons of the PMK, broadswords / axes of the SCM, sabers of the LMB. The optimal weight for weapons, again, it all depends on the level of your hero, at level 20 2.5 - 2.9, the higher the level, the harder you can take weapons. If your character gets tired or gets a lot of injuries, you are also given penalty points, but it's easy to deal with this, rest in a tavern, a brothel, help the church. Perform strikes with PKM, LKM, SCM. For the type of weapon broadswords / axes, the best type of strike is SCM, sabers / cleavers LMB, rapiers / swords PKM.
Corsairs To each his own Captive captains
In order to hand them over to the authorities, go to the governor and hand over the prisoners to the authorities for a ransom. But first of all, talk to the captains, maybe you will learn something new. It happens that they offer you a lot of interesting things, use all the dialog boxes.
Corsairs To each his own Artifacts, amulets, amulets, talismans
In the game you can find a variety of artifacts. The simplest of them can be taken in a fight or accidentally "found" among someone else's property. Rarer ones can be found in the cabins of prize ships or in the pockets of plot opponents. They can also be received in gratitude from the inhabitants of the Archipelago. Often the most attractive amulets, while enhancing some traits or properties, at the same time have a negative impact, often of the opposite nature.
All artifacts are divided into three groups:
Cursed Items:
have a negative effect on the character, do not require equipment. The power of the spell cast on them is so great that the only way to get rid of the effect of the curse is with the item, by throwing it away or putting it in a locker.
Amulets: artifacts that have an unlimited duration are equipped in a separate slot (top left on the character scheme). These are the most rare and valuable magic items. They cannot be made by yourself.
Amulets: artifacts, of which there are many in the Archipelago, are equipped in slots specially designated for them. You can even buy them in any settlement. Local residents, representatives of the indigenous population or wandering monks will be happy to sell simple crafts.
With due luck and ingenuity, you can get hold of an alchemical kit that allows the hero to make all kinds of items, talismans and potions himself. You will also need:
recipe;
components (consumable items);
tools (required for the manufacturing process).
If you manage to get and study the recipe, the lists of components and tools will become known.
And, of course, all this becomes available only if the protagonist has the Alchemy ability.
The game has three conditional type of magic:
church (Catholics, Protestants),
native (Indians, blacks),
household / marine (superstitions of sailors and townsfolk).
Each type of magic is indicated by a stone in the icon in the upper left corner of the artifact icon: turquoise (blue) - church; jade (green) - native, coral (red) - household.
The stones are designed to guide the player in who to sell and from whom to buy the desired artifact (the merchant of "his" specialty will pay more when buying, and ask for less).
Monks sell Christian artefacts. They give the maximum price for "turquoise" artifacts, half for "coral", and for "jade" - pennies (they buy up to destroy the anathema).
Native handicrafts are traded by peaceful (without war coloring) aborigines: they will buy “jade” amulets at the best price, “coral” amulets will be half appreciated and “turquoise” for a pittance (to mock at their leisure).
Household amulets, familiar to most of the colonists, are traded by ordinary merchants. They will purchase “coral” products for the maximum price, while church products can be taken at half price, in order to resell them to the monks. With the natives, perhaps, the laity will not mess with at all (mind me!).
Regardless of their origin, artifacts can work together, or they can be antagonistic.
Amulets of offensive and defensive magic are incompatible. Auxiliary magic is neutral, and therefore compatible with any of the previous groups.
The functional orientation of the amulet is indicated by a rosette under the stone:
necklace with claws: offensive impact;
sun with rays: protective effect;
Celtic circle: auxiliary.
As a rule, "auxiliary" amulets neutralize the accompanying negative impact of the main amulet.
In addition to the amulets of the three main groups that can be sold and bought on the streets of cities, there is a fourth indication group intended for rare artifacts: talismans, amulets, rare ammunition or equipment. The symbolic stone is lapis lazuli (i.e. blue with gold streaks).
The socket under the stone in the corner of the icon corresponds to the main function, similar to ordinary amulets.
In addition to the symbols listed above, you may come across a few more:
black morion in a bone socket means the danger posed by an inactivated object;
a white pearl in a bone socket means that the item has useful non-magical properties, but you will have to pay something for its use (such an item carries bonuses and penalties at the same time, for example, Rum or Wine);
yellow amber in a kolovrat frame means that the object carries information that can be recorded either in the Documents or in the Cartographic Atlas;
a golden star rune on a dark background means that the item is a tool with which you can create new items and which does not disappear after the first use, i.e. is not a component.
Members of your team - officers and companions - will not make independent decisions regarding artifacts, completely relying on the choice of the player.
Corsairs To each his own Global achievements
| Baptism of fire. First naval victory | |
| Scarred. Take more than 10,000 damage in total | |
| Alchemist. Craft over 200 potions and items | |
| Guest. Spend the night in a tavern 50 times | |
| home sweet home. Get a home | |
| The wind of change. Successfully complete the "Dutch Gambit" story quest with GVIK | |
| Jedi. Reach maximum reputation | |
| Naval commander. Assemble the maximum squadron | |
| Admiral. Develop the "Navigation" skill to 100% | |
| Dealer. Earn by trading / reselling goods 10000000 pesos | |
| In the service of the Empire | |
| Negotiant. Develop the "Trade" skill up to 100% | |
| Researcher. Explore 50 dungeons, caves, grottoes and workings | |
| Swordsman. Develop the skill "Rapiers and Swords" up to 100% | |
| Moneylender. Open deposits with loan sharks for a total of 5,000,000 pesos | |
| Minion of fate. Develop the "Luck" skill up to 100% | |
| Dragoon. Develop the "Broadswords and Axes" skill up to 100% | |
| Hussar. Develop the Sabers and Cleavers skill up to 100% | |
| Miser. Make a capital of 10000000 pesos | |
| Painful. Reduce the "Health" indicator to the minimum possible | |
| Living legend. Reach rank 40 | |
| Sith. Reach minimum reputation | |
| Death to enemies. Destroy 500 troops | |
| Knowing no fear | |
| Murderer. Lose 9999 sailors in the crew of the protagonist's ship killed in battles | |
| Toughie. Develop the "Protection" skill up to 100% | |
| Exorcist. Destroy 100 instances of evil spirits | |
| Red Book. Destroy 35 crabs | |
| Sniper. Kill 500 enemies with firearms | |
| Slaver. Sell 5000 slaves | |
| Diligent | |
Today we will talk about a game with an amazing story. Created by a team of Black Mark Studio fans, it interested the official distributor of this game series. So a full-fledged version of the continuation of the epic - "Corsairs: To Each His Own" - was released.
Lots of easter eggs, updated fleet upgrade system. It also became possible for the main character to create things and ammunition. In addition, the world has become more open, and the plot is less linear.
Beginning, or Where to get a million
In this game, you take on the role of the French aristocrat Charles de Maur. The father has asked you to find your missing son, your brother, in the Caribbean.
So, after you got off the ship in St. Pierre, Martinique, you have two options for the further development of the plot. Variety is the beauty of the game "Corsairs: To Each His Own." Quests can be done in many ways.
First, you go to the authorities. For a beginner, it is more correct, but there are some tricks here. Things will need to be hidden, and the weapon will be replaced with a harpoon. The stash can be made in the box, which is to the right of the fort gate.
Why such a turn? Very simple - then you will be arrested and all things will be taken away. The governor-general of the island himself will come to the prison with a proposal. He frees you, and you pay off your brother's debts. The amount is impressive, a million pesos, after all. Help would be useful here, however, in the game "Corsairs: To Each His Own" cheats are not common.
After agreeing, you go to the quartermaster, who will give you a basic set of armor and weapons. If at the beginning you hid things in a chest, further development will be easier. Just go to the brother in the dungeon.
The second way of plot development is suitable for more experienced people familiar with the game "Corsairs 2: To Each His Own".
Here, having felt the freedom and expanse of a pirate life, we eschew the authorities, and figure it out ourselves. You will need to run around the city, chat with the residents. We are interested in the fate of the brother. In the process, from one person, you will learn about the abbot. Then the path leads to the church. Benoit, through a friend, will help you get to your brother in the dungeon.
Learn about - oh my God! - a debt of one million pesos, we get the first task. Remember, it's temporary. The point is this. Michel has paid a deposit for the ship, but still owes 17,000 pesos. It is necessary to find this amount in three days, otherwise you will get a wreck.
Where to get money? Let's figure it out.
call girl
For this quest, you will need to find one senior. He usually hangs around in the square near the church. Look for a light camisole and a hat. The passage of "Corsairs: To each his own" is open and non-linear. Therefore, the name is generated differently.
The point is. It is necessary to go to a brothel and negotiate with its owner about the girl Lutisse Montagne. She must be brought to this aristocrat after eleven o'clock in the evening. For all expenses, he gives 6 thousand, your earnings are the saved amount.
The secret is that before taking the quest you need to save. Upon receipt of the task, the cost of the girl for the night is randomly generated. It can be from 2500 to 5000 pesos. We load until we get the minimum number.
When talking with the hostess, choose the option that refers to the inexperience of the girl. It will be possible to pick it up from 23.00 to 00.00. In an hour it would be easy to manage and lead her to the aristocrat.
And while there is some time, we will earn some more money. Remember - in the game "Corsairs: To Each His Own" the map of the island is an indispensable assistant when completing quests. Don't forget to check it out from time to time.
Warehouse worker
Near the brothel is a shop. Our path lies there. There, the owner will complain about the fate and talk about the runaway worker. We agree to find him. The reward is one thousand pesos. And that's just for discovering it. According to the orientation, it is located somewhere outside the walls of the city.
Our path lies in the pirate settlement of Le Francois. On the way, by the way, we will complete two more tasks. They are written below.
So, the worker is in the tavern or near it. After talking with him, we understand that the owner of the store is a miser, and Gralam will never return to him.
What can you do. We return with bad news. The merchant is upset, but he gives a reward. And, besides, he promises more if we help to hire a new employee. The higher the qualification, the higher your earnings. Does not let the game relax. What can you do - "Corsairs: To each his own"! Ships will soon be redeemed, remember? So let's push up.
We run to Le Francois. Where to look for an employee? At the tavern keeper. He appears to be a little responsive. For only a thousand pesos, he will help with the task, but you need to walk for an hour.
While we are waiting, you can play dice, a possible win will not hurt. After the agreed time, we return to the tavern and see the applicants. And then everything becomes just great. In addition to the fact that the owner will take only 500 pesos for help, the employees also offer you bribes!
We choose the one that gives a bag with fragments of amber. We will need the jewelry later, and in the city the owner of the store will pay us 5000 pesos for it. But that will be after the interview. Time is money, so we run to the head of the port department. It starts the quest "Cannibal".
Side missions
On the way to the pirate settlement, you can earn some more money. The first task will be "Scarce Goods". Do you remember where you hid things at the beginning of the game? Near this chest is a city guard. Talk to him. It turns out that he is also French, like you. And his tender stomach cannot stand the local liquor. You will be asked to bring good wine.

It seems to you that money is hard to earn in the game "Corsairs: To Each His Own", the codes would obviously not interfere. All wrong! After this quest, you will forget these thoughts forever!
The income from this task is one thousand pesos. Time to complete - days. Simply and easily. Where to get alcohol? Check the chests in the fort. If fortune is not on your side, any merchant sells a bottle for seven hundred pesos.
We carry it after returning from Le Francois. The guard will be waiting on the upper platform of the fortress, in the evening. But it was not there! It's not a mission, it's the Klondike! Insatiable French are ready to buy another 60 bottles of 1000 pesos. What to do? Where to rob the wagon?
No panic! We go to any merchant and for a thousand coins we buy information that there is alcohol in the store. Having gone there, we stumble upon a misunderstanding of the owner. We return to the thrower. And he demands another 2000 for You have to pay. With this sheet we return to the seller. Now you can buy 60 bottles for 500 pesos each. But! This is a one-time offer, so free up your inventory!
Net earnings - 27 thousand coins. And the card received in the next story task of the game “Corsairs: To Each His Own” will greatly help in the future.
In the city, all quests available at this level are taken. We leave the gate. But what is it? A corpse lies on the road, and the local natives run away. Let's go through the pockets of the dead man. 560 pesos for expenses, small change and earrings. Save this decoration, we'll need it later when we get back from Le Francois.
So, we sorted out the hard workers in the village (the quest is described above - “Warehouse Worker”). It's time to remember the find. We go straight to the governor-general. You can, of course, ask the price of merchants, but there the price is lower. De Poinsy will give you a "Cheap Map of the Islands" for them. Such a gift will greatly facilitate the passage for you. "Corsairs: To each his own" is a game that is designed specifically for making money in the spirit of piracy.
Cannibals
The tropics, the starving local population, sleek European aristocrats... It turns out that the port chief is looking for an assistant to his friend. Prospero's daughter was stolen. The poor father spent most of his property on the purchase of a musket and is already outside the walls of the city. We'll run after the money promised by the store owner later, now - to save the girl!
We find Truval near the well. From his story, we understand that abductions have become more frequent, and this is being operated by cannibal Indians. They get food, so to speak.
In this task, we will not only enrich ourselves financially, but also gain a lot of experience, if there is a desire. Only if fencing is not pumped, it will be bad. In the game "Corsairs: To Each His Own" cheats are aimed precisely at this area.
The point is. Your father will tell you how to act. If you do so, the quest will be completed quickly. If you destroy all the Indians yourself, without his help, you will get a lot of experience.
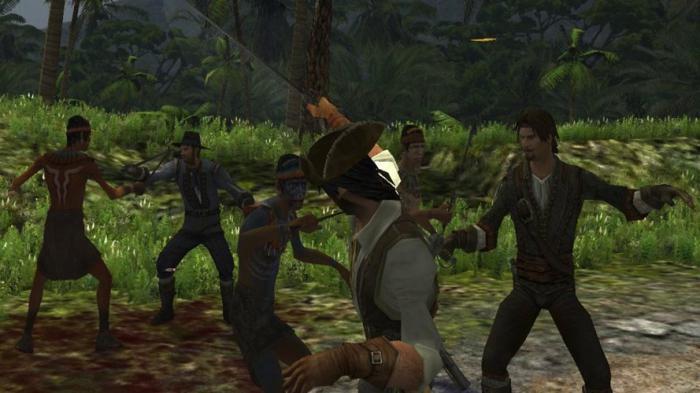
In the cave we find a daughter and another hostage. We accompany them to the city and get a reward. And this is neither more nor less - 8 thousand pesos, 35 doubloons and a good amulet.
In principle, the minimum of the game "Corsairs: To Each His Own" has been completed. The ships are already available for purchase. Count, there should be more than 17 thousand in your pocket. However, we still need officers, a team, ammunition. In addition, in stock the whole day.
How to have a fun night
What to do in the tavern, waiting for the morning? Don't sleep!
There are several entertainments to choose from - gambling, duels, "divorce" of the waitress. But first things first.
So, dice and cards. There will be a lot to save here. How to win? Just. We always start with the maximum bet - 1000 coins. We trade until the opponent agrees. For example, we play for 800 pesos. You win. Better save. If he wins, and then he starts to drain his bank to you, we rejoice and earn.
The main thing is not to win very often, otherwise they will call you a cheater and stop inviting you to the table.

When everyone is broke, you can still earn. Blame someone for cheating. Or get into a fight. Duels are won easily, and the dead drop good things and a lot of gold, if you're lucky.
The third fun is related to the waitress. You need to flirt with her until she invites you to spend time with her. We order a room from the owner of the tavern and wait. Instead of a girl, an accomplice appears, burning with a desire to rob us. Killed easily. The beauty of this task is that the waitress apparently has a lot of thugs. And from each you can get things and money. Without such pranks, the passage will be boring. "Corsairs: To Each His Own" allows you to experience the wild life to the fullest.
Rum for the bartender
Morning. The owner enriched himself by renting a room for an hour, so he is kind. When asked about the task, you receive an offer to smuggle cargo.
It is important to remember the password when receiving the task! He will not sign up anywhere, and without him the quest cannot be completed. There are several options, but the most common are: “the bay is ready for landing” or “old Thomas was waiting for a beer.” Again, yours may be different. Will have to write it down.
So, at seven o'clock in the evening we go to the pier, sit on the launch and quickly move to the right of the pier. If the wind is fair, it will be easier, if not, we go in zigzags.
Destination - ship "Ghost" near Lamentin beach. When the boat from the longboat approaches it, you will need to write a password in the dialog box. Did you remember him?

We receive a contraband cargo and quickly move to the bay of Le Francois. There, you pass the ship with alcohol to the people of the owner of the tavern, and you yourself go on foot to it. You get 5000 pesos, a couple of bottles of rum and a gift.
Spanish engineer
We bought the ship. Where can I get a team? That's right, in a tavern. After much questioning and persuasion, the bartender gives a tip. There is one sailor, decommissioned ashore.
We get acquainted, we answer a meticulous interrogation. He agrees to go to you, but only with his entire team. Not bad! 40 sailors at once for 8,000 pesos.
But where to get a navigator? The tavern keeper doesn't know. We run to the port. Good people say that there is one. He is in jail for debt.
I'm going to the moneylender. You will have to pay 11,000 pesos. Or maybe there is another option? There is. You need to free his friend from captivity. Easily!
Freebie - that's the basis of the game "Corsairs: To each his own"! Quests are supplemented with gifts. Before meeting the pawnbroker, hide your gun. He will give you a new one, with cartridges!
At half past eleven at night we go to the beach, we beat off the Spaniard from the pirates. The secret is that the first robber you meet must be killed first, immediately after the conversation. The rest are easy to put in. But the saved will attack you. We beat him until he gives up.
Now the hardest part. At night, patrols roam the city, so you need not get caught. We save in front of the city.
After completing the task, we get and, consequently, the navigator.
We buy provisions for the ship. Collect more charges for guns - buckshot and knippels. At the exit from the bay will attack
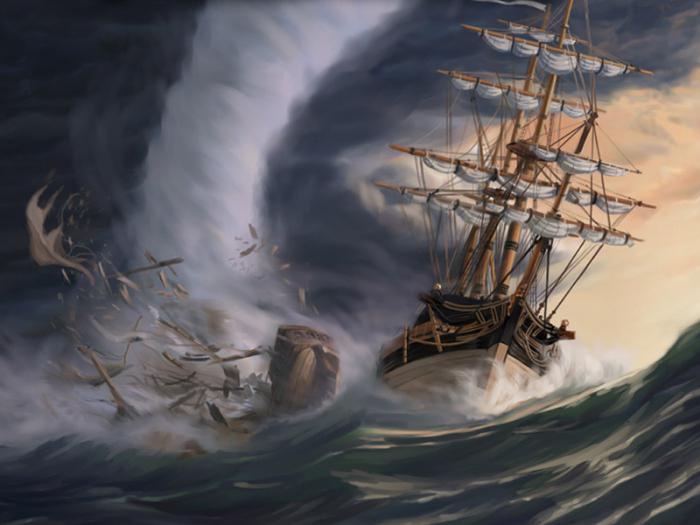
Getting rid of it is easy. Let's lower all the sails. We immediately destroy the entire rigging with nipples, and after the maximum command with buckshot. We board and rob. You can't take it for yourself.
"Corsairs: To each his own". "Dutch Gambit"
The second part of the epic is connected with the West India Company. Here you will have to master the entire archipelago. At this stage, you can already have several ships and a slightly more pumped team.
During the second part you will visit Guadeloupe, Cuba, Maracaibo and other places. Such advice. Often there will be tasks to destroy pirates, or they will meet during the voyage. Always attack several times with knippels, and then constantly with buckshot. Then board. Only such tactics will allow you to constantly win and get rich quickly.
When you finish the storyline, the reward will make you happy. An amazing ship and an excellent experienced officer. Next will be the last part - "Corsairs 3. To each his own."

pirate saga
Hooray! Accumulated a million pesos! Buying brother. But everything is not so simple. The governor-general took the money, but he does not want to release the prisoner. Like, you still need to help him become the head Well, the task! Go against all the pirates at once!
Compared to this, the second part of the game "Corsairs: To Each His Own" - "Dutch Gambit" - is just child's play!
But it is not all that bad. Helpers are here too. Especially if you know the secrets. When you find yourself in Cartagena (it is advisable to raise it, find a pirate in the city. He has a very good sword. Have you already learned how to duel?
Influential connections will be needed to capture Tortuga. Then the path lies to Zechariah, to Cuba. He will send us to look for the cartographer. Thus begins the next branch of the game "Corsairs: To each his own" - "The Island of Justice".
After the task "Shadows of the Past" we will receive Morgan's flamberg, which has no equal in all the Caribbean.
At the end of the line, you will kill Levasseur, report the change of power on Tortuga de Poinsy and free your brother. As a reward - a frigate with a crew and a French letter of marque.
But this is not the end of the game "Corsairs: To each his own"! The gambit was played well. Now we're racing to defend St. Pierre, our brother's former prison. After all, now our hero is a French officer!

Do you want to become invincible right away? Or is it easy to complete all tasks? We will talk about tricks and bugs.
So, in the game "Corsairs: To Each His Own" codes are not common, but there are many "raw" moments.
For example, when you capture an enemy ship, you can combine his team with yours. To do this, hold down the "shift" button. It may not work the first time, but the next ship will reward you with an endless team. It's time to bomb the forts!
By the way, about this. When behind the shoulders of the entire passage, "Corsairs: To Each His Own" did not end. This is just the beginning. No quests. Full freedom. We recruit officers from taverns with pumped pistols and fencing, and then through the F2 button we put them in our squad. And among the pirates you will not be equal!
We advise you to read
, diagnosis, treatment Treatment of urogenital chlamydia") Chlamydia urogenital - description, causes, symptoms (signs), diagnosis, treatment Treatment of urogenital chlamydia
Chlamydia urogenital - description, causes, symptoms (signs), diagnosis, treatment Treatment of urogenital chlamydia The benefits and significance of hydroamino acid threonine for the human body L threonine what
 To wait or not to wait for a guy from the army For what reason can they be commissioned from the army
 Baked apples with cottage cheese Baked apples with cottage cheese

